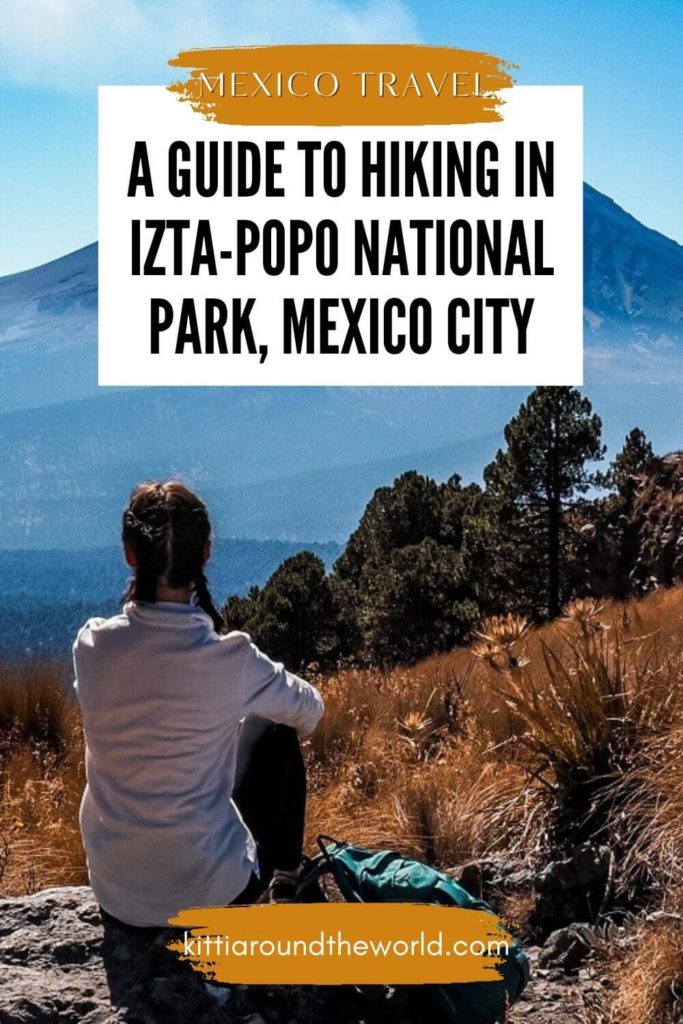
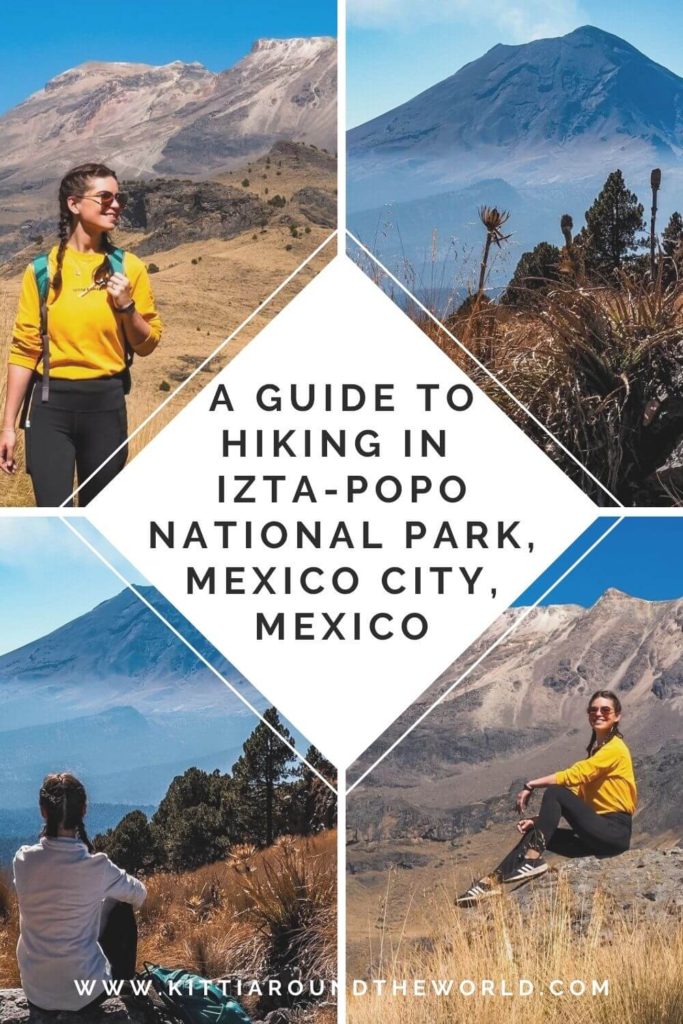
Ultimate Guide to Hiking in Izta-Popo National Park, Mexico
Here you’ll find the ultimate step by step guide if you’re planning on hiking in Izta-Popo National Park during your Mexico City visit. This blog post includes a detailed guide on how to get to the national park by a mixture of public transport and taxis, answers to common questions about the trail and also has a trail description with a map that you can refer to during your hike.
Please Note – During this trip we didn’t hike all the way to the top of Iztaccihuatl volcano, we only completed a shorter and much easier route around the national park which offered amazing views of both Iztaccihuatl and Popocatepetl volcanoes.
For reference, we spent 2 weeks in Mexico City and during this time we took many incredible day trips like this one, tried a ton of Mexican food and really fell in love with the city.
If you’d like to see our Mexico City adventures then make sure to watch our YouTube video by clicking here. You can also check out our Mexico Playlist for more adventures.
Disclosure: This post may contain affiliate links, which means we may receive a small commission if you click a link and purchase something. Clicking these links won’t cost you anything, but it will help us to keep this site up and running! Learn more about our affiliate policy.
Introducing Izta-Popo National Park, Mexico
Located on the border of three states – Mexico, Puebla and Morelos – is Iztaccíhuatl–Popocatépetl National Park, also known as Izta-Popo Zoquiapan National Park.
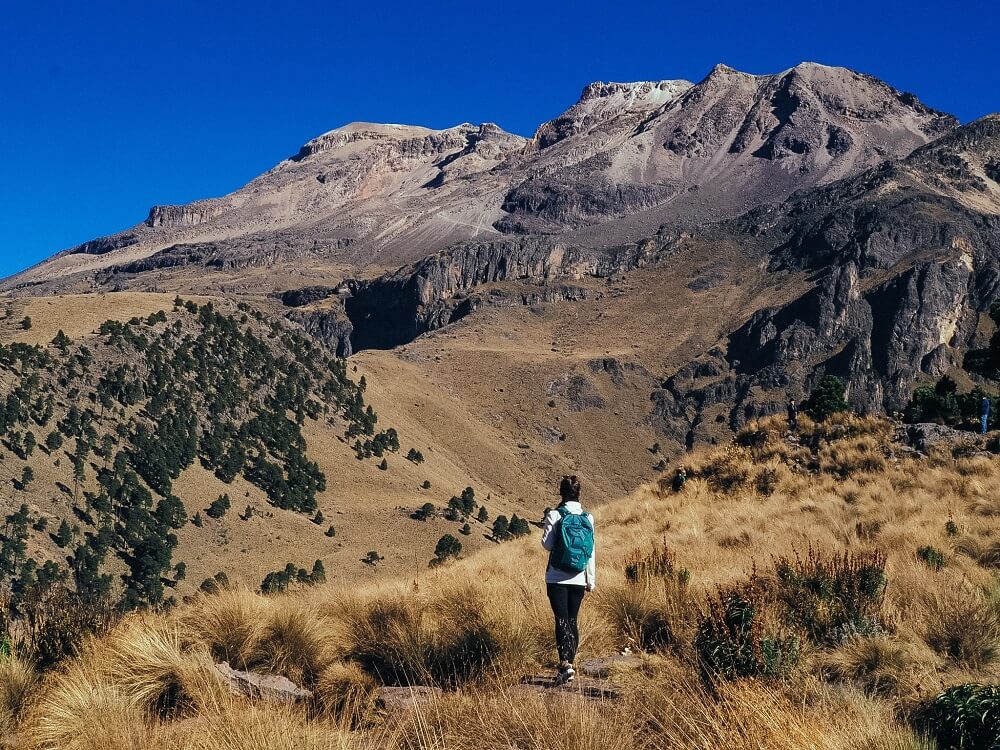
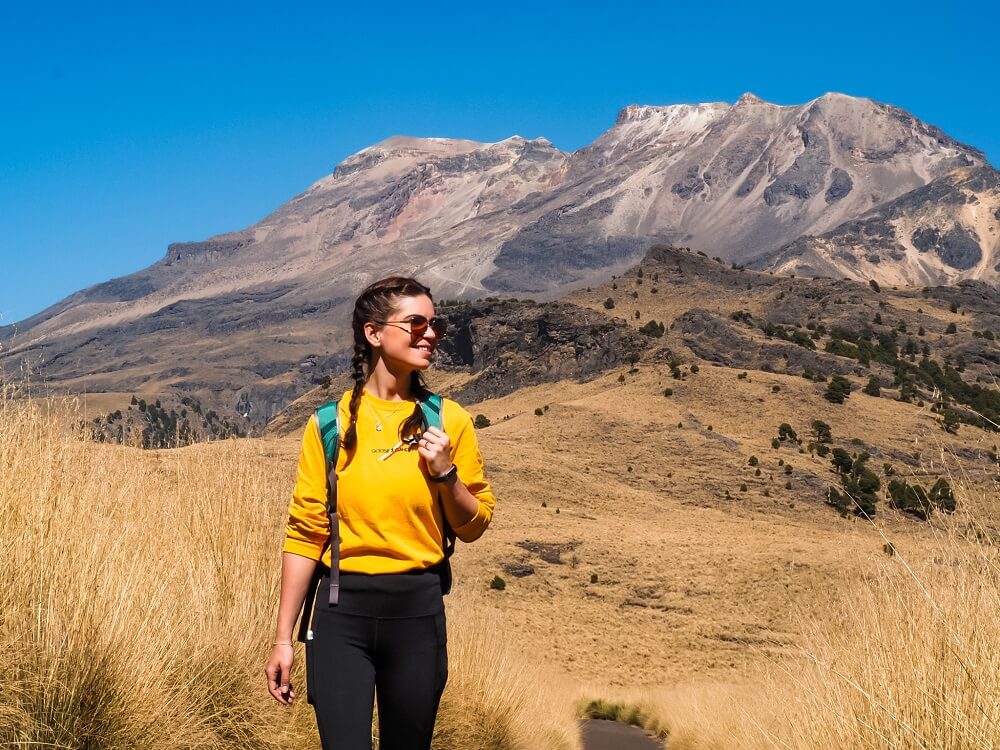
The park covers nearly 100,000 acres which makes it the tenth-largest national park in Mexico. It is home to over a hundred mountains, including Mexico’s second and third highest peaks: Popocatepetl and Iztaccihuatl volcanoes. The two snow-capped volcanoes are definitely the park’s main attractions.
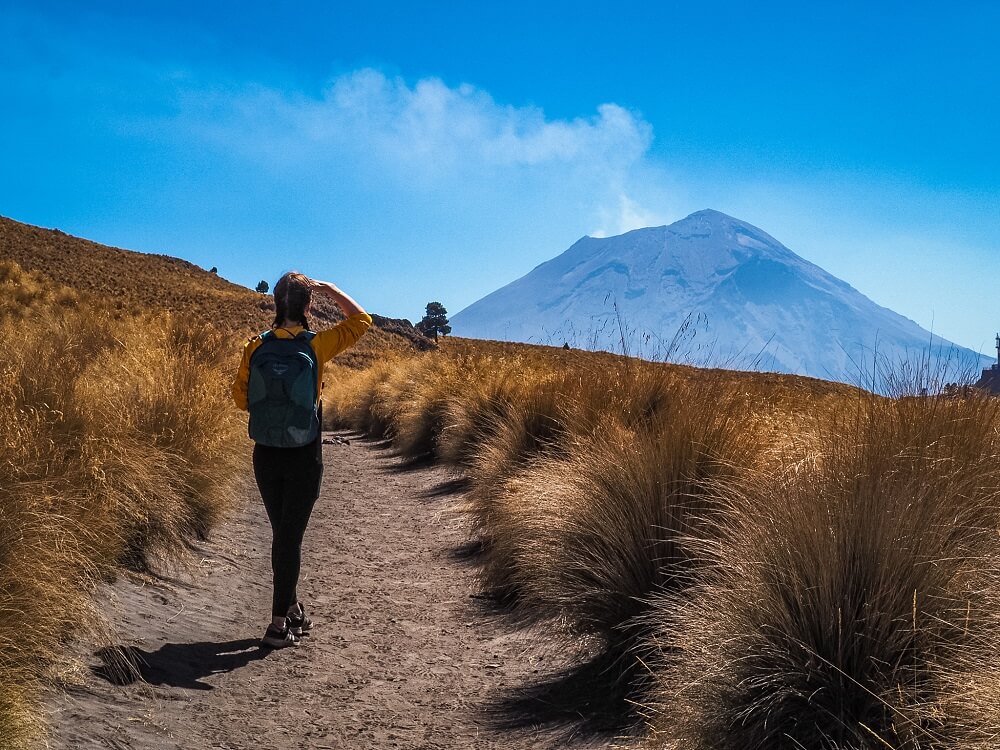
At 5,426m Popocatepetl (‘Smoking Mountain’) is the second highest point in Mexico and the highest within the national park. It is actually an active volcano and climbing it is prohibited. However, you can still enjoy watching it smoking from many viewpoints within the park.
At 5,220 – 5,230m high Iztaccihuatl (‘White Woman’ or ‘Sleeping Woman’) is the third highest peak in the country. It is a dormant volcano and with the right mountaineering gear you can climb to the top of it.
Did you know? – According to legend, Iztaccihuatl was a princess who fell in love with a warrior called Popocatepetl. They were turned into mountains by the gods so they could be together forever, since they couldn’t be together in life. From a certain angle, Iztaccihuatl actually looks like a sleeping woman.
How to get to Izta-Popo National Park, Mexico
By Tour
Obviously the most hassle-free way to reach Izta-Popo National Park is by booking a guided tour.
Whilst I think the hiking trail we completed is relatively easy to follow, I think getting to the park on your own might be intimidating for some. It’s a long way from Mexico City with multiple changes of transportation and will require at least some basic Spanish for buying tickets and booking taxis. Therefore, if you’re short on time, want to meet with other people or just find the way there by public transport to be too complicated, then browse through different tours.
In addition, you should definitely go with a guide if you’d like to hike to the top of Iztaccihuatl.
By Private Vehicle
Obviously the other more convenient way to get to the national park is by private transport. You can rent a car for a day or for the duration of your stay in Mexico City. Discover Cars is a great one to check out and it has been recommended on multiple comparison websites as it compares local, national and international companies.
You’ll need to drive to Paso de Cortes or La Joya via Amecameca which can take just under 2 hours depending on traffic.

By Public Transport
Step 1: Getting to TAPO Bus Station in Mexico City
Your first step to reach Izta-Popo National Park by public transport would be to get to TAPO bus station where the buses to Amecameca depart from. There are a few ways to get there depending on where you’re staying in Mexico City.
Please Note – Mexico City has 4 bus stations: Terminal de Autobuses del Norte (North), Terminal de Autobuses del Sur (South), Terminal de Autobuses de Pasajeros Oriente (TAPO) and Terminal de Autobuses del Poniente (Observatorio). Make sure to arrive to TAPO!
The cheapest way to get to the bus stop is by metro. One way will cost you 5MXN (yes, Mexico City has one of the cheapest public transportation systems in the world). Click here to read more about how to travel around Mexico City by metro.
You’ll need to take Line 1 and get off at San Lazaro metro stop. Depending on where you’re staying you might need to change lines once or twice. Click here to view the metro line map.
Step 2: Getting the Bus to Amecameca from Mexico City
Once at TAPO, look for the ‘Volcanes’ bus sign and buy your ticket to Amecameca. The bus ticket will cost around 35MXN per person. (We paid slightly less on the way back and aren’t sure why.)
There are pretty regular buses to Amecameca, however I recommend getting an early one so you can start your hike as early as possible. The ride to Amecameca could take 1.5hrs if not more due to traffic. For reference, we took a 7AM bus and we managed to start our hike around 10AM.
Step 3: Getting a Taxi from Amecameca to Izta-Popo National Park
Once in Amecameca, walk out of the bus terminal and find a taxi that will take you to the national park. There are definitely quite a few circling around the main street. You can also try and book an Uber, which might be cheaper.
It’s up to you but you can either get the driver to drop you off at Paso de Cortes or at La Joya. Paso de Cortes is the main entry point to the park, and La Joya is a popular starting point for hiking Iztaccihuatl. Since it was our very first time hiking at such altitude we asked our driver to take us to La Joya.
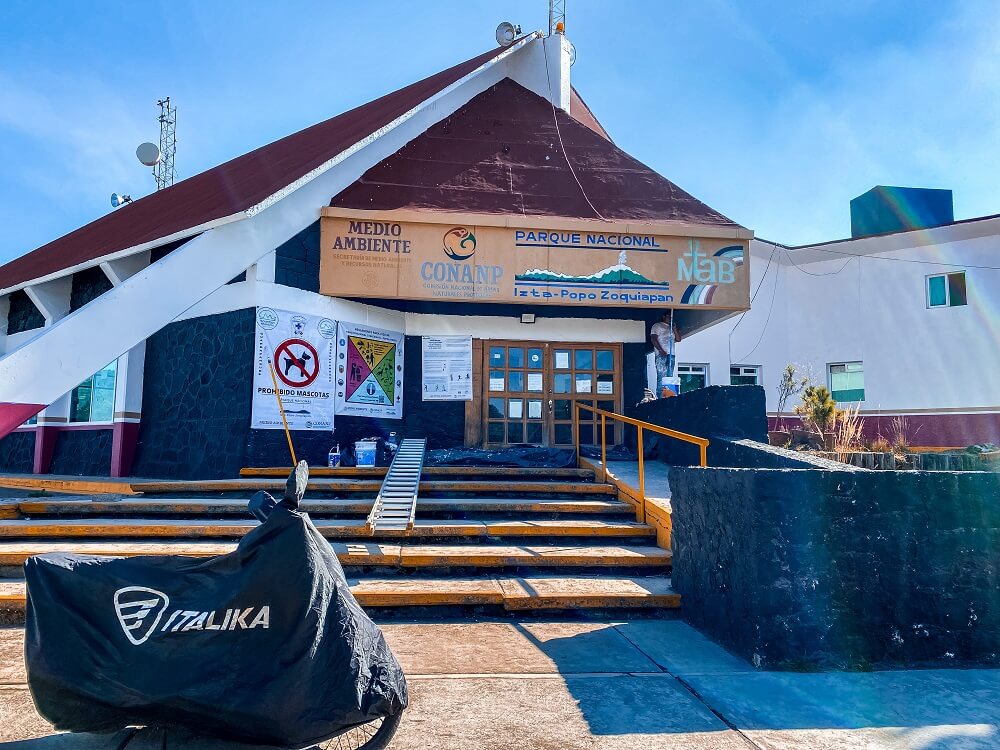
In either case, the taxi driver will have to stop at the main entrance and you’ll need to pay the entry fee to the park (50MXN per person) and fill out a form with your details.
For this taxi ride we paid 450MXN and it took us a good 45 minutes or so to reach La Joya.
Step 4: Getting Back to Mexico City
For your return to Mexico City, either agree on a time for the taxi driver to pick you up or ask for his phone number so you can call him when you’re ready.
Don’t forget that it’ll take a good 30 minutes for the driver to reach Paso de Cortes, and you might not have good enough signal to call along the trail. Even though our driver gave us his phone number it didn’t work, so we had to call the main office and request a driver. Their contact number is +55 2326 9514, so make sure to have a Mexican SIM card. At the end we waited nearly an hour before our driver turned up.
The way back to Amecameca cost us 370MXN since our pick up location was Paso de Cortes.
After that it was a pretty smooth ride and getting the bus back from Amecameca to Mexico City was also straight forward. Apart from the fact that the bus was packed and we had to stand for at least an hour before we could get a free seat.
Good to Know Before You Go
Cost of Hiking in the Izta-Popo National Park
Here’s a quick cost breakdown including bus tickets, taxi fares and entry fees:
- 5MXN for one metro ride in Mexico City
- 35MXN for one-way bus ticket to Amecameca
- 400MXN – 500MXN for one-way taxi ride to Izta-Popo National Park from Amecameca
- 50MXN for Izta-Popo National Park entry fee
- Cost of your food, drink and snacks for the day
You’ll have to double up everything to calculate in your return journey.
Length of the Izta-Popo National Park hiking trail
Our chosen hiking route in Izta-Popo National Park was approximately 8.5 km (5.2 miles) long. Depending on your speed, how long it takes you to reach the viewpoint and how many breaks you take, this route could take around 4 hours. Walking uphill will inevitably make you stop more often to catch your breath at such high altitude. In addition, you’ll need to be cautious going downhill as the trail might be slippery.
For reference, we started our hike around 10:00AM, and finished the route around 14:30PM. We took our time at the viewpoint between the two volcanos because it was just so beautiful and peaceful there. As always we were also filming and taking a lot of photos. So, we probably completed the trail a bit slower than if you were constantly walking with minimal breaks.
Level of Difficulty
Elevation and Altitude:
This hike can be a little bit of a struggle, especially if you’re not used to hiking at altitude. La Joya is located at 4,000m above sea level and you’ll have a steep section with nearly 200m of elevation gain before you reach the volcano viewpoint. Being at an altitude of over 4,000m on its own can be challenging, let alone hiking uphill on a rather slippery path. For this reason, I recommend getting used to the altitude in Mexico City first before you attempt hiking in Izta-Popo National Park.
Top Tip – I think this hiking trail is actually a great way to get used to hiking in altitude, especially if you’re planning on completing other hikes around South America like we did.
Click here to read about how to avoid altitude sickness when travelling to Mexico City.
Length of the Trail:
If you start your hike from La Joya like we did, then the length of the trail won’t feel too long, especially because you’ll be hiking downhill for the most part. However, if you’re planning on starting your hike from Paso de Cortes (3,692m), then you will have an additional 6 km long hike with about 400m of elevation gain just to reach La Joya. This could be a struggle if you’re not used to hiking in altitude.
Weather Conditions:
Due to the high altitude you’ll have to be ready for any kind of weather conditions when hiking in Izta-Popo National Park. You’ll likely have lower temperatures, crisp air but also very strong sunlight.
Best Time to Hike in Izta-Popo National Park
There are a few things to consider when it comes to when to hike in Izta-Popo National Park:
Firstly, I highly recommend checking Popocatepetl’s up-to-date activity. Sometimes, if the volcano is too active, you won’t be able to enter the national park for obvious safety reasons. You can actually watch the volcano in real-time, which is pretty cool I think.
In terms of the best time of year, obviously during winter the weather conditions can be harsher here, just like anywhere at higher altitude. The coldest months are January, November and December, although the sun was pretty strong in the middle of the day in December. In February, March and December there’s also much less rainfall compared to July and August when it rains the most.
The daylight will be shorter in winter too, so take that into consideration when visiting during this season. For reference, the shortest daylight will be in December and the longest in June. We visited at the end of December and if you follow our timings for getting to the park you should be fine.
Similar to just about everywhere in the world, weekends and holidays equals a lot more people on the trail. Therefore, I recommend checking out Mexico’s holidays and trying to avoid weekends if you’d like a slightly quieter hiking experience.
Lastly, I highly recommend starting your hike as early as possible for multiple reasons. Firstly, the journey to the park, especially with public transport, could take a long time there and back. The roads are a bit quieter in the morning, so you might get there quicker. Secondly, you’ll have a much clearer view of the volcanos and the surrounding area in the morning before the smog and the clouds roll in in the afternoon.
Facilities Around Izta-Popo National Park
Places to eat – For your trip I highly recommend bringing enough food, snacks and water with you. You can only buy food at TAPO bus station and then in Amecameca, but there won’t be any opportunities to buy food in the national park. Having said that there are always street vendors who will sell some light snacks and fruits but I wouldn’t rely purely on that, so come prepared.
Toilet facilities – Obviously TAPO station and Amecameca bus terminal will have toilet facilities. These toilets normally cost between 5 or 6MXN, so have enough change with you. However, there won’t be any toilet facilities once in the park.

What to Wear and Bring with You?
We completed our hike at the end of December, and it was a little chilly in the early morning. However, the temperature got much higher by late morning. Therefore, I recommend wearing different layers which you can adjust according to the temperature.
Make sure to wear sun-cream to protect your skin. The trail isn’t shaded by the trees, and the sun can be very strong, so I also suggest wearing a cap and bringing some sunglasses.
I recommend wearing supportive shoes with good grip. As I mentioned before, the trail can be pretty slippery so you ideally want shoes with a good grip. I wore a simple pair of trainers and they were fairly sufficient. You can also wear hiking shoes or boots.
I suggest bringing enough snacks and a packed lunch for the day. Having plenty of water is a must too because you want to stay hydrated, especially in such high altitude. I recommend having a reusable water bottle with you.
Please Note! – Whatever you bring with you, make sure you either take it home with you or dispose of it responsibly. I suggest bringing a garbage bag with you where you can collect all your waste. Enjoy your time in nature but Leave No Trace!
Izta-Popo National Park Hiking Trail
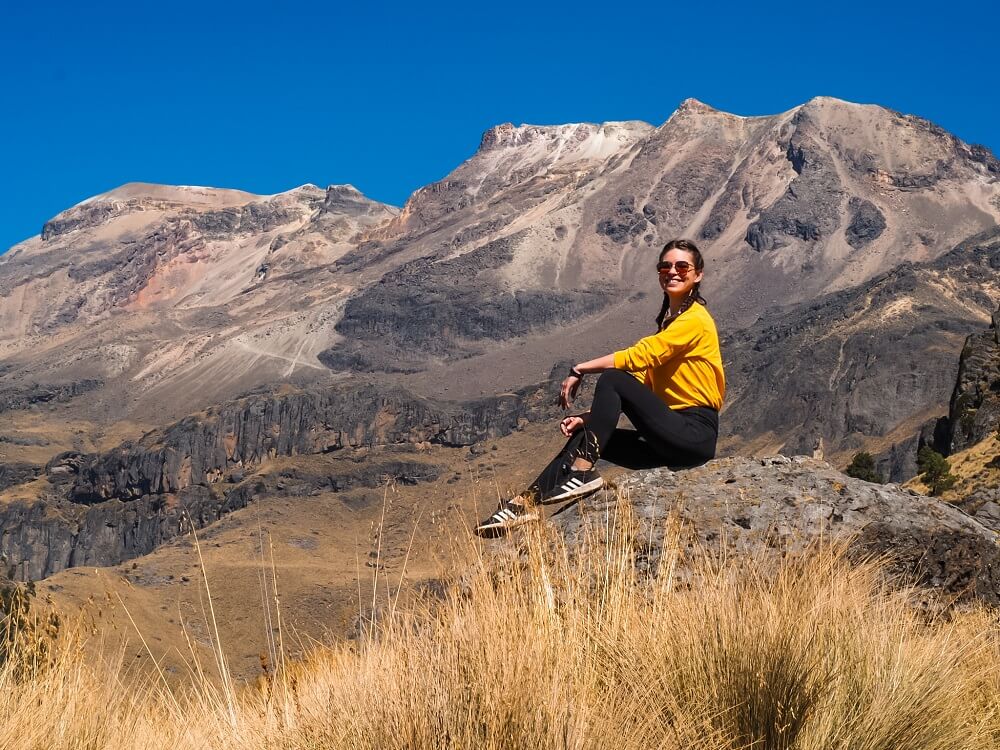
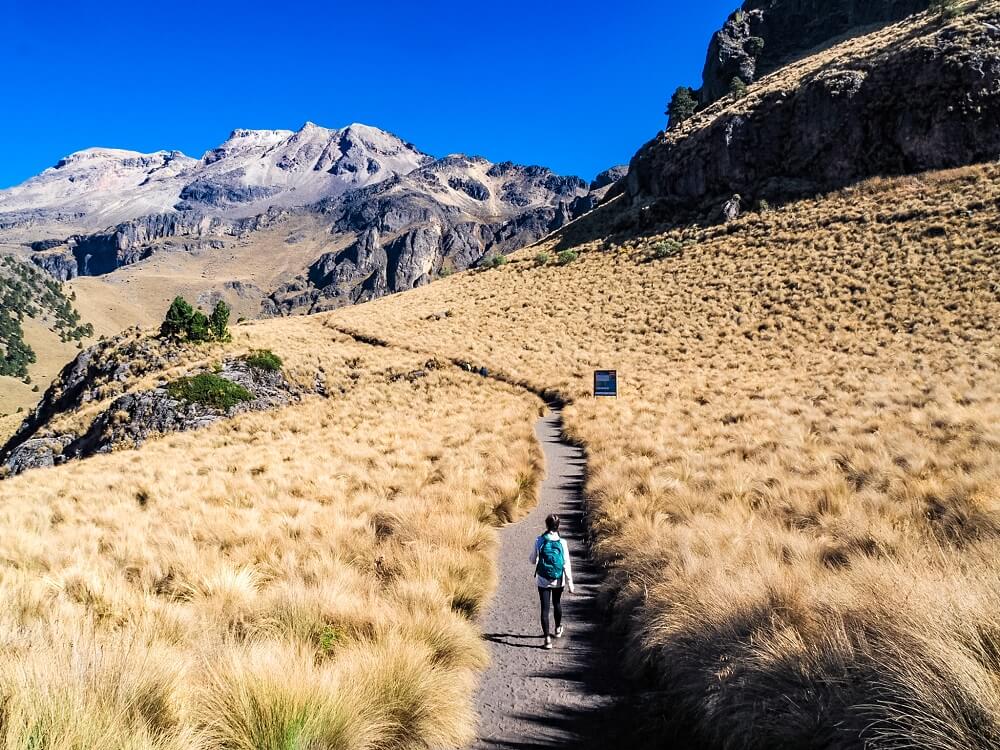
1. La Joya to Volcanos Viewpoint
If you’ve asked your taxi driver to drop you off at La Joya, then you’ll start your hike from the parking lot. From here, you’ll basically start hiking on Izta Volcano. The trail from the car park starts relatively flat with a gradual incline. However, soon it’ll get steeper and also relatively slippery, so take your time.
When you see a path on your right, carry on along that one and climb higher. Although the path is steep here, the views will be absolutely stunning too, so taking this section slow will not only help you acclimatise, but you can also enjoy the views of Izta much longer.
You’ll soon reach the ridge from where you can get a view of both Popo and Izta volcanos.

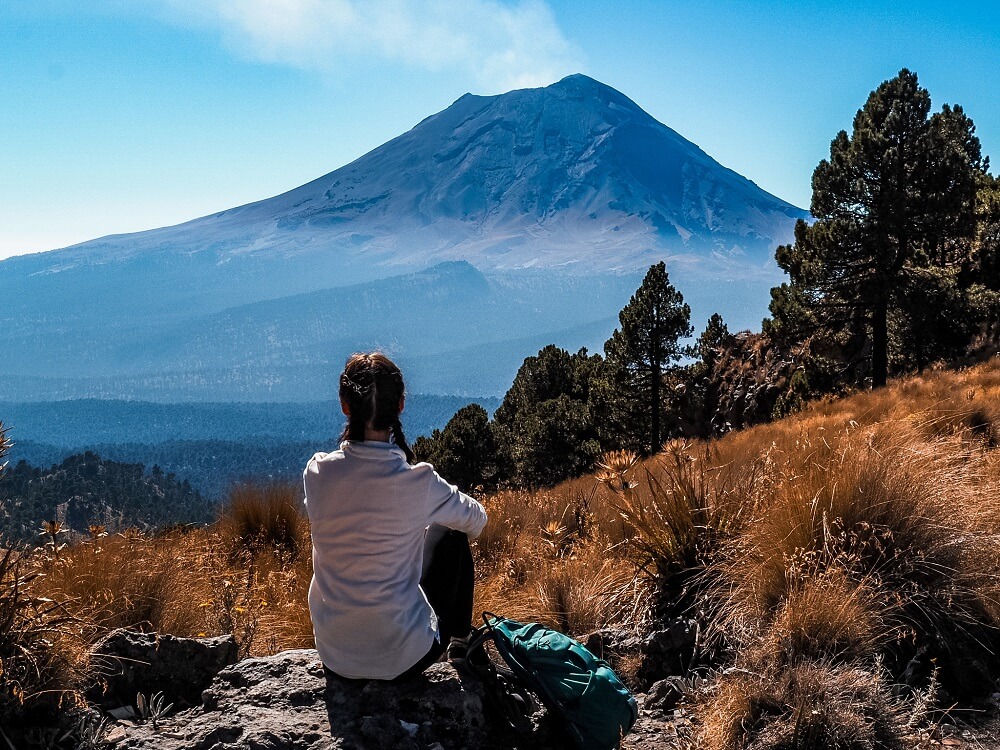
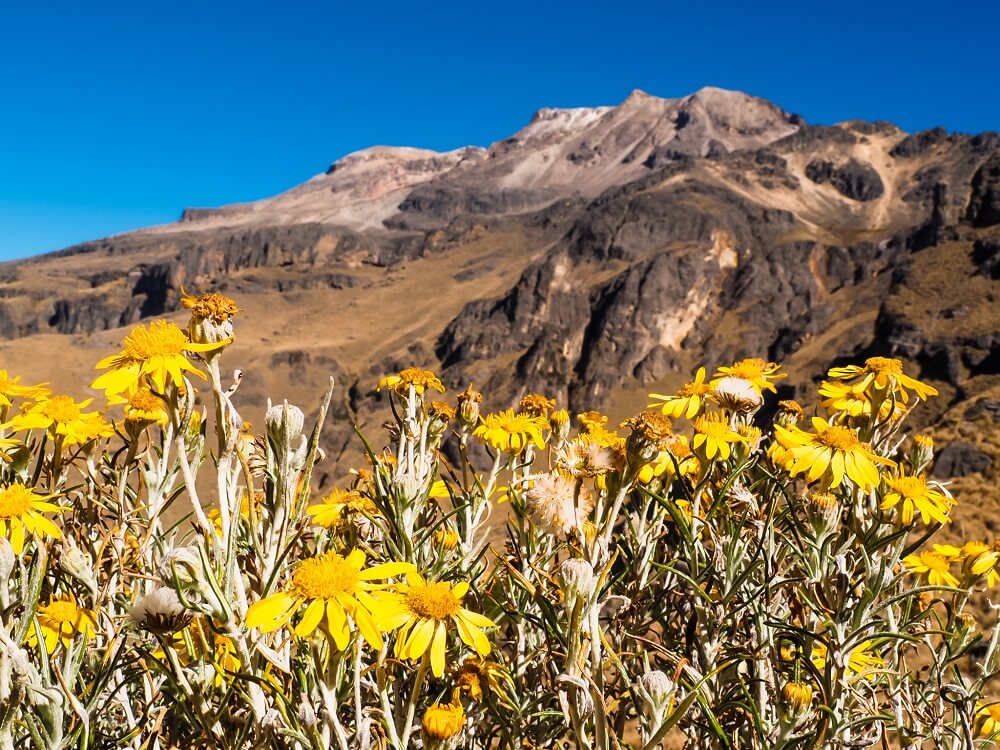
2. Izta and Popo Volcanos Viewpoint
If you’re not summiting Izta, then this volcanos viewpoint will be the highest point along this trail. This is also the highlight of the entire trail, so I highly recommend staying here a bit longer.
By the time you’ve reached this point it’ll probably be lunchtime too, so sit down and enjoy your packed lunch whilst watching Popo smoking. We probably could’ve sat here for much longer, but we also needed to be aware of how much sunlight we had left in the day.
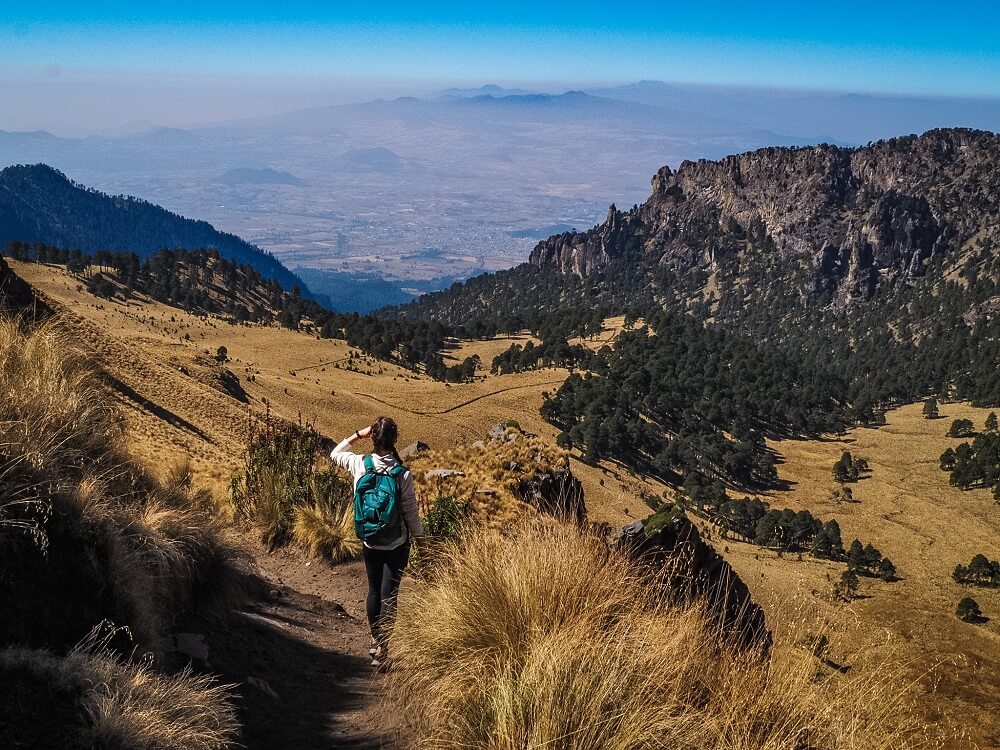
3. Volcanos Viewpoint to Paso de Cortes Visitor Centre
Once you’re ready to carry on, you’ll have to head back to La Joya the same way you came. Take it easy because the path will be even more slippery going downhill. From La Joya car park, just follow the trail that pretty much runs parallel to the dirt road. Make sure not to walk on the road because the cars driving past leave the road pretty dusty.
Luckily the hiking trail is sign posted and pretty easy to follow. This part will also be downhill which will feel much easier. However, there won’t be any shade and you’ll likely be walking during the hottest part of the day. Therefore, make sure to use plenty of sun-cream, a hat and sunglasses.
During this part of the hike, you’ll have an excellent view of Popo the entire time. Once you reach Paso de Cortes Visitor Centre, you can call for a taxi and head back to Amecameca and then to Mexico City. Whilst you’re waiting for your ride to arrive, you can sit and soak in the beautiful views of both Izta and Popo volcanos for one last time.
Final Thoughts on Hiking in Izta-Popo National Park
Although it takes some time to reach Izta-Popo National Park by public transport, it was without doubt one of my favourite day-trips from Mexico City. Sitting between two beautiful volcanos and witnessing one of them constantly smoking was an experience I’ll never forget. Now – after completing many hikes in high altitude in South America – I’d love to return to Mexico City and actually summit Izta Volcano.
Have you ever been to Izta-Popo National Park before? If so, how much of the area did you manage to explore? If not, would you want to hike around the volcanos? Let me know in the comments below.
Now, let your adventure begin,

Our Top Travel Resources
Accommodation: For hotels we always use Booking.com and Hostelworld for hostels. We also book longer stays on Airbnb or Vrbo.
Flights: To find the best flight prices we always check Skyscanner, Google Flights or WayAway. Then we also check the airlines’ websites too for comparison.
Car Rentals: We use Discover Cars when we want to rent a car as it compares local, national and international companies.
Activities: If we book organised tours we always check either GetYourGuide or Viator.
Foreign Currency: Whenever we can we prefer to pay in local currency and for that we always use our Wise card. We can easily withdraw money from the ATM or pay by card at most shops and restaurants.
Travel Insurance: We never go anywhere without travel insurance. You never know what will happen on your trip, so good travel insurance like SafetyWing can protect you in case of injury, illness, theft and cancellations.
eSIM and VPN: To get data abroad we use Airalo which is an app that allows you to download a prepaid eSIM to your phone in over 190 countries. Make sure to have a VPN to avoid hackers accessing your personal data when using public WIFI. We use Surfshark which is the only VPN that offers one account on unlimited devices.
Remember…It all starts with a Pin…
Thanks Kitti! Your blogs have so much detailed and useful information. Sounds like it was well worth the effort of getting there by public transport!👍 The Volcano’s are stunning and I could see the sleeping woman!
Thank you Karan, I’m so happy that you find my blogs useful. The national park is absolutely stunning and I’m so glad that we had the chance to visit it.