
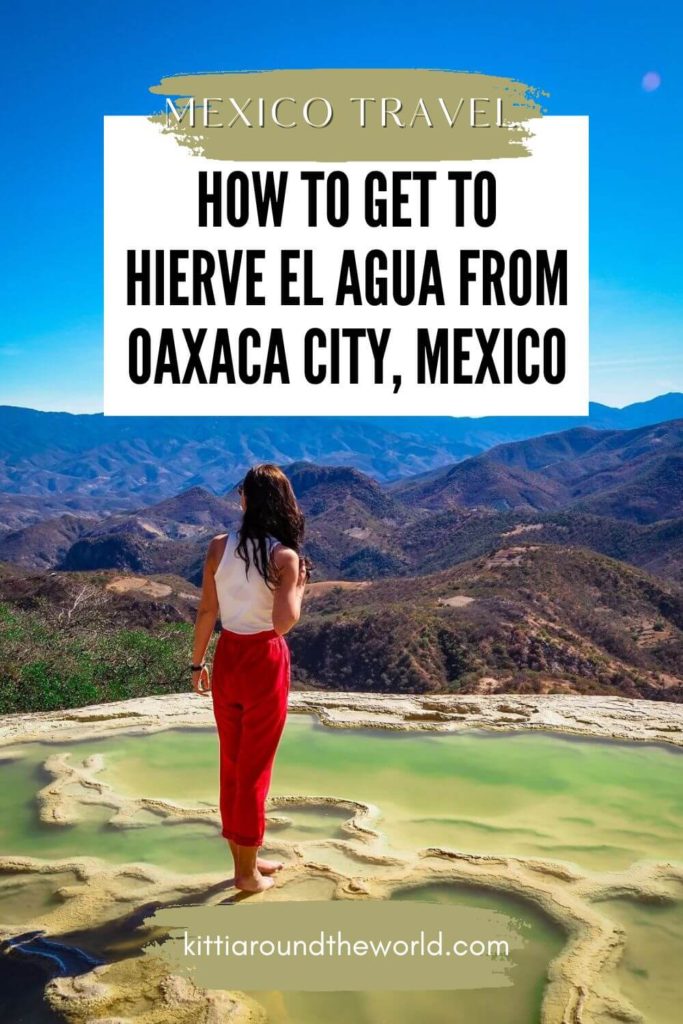
A Step-by-Step Guide on How to Get to Hierve el Agua from Oaxaca City Without a Tour
This blog post is your detailed, step-by-step guide on how to get to Hierve el Agua from Oaxaca City without a tour. It also includes a cost breakdown and other useful information such as what to bring with you and how to spend a full day at the site.
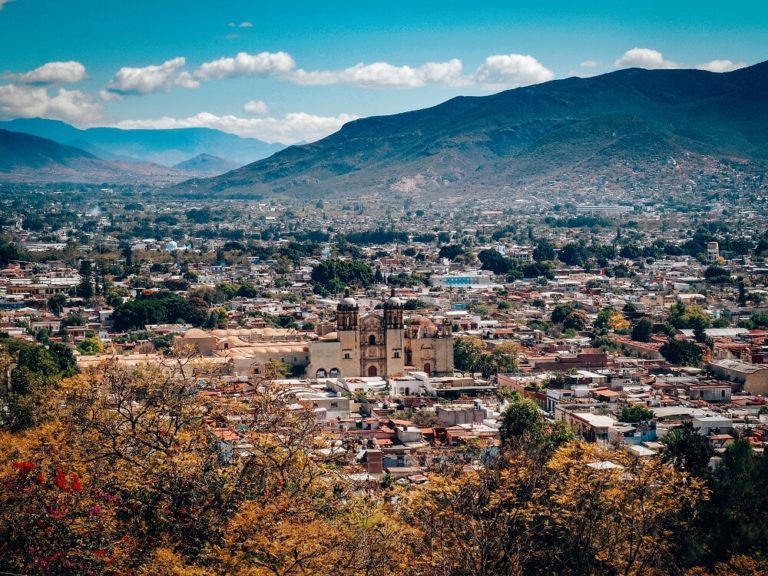
You definitely can’t leave the City of Oaxaca without taking a day trip. There are many amazing locations you can visit such as Mitla archaeological site, El Tule tree, Teotitlan del Valle or Tlacolula. However, as soon as we saw some photos of Hierve el Agua, we instantly knew that we had to see this place in person.
If you’d like to see our Hierve el Agua adventures then make sure to watch our YouTube video by clicking here. You can also check out our Mexico Playlist for more adventures.
Disclosure: This post may contain affiliate links, which means we may receive a small commission if you click a link and purchase something. Clicking these links won’t cost you anything, but it will help us to keep this site up and running! Learn more about our affiliate policy.
All You Need to Know About Hierve el Agua
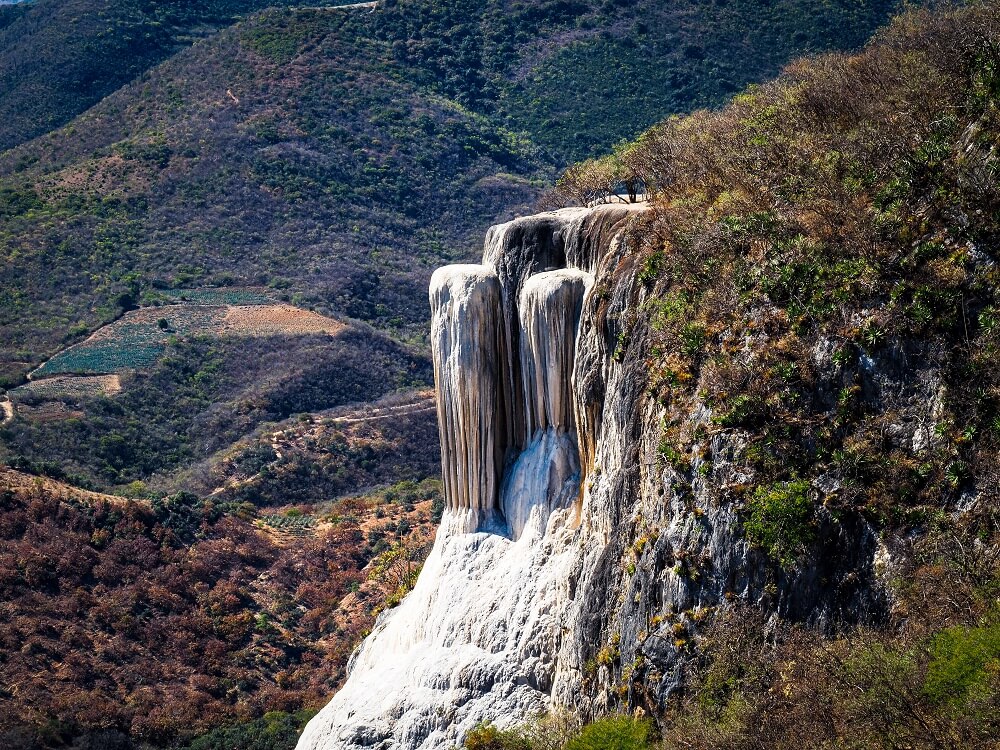
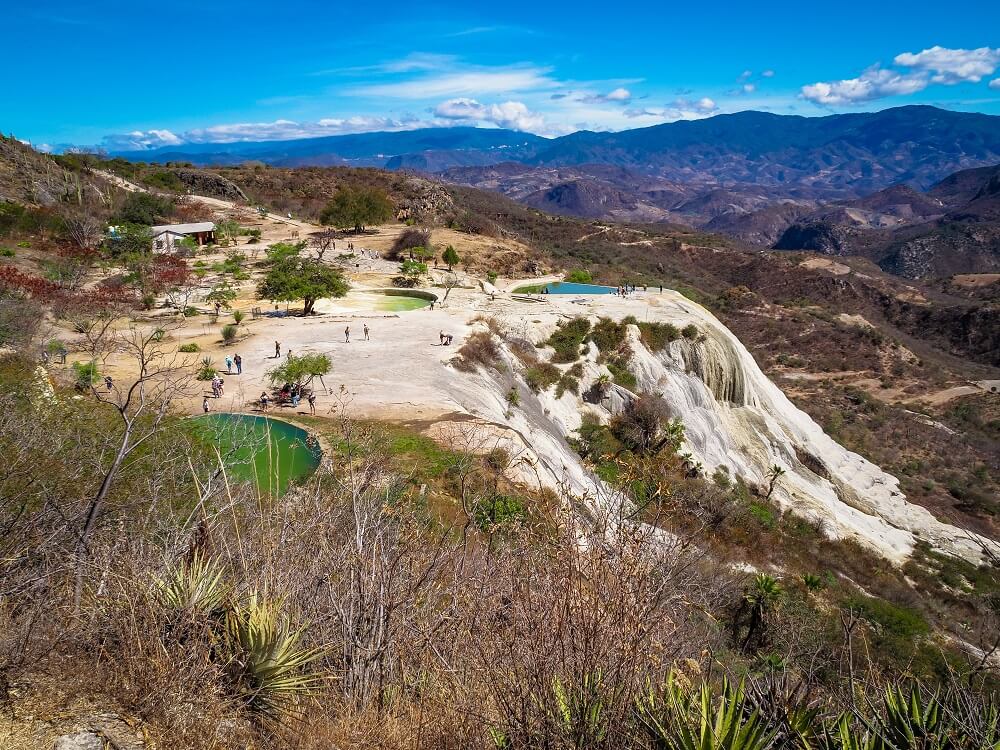
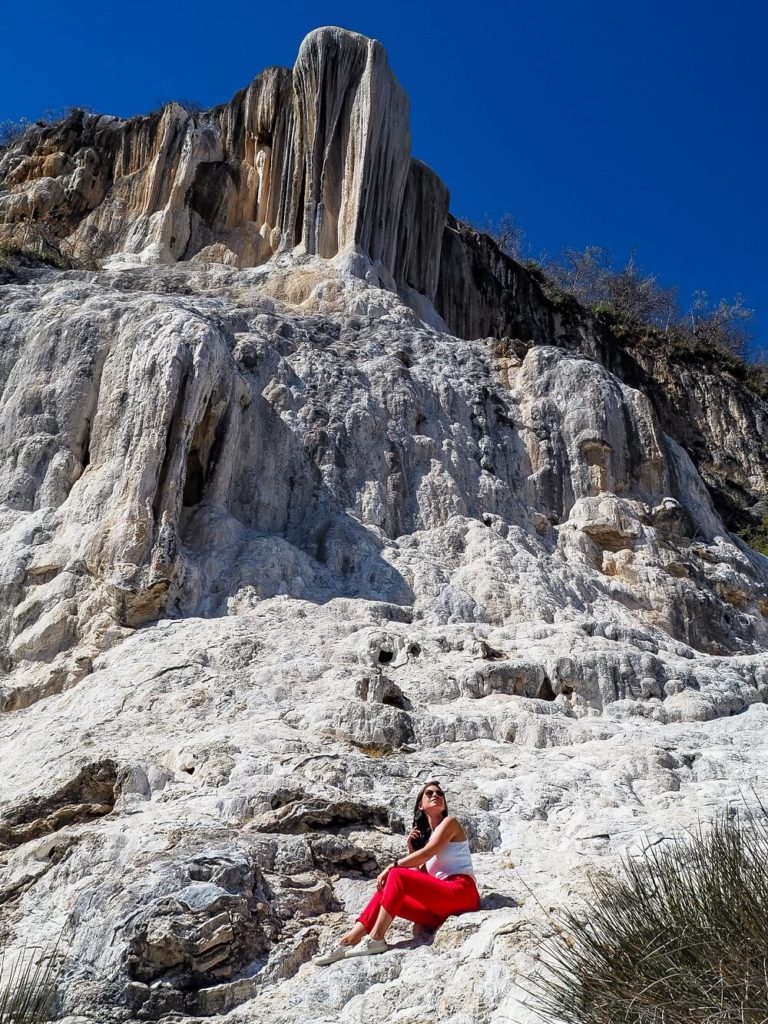
Located about 70km to the east of Oaxaca is a place called Hierve el Agua. It is a set of natural rock formations that look like waterfalls from a distance. However, these are actually petrified waterfalls which are formed by a small amount of fresh water springs that are oversaturated with calcium carbonate and other minerals.
The site has two of these waterfall-like rock formations called ‘Cascada Chica’ and ‘Cascada Grande’. Both of them have taken thousands of years to form. The ‘Small Waterfall’ rises 50m and the ‘Large Waterfall’ rises 90m from the valley floor.
Fun Fact – Hierve el Agua translates to ‘the water boils’ and especially after seeing the bubbling water you would – quite rightly – think that the water is hot. Well it’s actually the complete opposite and the water temperature is pretty cold.
What makes this place even more unique is that this is one of only two petrified waterfalls in the world. The other one of its kind is the famous Pamukkale in Turkey (Türkiye).
How to Get to Hierve el Agua from Oaxaca City Without a Tour
Getting to Hierve el Agua independently is an adventure in itself that you’ll never forget. If you’re ready for a scenic but bumpy ride and don’t mind a few bruises along the way then you can find a detailed guide below on how to get to this magical place without a tour.
Step 1 – Taking a Local Bus to Mitla
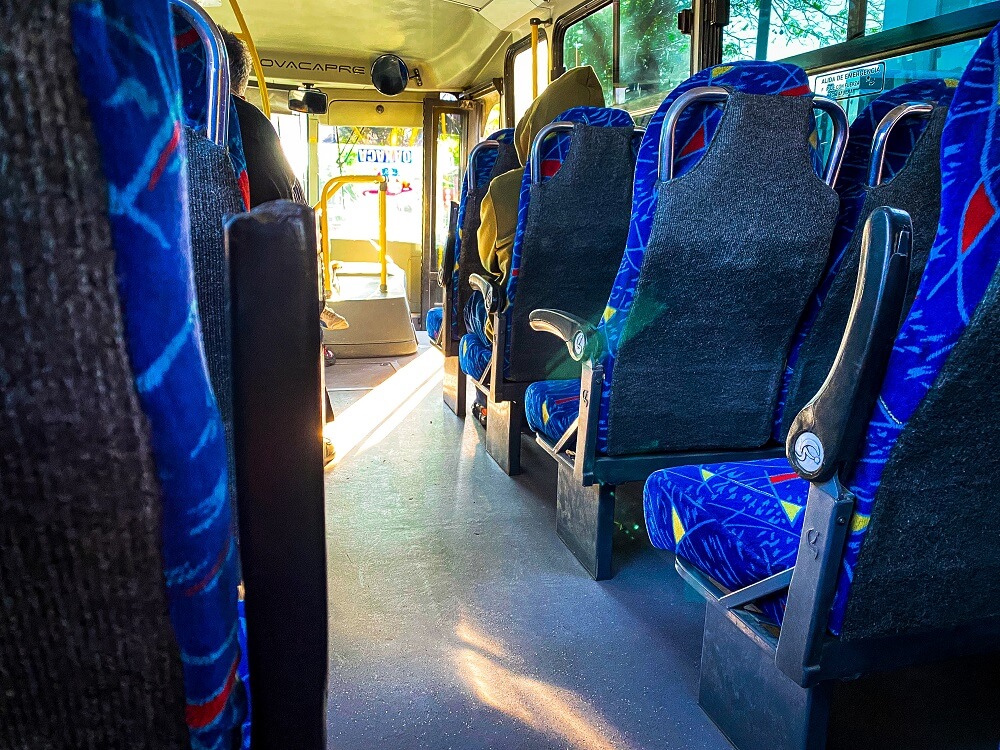
Your first step to reach Hierve el Agua independently is to take a local bus to San Pablo de Mitla. The town is located about 45km to the east of Oaxaca City.
You can get a bus from the bus stop next to the Estadio Eduardo Vasconcelos baseball stadium along Highway 190. The bus stop is marked and people will be waiting there but for extra assurance, you should have a McDonalds to your right. I read that you could also get the bus from Oaxaca’s Second Class bus stop, approximately 1km to the west of the City Centre, but the stadium was much closer to where we were staying.
There will be a ton of buses coming along this road and on the front they will tell you where they are headed. Watch out for the one that says Mitla on it and wave it down. We waited a fair bit but a bus should come approximately every half an hour.
The bus ride itself should be about an hour long depending on traffic. A one-way ticket is 20MXN which is very affordable.
Top Tip – The journey to Hierve el Agua is quite long not even counting for the waiting times, so I suggest leaving as early as you can. In addition, if the bus doesn’t turn up, you can always flag down a shared taxi that has Mitla on it. Depending on how many people are in the vehicle it could cost you between 30 to 40MXN. (Yes, we saw quite a few 4-passanger taxis with 6-7 people in them.)

Step 2 – Getting a Colectivo to Hierve el Agua
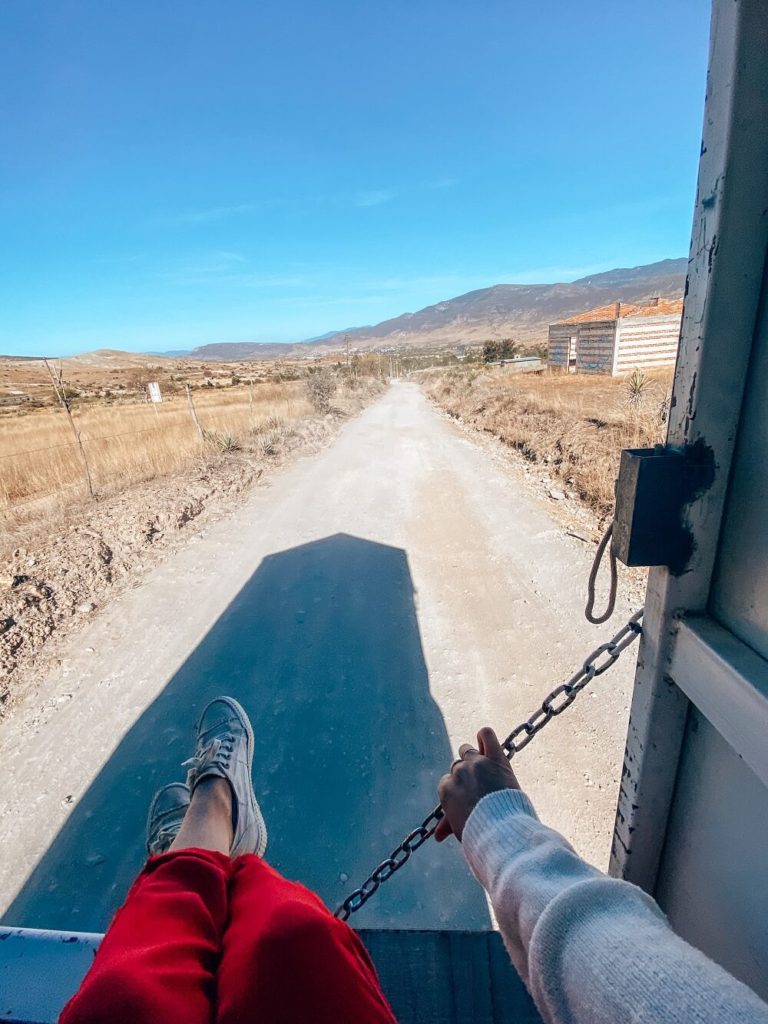
Once you’re in Mitla you’ll need to take a colectivo to Hierve el Agua. Normally right next to where the bus drops you off there will be a truck parked called a Camioneta with ‘Hierve el Agua’ written on the top. This is the colectivo that will take you high up into the mountains to your destination.
Now, there are two downsides to this method of transport. Firstly, you’ll have to wait until there’s enough people for the driver to consider it worthwhile to make the trip. They normally wait until there are at least 10 people. It’s really a matter of luck, but if you’re willing to pay a bit more per person, the driver will likely be happy to leave with less people.
The second downside of this method of transport will be the ride itself. The road is unpaved, uneven and incredibly bumpy! If you’re unlucky like us the seats in the back will be wooden and uncomfortable. In addition, you’ll likely end up with a few bruises from being slammed around. However, as I said before, it’s definitely an adventurous way to get to Hierve el Agua and one that you’ll never forget. Plus the scenery will become more and more beautiful as you climb higher and higher.
In the end we paid 100MXN each and in total we had 9 people in the colectivo. Luckily most of our fellow travellers arrived on the same local bus to Mitla as us.
When you arrive, someone will come and collect 50MXN each which is your entry fee to the site.
Top Tip – There was a small restaurant right in front of where the bus dropped us off with toilet facilities. I recommend using it before your ride to Hierve el Agua. It should cost around 5MXN.
Step 3 – Getting a Colectivo back to Mitla
Once you’re ready to leave, you just need to walk back to where you got dropped off. There will be a few of these colectivo trucks parked there already. Once again, you’ll likely have to wait until there’s enough people to take the journey. As luck would have it the collectivo was ready to leave as soon as we got there. We even had the exact same people on it as in the morning, so by the end we had bonded with them whilst being thrown around in the back of the truck. At least the seat was cushioned on the way back which was a blessing.
Once again we paid 100MXN each for the ride back to Mitla.
Step 4 – Getting a Bus or Taxi back to Oaxaca City
Now, the colectivo driver didn’t quite drop us off at the bus stop but rather at a taxi station. We could’ve just walked up to the bus stop and waited for a bus, but since we’d bonded with the others we decided to share a taxi back to Oaxaca City.
The taxi ride cost 40MXN each for 4 people. It’s definitely more expensive than the local bus, so if you can’t share the ride with others I suggest taking the local bus back which would only cost you 20MXN.
Cost of Visiting Hierve el Agua from Oaxaca City
Here’s a quick cost breakdown including bus tickets, colectivos and entry fees:
- 20MXN for one-way bus ticket to Mitla
- 100MXN for one-way colectivo fare (Cost depends on the number of people – we were 9 in total for reference)
- 50MXN for Hierve el Agua entry fee
- 40MXN for one-way taxi ride from Mitla to Oaxaca City (Cost split between 4 people)
- Cost of your food, drinks, snacks and toilet for the day
You’ll have to double up everything to calculate in your return journey.
What to Pack to Visit Hierve el Agua
Here’s a list of things you should consider taking with you when you visit Hierve el Agua:
Items for protection:
- Reef safe sun-cream
- Sunglasses
- Hat
Clothing items:
- Quick-dry towel
- Swimsuit
- Flip-flops or water shoes
- Comfortable trainers for walking
Tech items:
- Phone
- Waterproof Phone Case
- GoPro with waterproof case and camera
Other Items:
- Small backpack
- Cash
- Snacks
- Water bottle

How to Spend a Day at Hierve el Agua
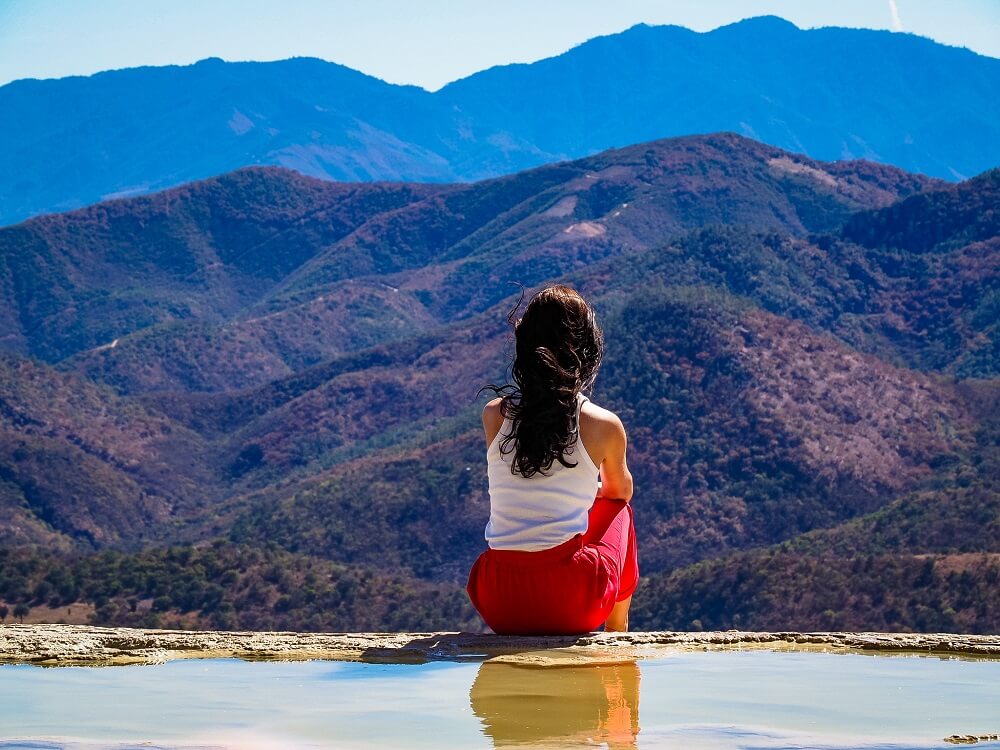
You can just enjoy swimming in the natural pools overlooking the valley and the mountains. However, you can also complete a short circular hike for a different point of view of these ‘waterfalls’.
Enjoy the Pools at ‘Cascada Chica’
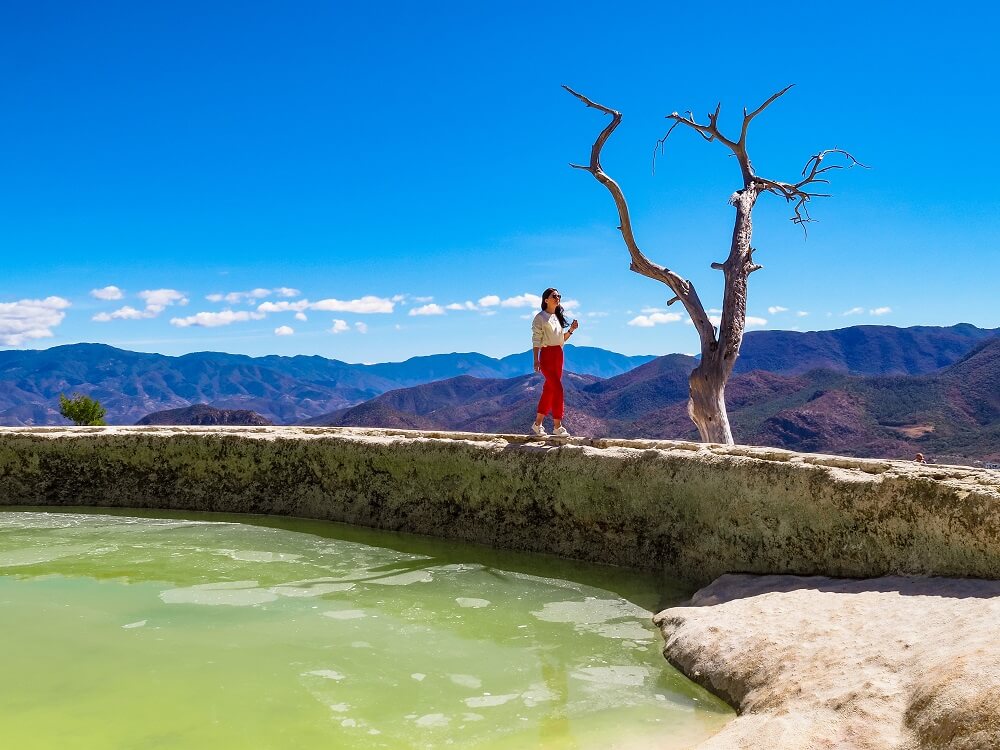
Cascada Chica, aka the ‘small waterfall’, is the first one you’re going to visit after entering the site. It’s also referred to as ‘El Anfiteatro’ or the Amphitheatre. It has two big artificial pools and other natural ones.
One of the artificial pools is the iconic one with the tree in front of it that from a certain angle looks like you’re in an infinity pool overlooking the mountains. In reality, it’s just an illusion and the pool isn’t actually at the edge of the cliff. Unfortunately at the time of our visit the pool wasn’t full so you couldn’t swim in it, but it was still picturesque.
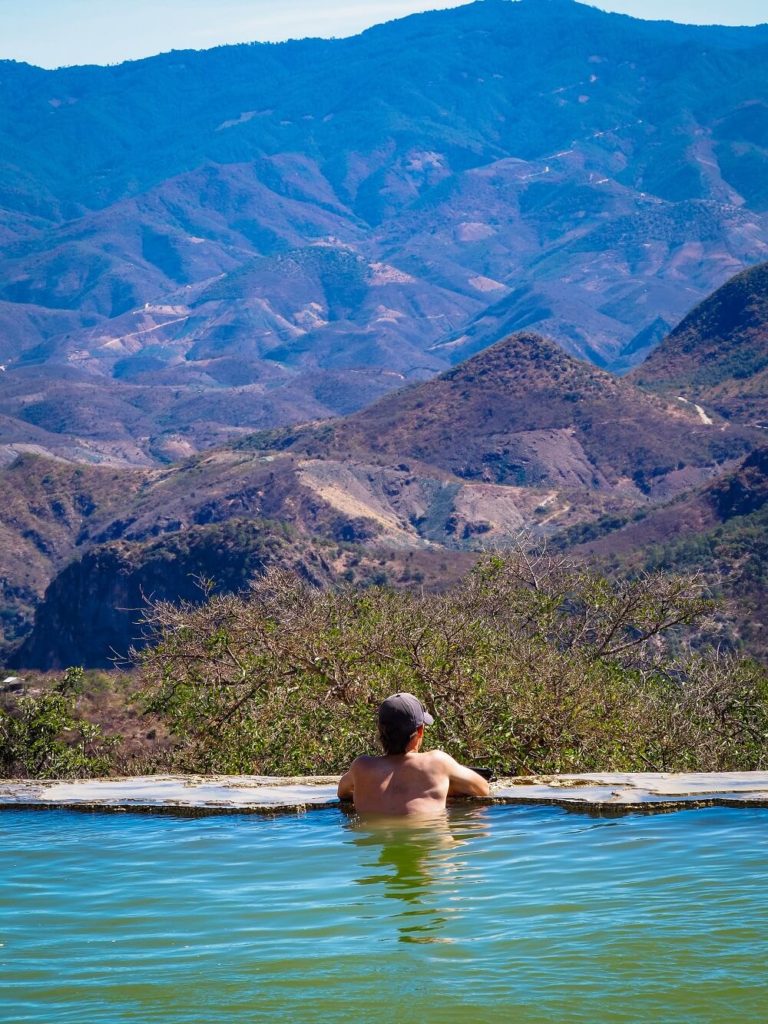
You could, however, swim in the natural pool that really is like an infinity pool and there’s a big drop at the edge of it. The colour of the water here is amazing and so are the views.
Please Note – The water will be cold, but refreshing on a hot day!
From Cascada Chica you can also get a fantastic view of Cascada Grande to your right.
Facilities – There are toilets and changing rooms next to the pools.
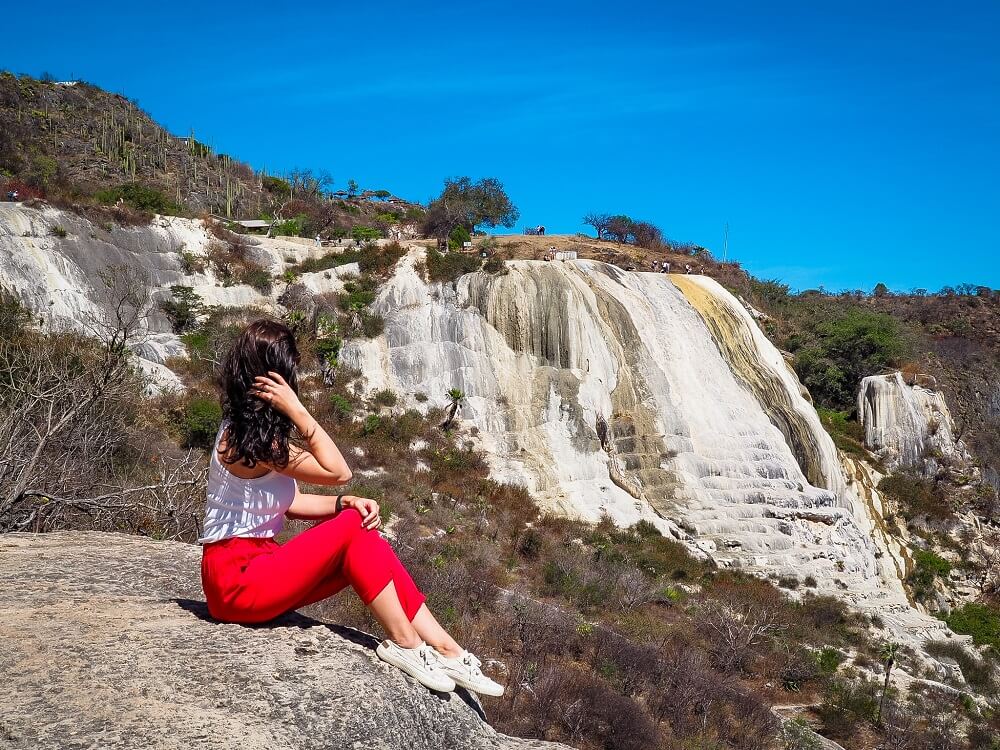
Walk Over to ‘Cascada Grande’
Once you’ve enjoyed the pools on top of Cascada Chica and taken enough photos of this incredible spot, walk over to Cascada Grande.
The short trail to the large waterfall starts on your right if you’re facing the pools. Don’t worry it’s signposted and easy to find.
You won’t be able to swim in the pools of Cascada Grande because firstly they aren’t as big and secondly they’ve placed safety tapes around it to keep it natural.
The main reason I recommend coming over here is to get a great view of Cascada Chica. The views are really amazing and worth the short but steep walk.
Top Tip – From the viewpoint, if you look directly below you, you’ll find a heart shaped hole which felt like a little hidden gem even though it was pointed out to us by a guide who was with a few other people.
Hike Between ‘Cascada Chica’ and ‘Cascada Grande’
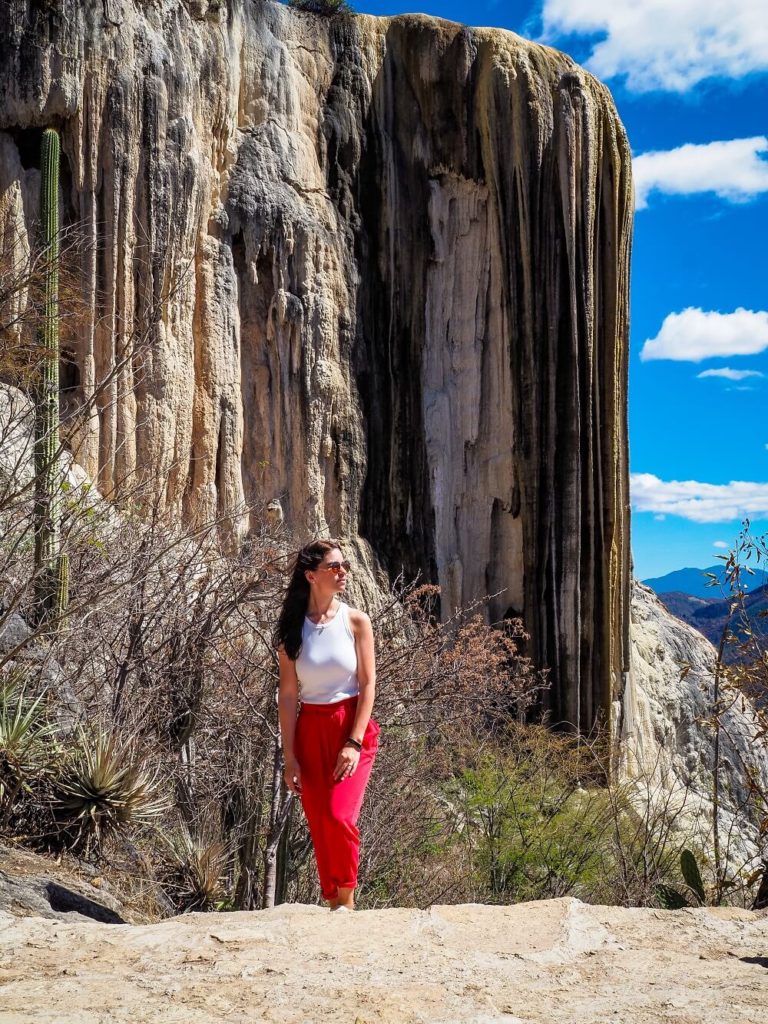
Another great way to appreciate these petrified waterfalls is by walking directly below them.
From the top of Cascada Grande you can follow the steep trail that goes below and eventually around it. Even if you don’t want to hike between the two waterfalls, I recommend coming down to this point to really see the formation.
If you’d like to complete the hiking trail then just carry on along the path. It’ll be a bit uneven and rocky but luckily it’s easy to follow. It’ll give you the chance to really see this phenomenon from every possible angle, plus the views of the valley in front of you will be incredible too.
There won’t be many people along this trail either, since most people will gather at the pools. Another reason why coming here without a tour is great because you can definitely complete this hiking trail which you might not have had time for otherwise.
The trail will eventually lead you back to the food area from where you can hop onto a colectivo back to Mitla then to Oaxaca City.
Final Thoughts on How to Get to Hierve el Agua from Oaxaca City
Hierve el Agua was definitely one of the most unique places we visited during our stay in Mexico. The country is just filled with many special places like this one and it never failed to surprise us.
We didn’t even mind the crazy ride that left us with a few bruises at the end. It was definitely an adventure that we’ll never ever forget. Seeing this phenomenon was absolutely incredible and now we really want to visit Pamukkale in Turkey.
Have you ever been to Hierve el Agua before? If so, did you take a tour or travel there by yourself? What was your experience? If not, would you want to visit Hierve el Agua from Oaxaca City? Let me know in the comments below.
Now, let your adventure begin,

Our Top Travel Resources
Accommodation: For hotels we always use Booking.com and Hostelworld for hostels. We also book longer stays on Airbnb or Vrbo.
Flights: To find the best flight prices we always check Skyscanner, Google Flights or WayAway. Then we also check the airlines’ websites too for comparison.
Car Rentals: We use Discover Cars when we want to rent a car as it compares local, national and international companies.
Activities: If we book organised tours we always check either GetYourGuide or Viator.
Foreign Currency: Whenever we can we prefer to pay in local currency and for that we always use our Wise card. We can easily withdraw money from the ATM or pay by card at most shops and restaurants.
Travel Insurance: We never go anywhere without travel insurance. You never know what will happen on your trip, so good travel insurance like SafetyWing can protect you in case of injury, illness, theft and cancellations.
eSIM and VPN: To get data abroad we use Airalo which is an app that allows you to download a prepaid eSIM to your phone in over 190 countries. Make sure to have a VPN to avoid hackers accessing your personal data when using public WIFI. We use Surfshark which is the only VPN that offers one account on unlimited devices.
Remember…It all starts with a Pin…


What an incredible place!! I can only imagine how refreshing those pools were in the hot Mexican sun ☀️
Hierve el Agua is definitely a unique place and we loved our visit. Yes the pools were very refreshing in that heat 🙂
this is such a comprehensive guide and i loved it! some places are nervewrecking to navigate when you’re not a local – i imagine this would be such absolutel spot-on information for anyone headedto Hierve Al Agua!
Thank you so much Shafinah. I agree, some places are require a lot more effort to get to but totally worth it. I hope this post will make someone’s planning a bit easier.
Wow, is this a thorough comprehensive post..thank you for breaking down all the costs and including travel tips.
Thank you so much Jenn, I’m glad you found it useful.
What an awesome experience! Thanks for sharing this guide; I hope I get to visit soon!
Thank you Alex, I’m glad you enjoyed this guide.
Such a beautiful place, and beautiful photographs too!!
Thank you so much Emily.
Can’t wait to visit. Thank you for your post. I want to explore more places just reading these comprehensive reviews … keep sharing 🙂
Thank you so much Tara. I hope you can also get to visit Hierve el Agua in the near future. It’s a very unique place 🙂
Thanks for the tips! We left from the Second Class Bus Station on the opposite side of town from the baseball stadium. The buses to Mitla are green and leave from the street outside the station, the Periférico.
Thanks Joel, we’re glad to hear that our tips were useful. Hope you had a good day at Hierve el Agua.