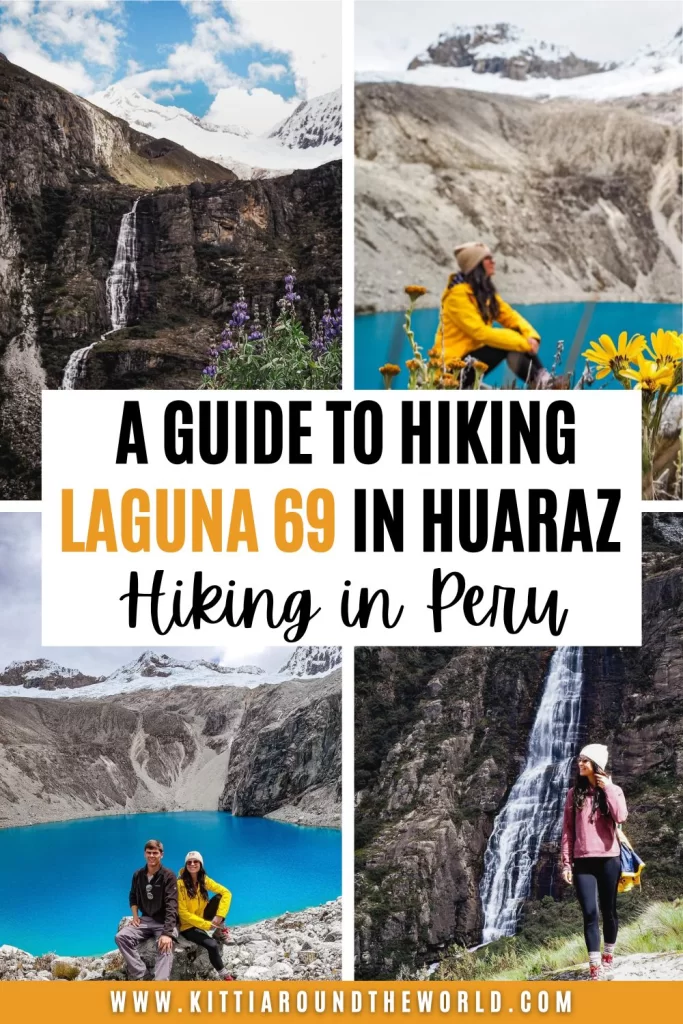
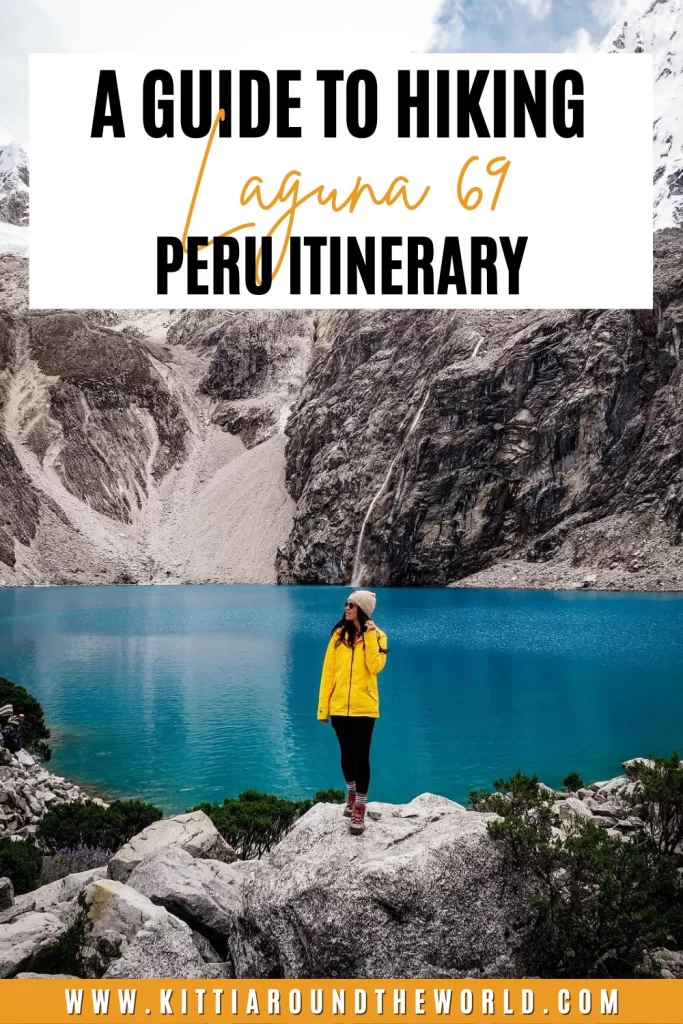
A Guide to Hiking Laguna 69 in Huaraz, Peru
In this hiking guide we’ll share everything you need to know about hiking Laguna 69 in Huaraz. Over the years Laguna 69 has become one of the most popular day trips from Huaraz, and is constantly being added to people’s bucket lists when visiting Peru. Many travel all the way to Huaraz just to complete this particular trail.
Unfortunately, Laguna 69’s popularity often makes people overlook the fact that this hike isn’t an easy stroll in the Andes. Whilst it might not be as physically challenging as other hikes in Peru, such as the Salkantay Trek or Ausangate Trek, it also won’t be as easy as other day trips from Huaraz, such as Laguna Paron where you only have to walk for 30 minutes for a great view. It’s a serious hike and it’s important to arrive prepared.
So, in this blog post we’ll discuss everything you might need to know including whether to do it independently or with a tour, what the difficulty level is like, the altitude of this hike and also what to wear and pack to have the best possible experience.
If you’d like to see our adventures, then check out our dedicated Huaraz video on our YouTube Channel. For more Peru videos check out our Peru Playlist.
Disclosure: This post may contain affiliate links, which means we may receive a small commission if you click a link and purchase something. Clicking these links won’t cost you anything, but it will help us to keep this site up and running! Learn more about our affiliate policy.
About Laguna 69 in Huaraz
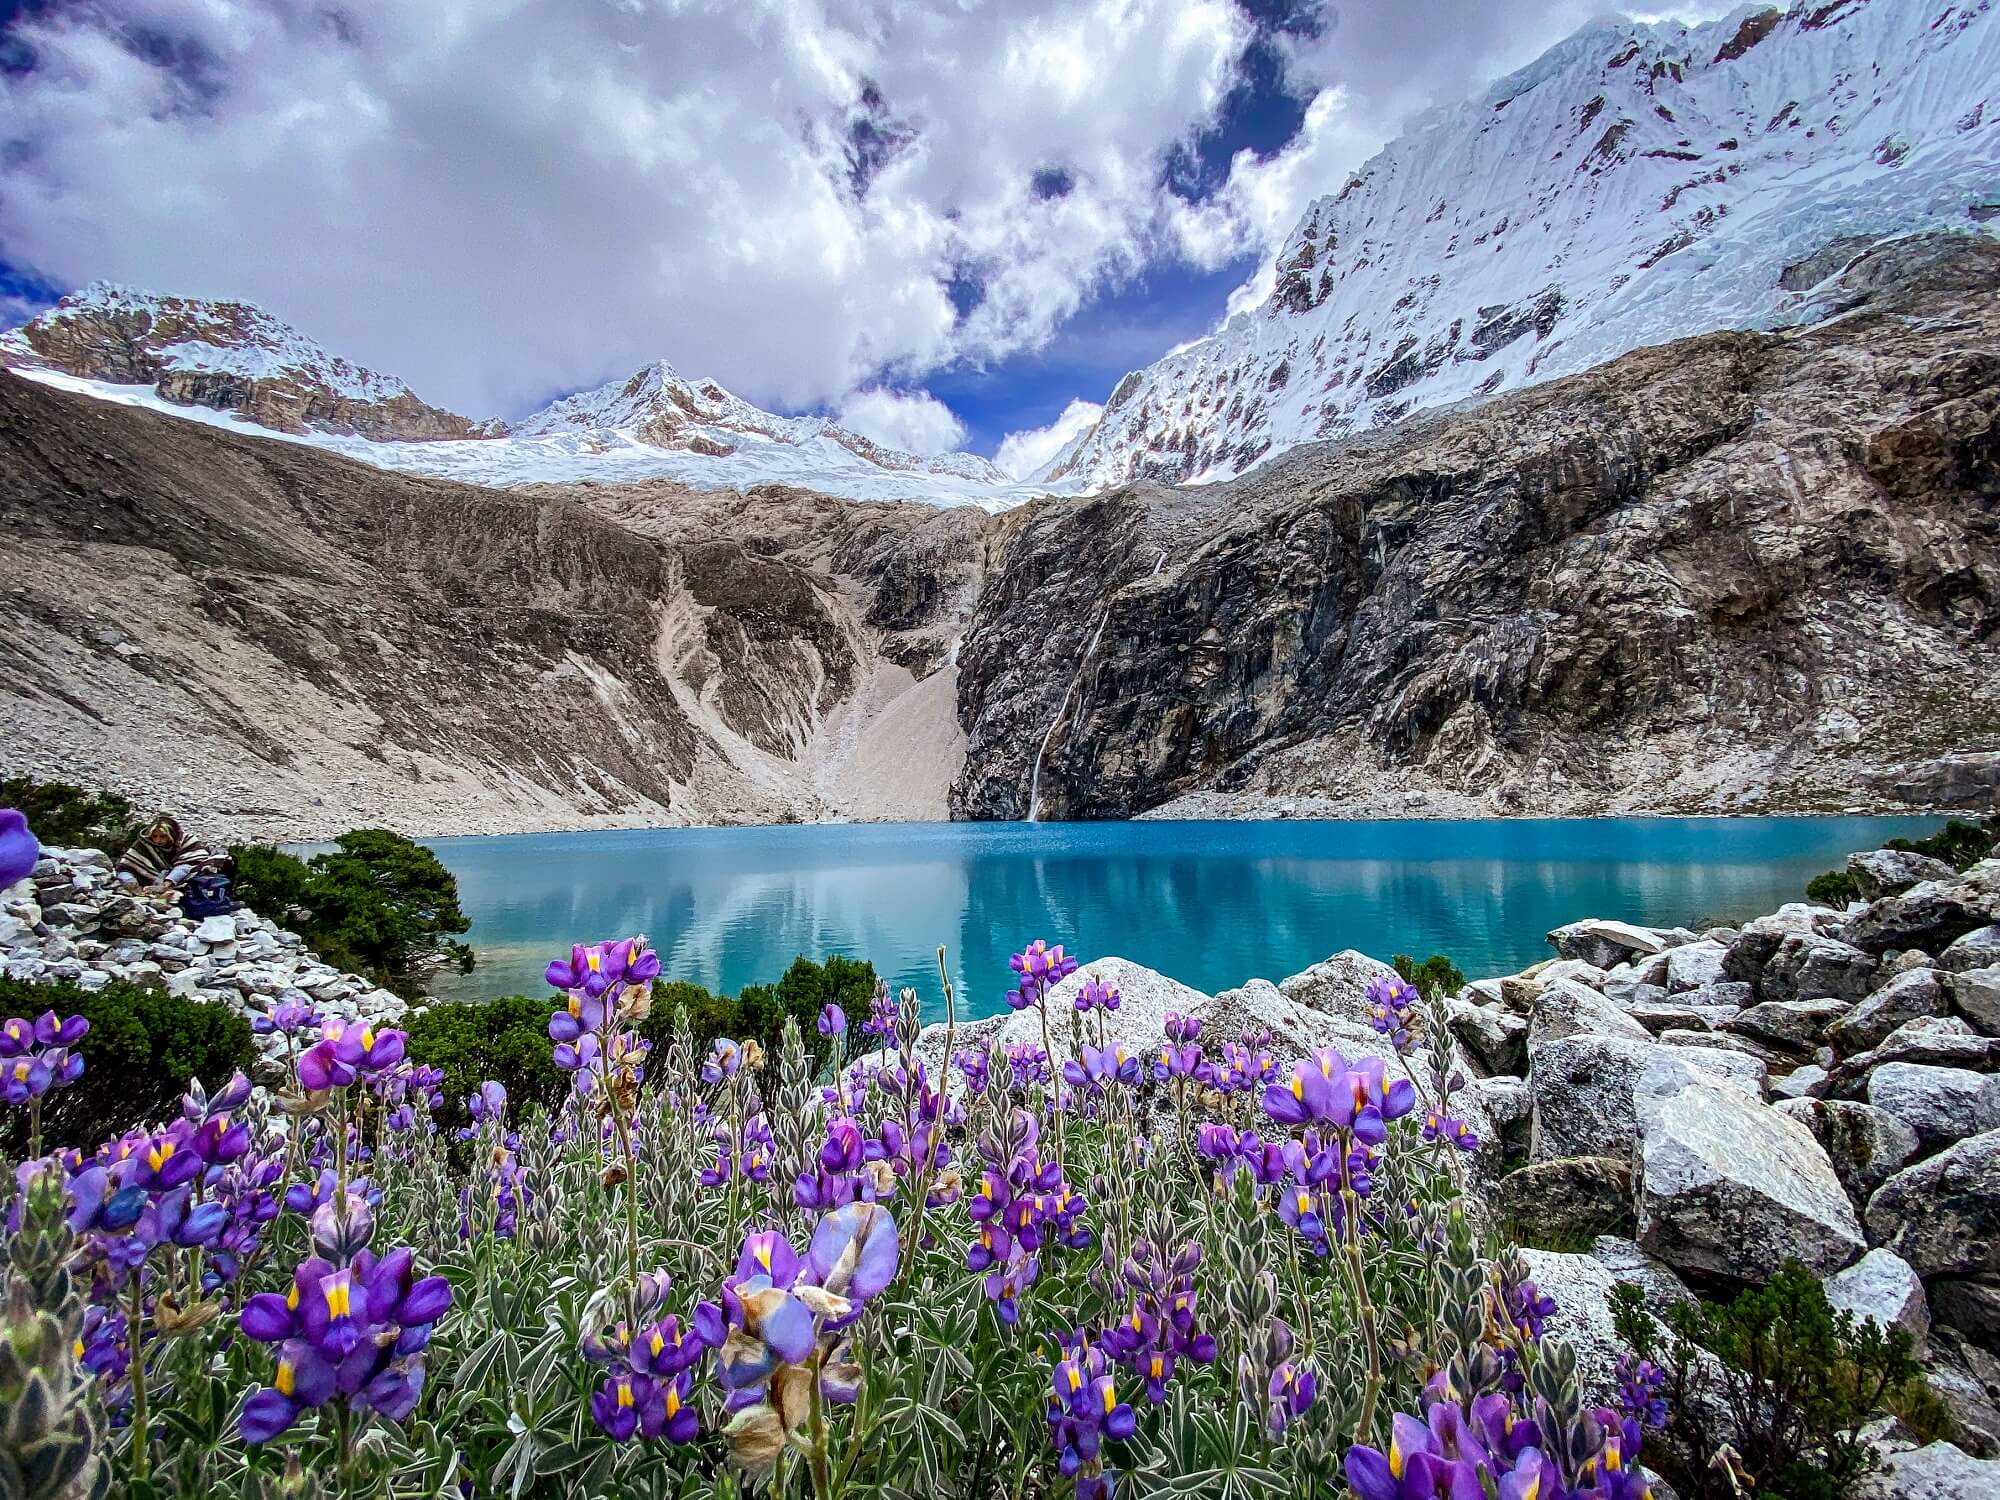
Laguna 69 is located within the Huascaran National Park near Huaraz in Peru. The 340,000 hectare national park has been a UNESCO World Heritage Site since 1985. The park comprises most of the Cordillera Blanca (“White Mountains”) mountain range. It also boasts Peru’s highest peak: Huascaran Sur (6,768 m / 22,205 ft). The Cordillera Blanca is actually the world’s highest tropical mountain range which means that Huascaran Sur is the world’s highest tropical mountain.
Laguna 69 sits at about 4,600 m (15,091 ft) above sea level. You might wonder why such a popular lake has such a simple numbered name. Well, when Huascaran National Park was created in 1975 they had to provide a list of all the natural attractions within the park. It has over 300 lakes, so instead of giving all of them a unique name, they just simply numbered the ones that didn’t already have one. As you may have guessed, 69 was the number given to this particular lake.
Things to Know Before Booking the Laguna 69 Hike
Tour or Independent Hike to Laguna 69?
There are pros and cons for either visiting with a tour or independently, so let’s run through them.
Pros of Taking a Tour:
- Unlike most places in Peru, joining a tour will actually work out a bit cheaper than trying to get there with a mix of public transport or taxis.
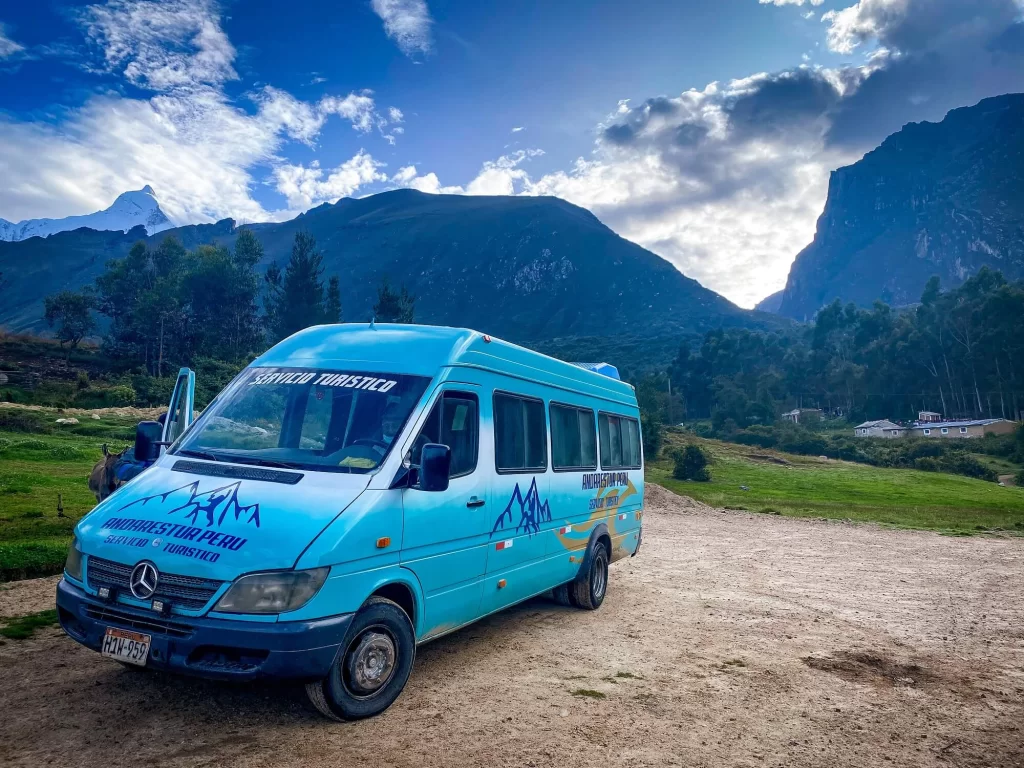
- As well as being cheaper, it’s also way more convenient. You’ll just need to hop in a minivan and then get off at the start of the trailhead. No need to worry about getting from A to B.
- You don’t have to stick with the group and you can do the hike at your own pace.
- The tour will also include a few pit stops along the way; for breakfast and at Laguna Chinancocha.
- Compared to other day hikes from Huaraz, you’ll actually spend a lot of time hiking, so you wont feel like you’ve been in a minivan for 8 hours just to stretch your legs for an hour like with the Laguna Paron or Pastoruri Glacier day tours.
Cons of Taking a Tour:
- It won’t be your typical guided hiking tour as you may have experienced them in other parts of the country. Most day tours in Huaraz will act more like a transportation service. You’ll have a guide but he/she won’t really be hiking with the group. Instead, you’ll be given a time when you should get back to the minivan by and left to your own devices.
- Now, since the guides aren’t there to push people along the trail, you might end up like us and have to wait an extra 2 hours for everyone to arrive back to the van. Unfortunately, the level of fitness for people can vary greatly on this day trip.
- This also means that you might end up back in Huaraz much later than expected.
- You also may or may not be able to bond with others on this tour. Everyone is doing their own thing, so there’s not as much chance to get to know people. Unless you’re one of the fast ones, because then you can spend a few hours chatting with the others whilst waiting for the rest of the group.
- Food is normally not included in the tour cost.
Pros of an Independent Hike
- You’ll definitely have a more adventurous day by travelling on colectivos, local buses and taxis.
- You also won’t have to wait around for slower hikers.
Cons of an Independent Hike
- The cost of getting your own transport could very well add up to being more expensive than a tour. Especially if you end up having to take a private taxi!
- Getting to the trailhead is always easier than getting back from such a remote area. We read that some people ended up getting a ride back in one of the tour minivans because there wasn’t any other option available.
- You’ll still have to be up early and you’re still not guaranteed to be completely alone at the lagoon since tour buses leave super early too.
Cost of a Tour and Entrance Fee to Laguna 69 in Huaraz
Tour costs can vary slightly depending on who you book with. We paid around S/.60 ($17 USD) per person. We recommend having a look around in Huaraz and booking it once you’re in the city.
During our time in Huaraz we noticed that it doesn’t really matter which tour company you book with. Most companies actually work together and fit people who’ve booked through different companies into a few vans to make it more cost efficient.
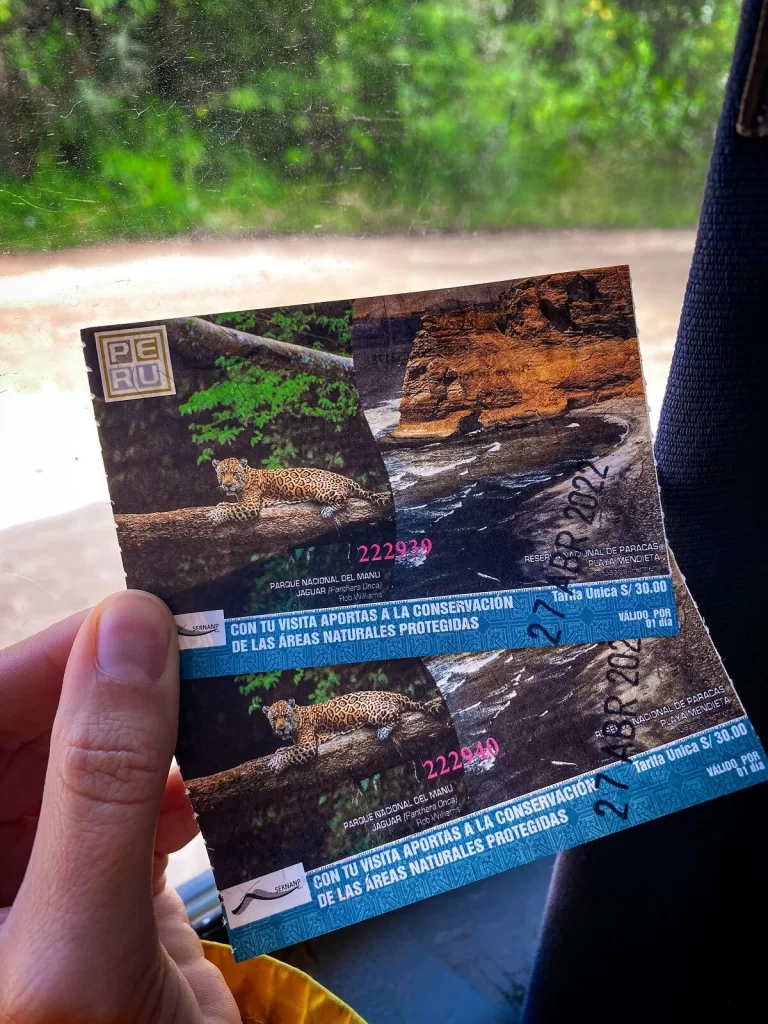
Since Laguna 69 lies within the Huascaran National Park, you’ll have to pay an entrance fee of S/. 30 ($8.5 USD). This is basically the cost of a day pass that lets you visit the national park without an overnight stay.
If you’re staying in Huaraz a bit longer and planning on doing a few more day trips, then we recommend buying a multiday pass. You can buy a 3-day pass for S/. 60 ($17 USD) or a one month pass for S/. 150 ($42 USD).
It’s worth thinking about how many attractions you want to visit within the park so you purchase the most suitable version of the pass.
You can buy your pass on your first day trip and just bring it along with you when you’re on a different tour.
Do you Need Special Travel Insurance to Hike Laguna 69
We cannot emphasize enough how important it is to have travel insurance before any trip you make abroad. Now, most travel insurance won’t automatically include cover for all the activities you’re planning on doing during your travels.
For example, if you’re visiting Peru, and planning on hiking in high altitudes, then you should have cover for high altitude trekking in your insurance policy. Make sure to shop around to find the most suitable one. You just never know what could happen and it’s better to be safe than sorry.
Best Time to Hike Laguna 69 in Huaraz
You can technically hike Laguna 69 all year round. However, there are better and worse times of the year to complete it.
The wet season is normally between December and March/April. Whilst visiting during this time frame doesn’t necessarily mean that you’ll be hiking in the pouring rain, the chances are much higher. The hike can become a bit more dangerous due to the bad weather conditions and is more likely to get cancelled. Even if it does go ahead, you really want to enjoy the jaw dropping scenery and not be wishing the hike was over because you’re soaking wet and feeling miserable.
The dry season is from about April to November. This time frame definitely gives you a high chance of a sunny and enjoyable hike. If you come just before the dry season, around April, then you’ll probably have a pleasant and rain free hike. It’s also less busy with tourists, so a good time to come to avoid the crowds. When we visited in early May we had a very lovely hike up to the lagoon but on our way back we were hiking in a heavy downpour with hail.
June to September are the most popular tourist months, so be prepared for a lot more people to be on the trail with you.
Laguna 69 Trail
1. Cebollapampa to the First Switchbacks
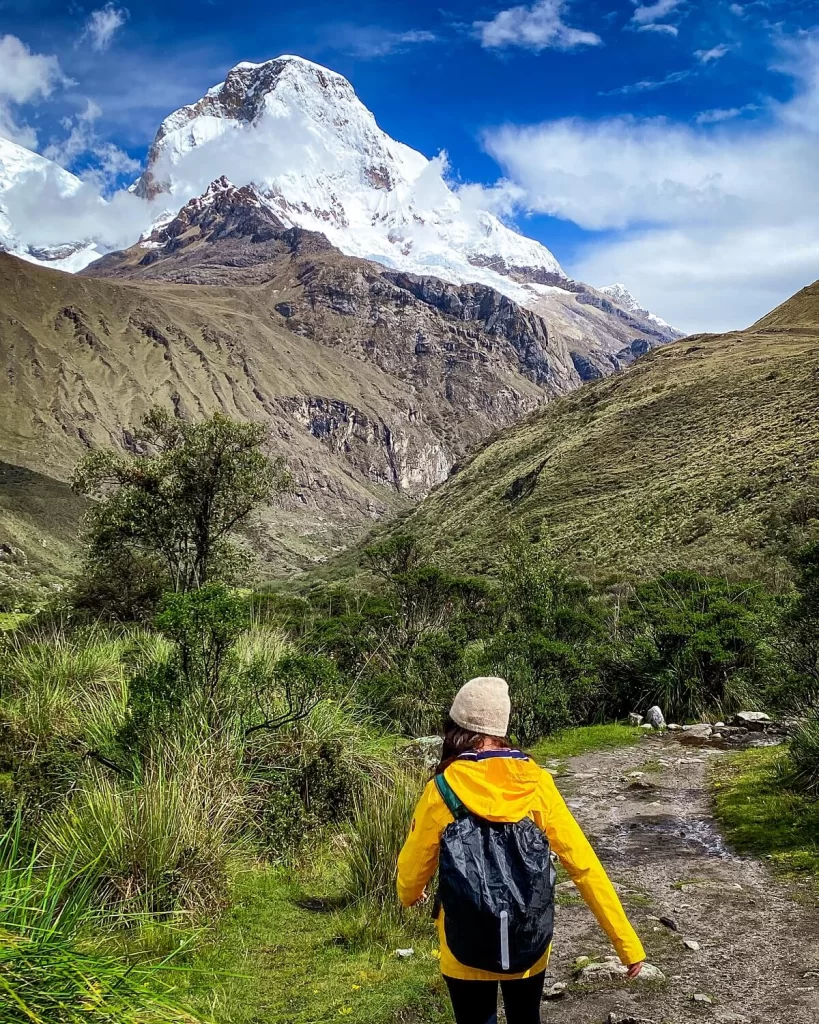
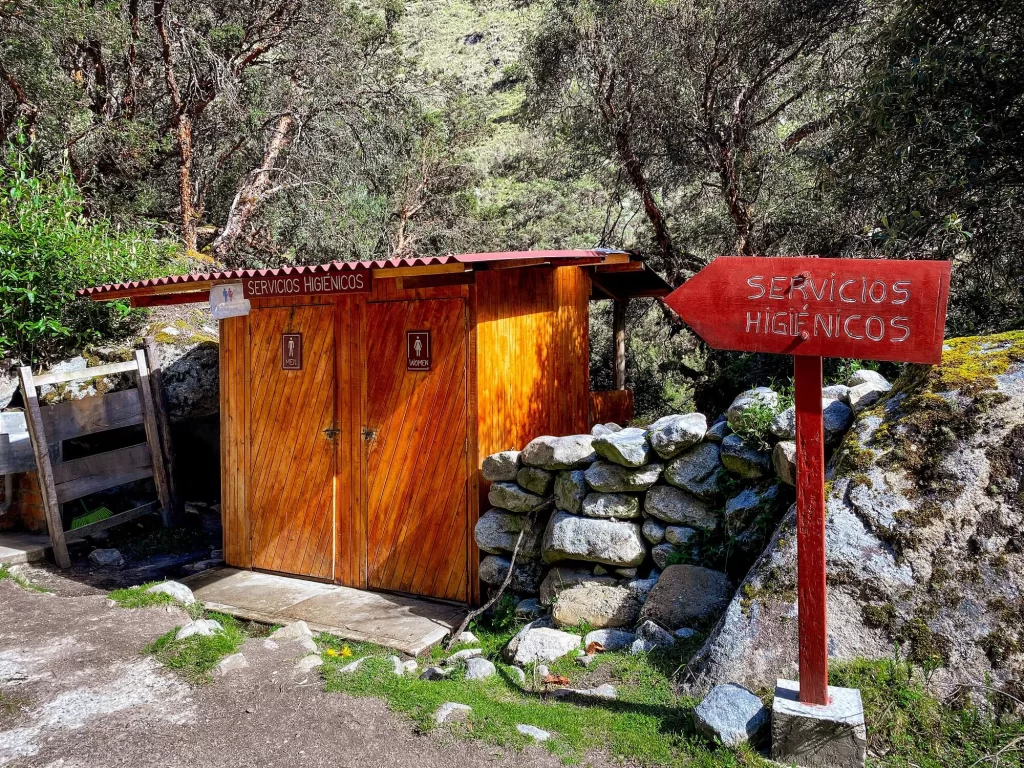
Once you’re out of the minivan, you’ll have the chance to use the toilet facilities at Cebollapampa. This first section of the trail is about 3 km (1.8 mi) long and quite easy. You’ll have a very gradual elevation gain which is perfect to get used to the altitude.
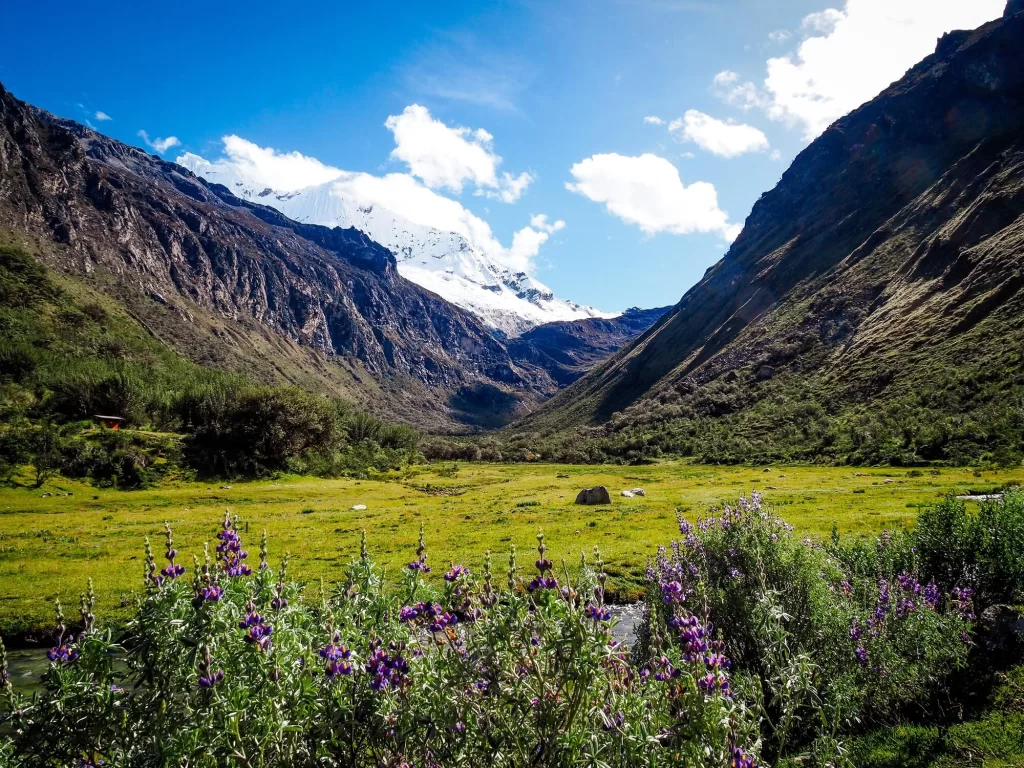
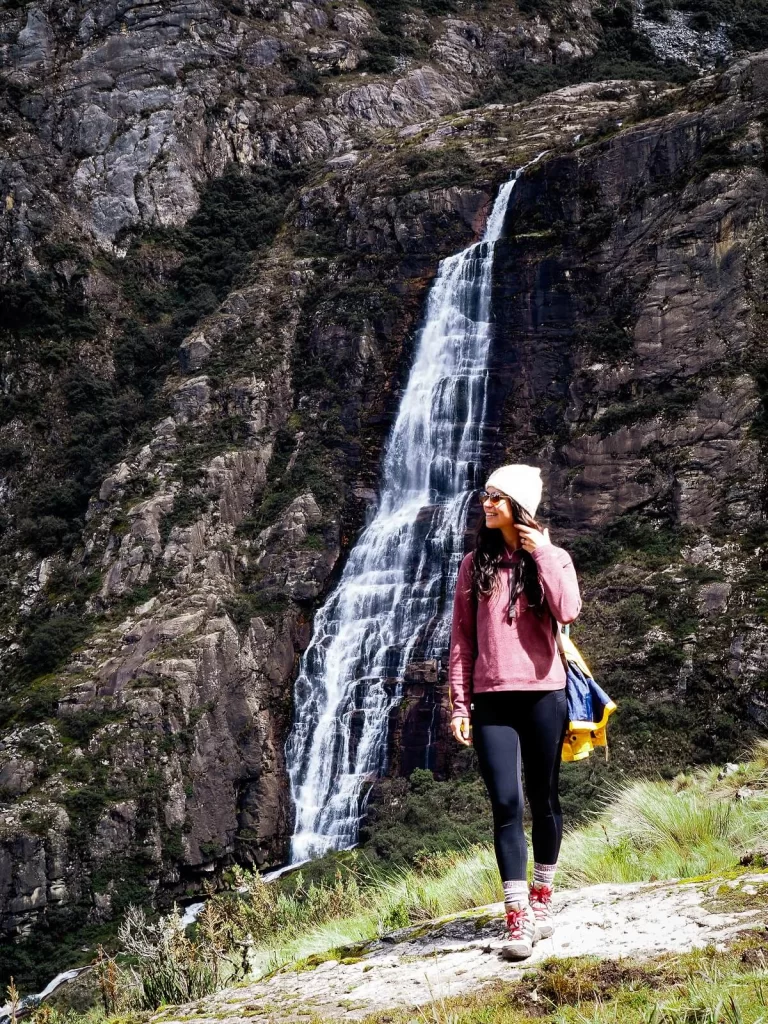
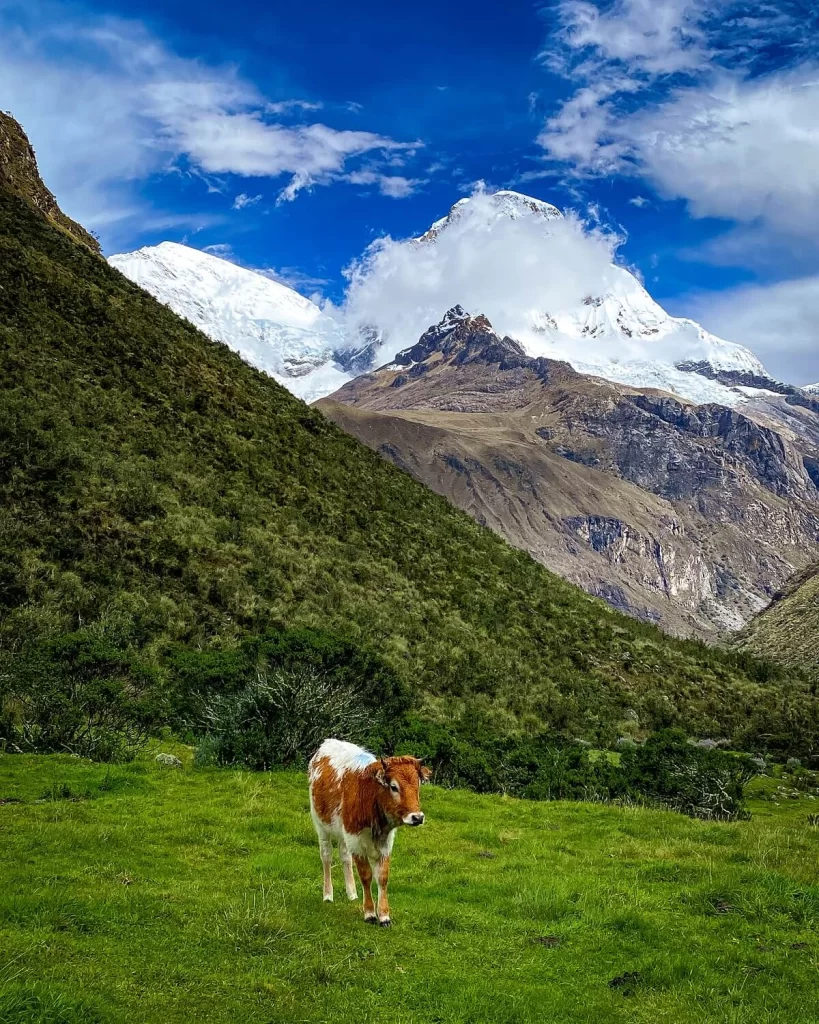
The scenery is also stunning! You’ll follow the meandering river surrounded by snow-capped mountains and cascading waterfalls, with grazing cows and horses in the lush green fields all around.
2. First Switchbacks – Flat Section – Second Switchbacks
You’ll soon start the first tough section along this hike. These switchbacks will last for less than 1 km (0.6 mi) but you’ll gain around 140 m of elevation.
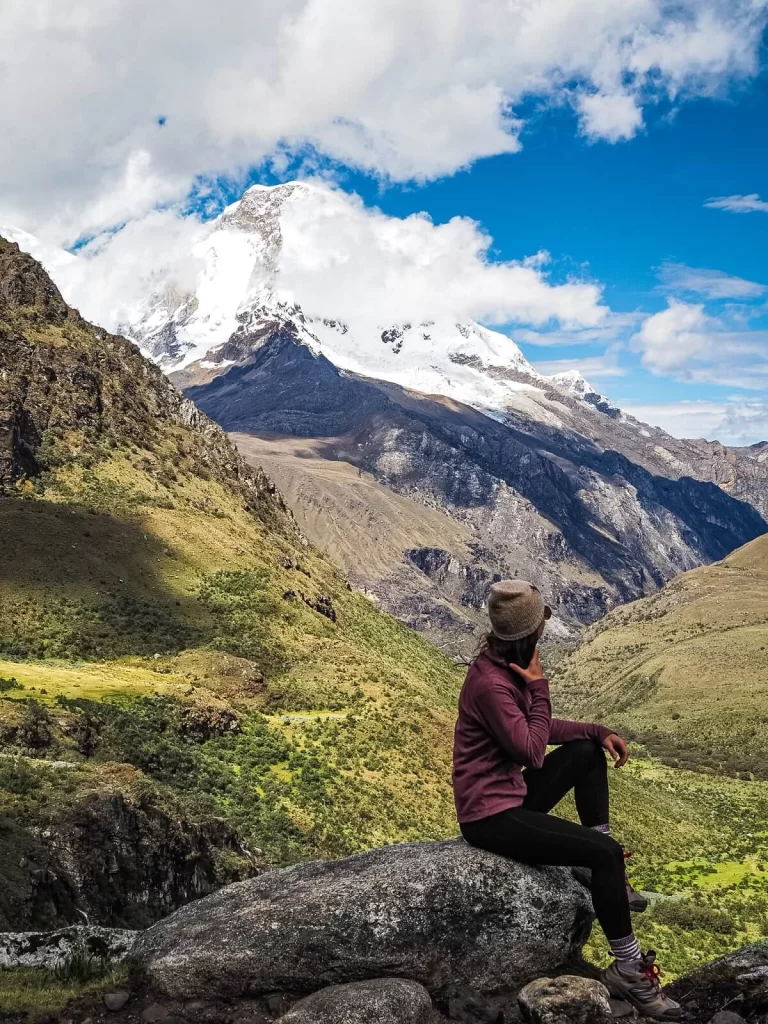
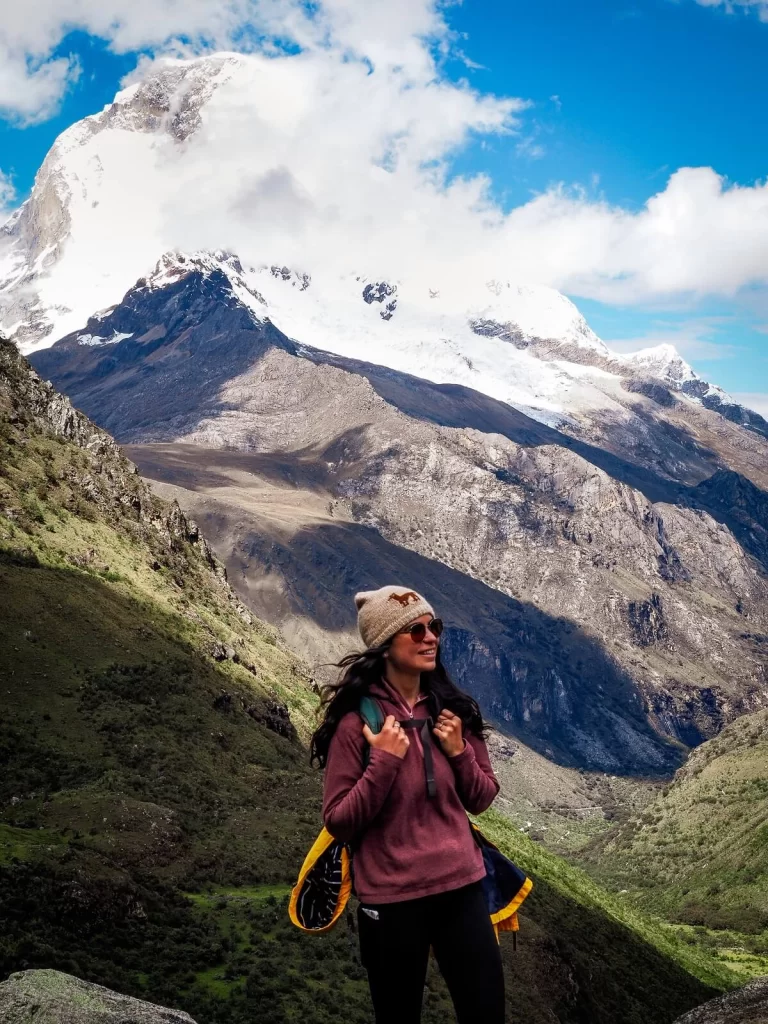
Whilst it’ll be tough and feel like it’s never ending, the views will get better and better as you climb higher. Don’t forget to look back at the valley you just walked through and appreciate the closer views of the mountain peaks and waterfalls.
Soon you’ll reach a welcome flat section to give your legs a short break. It’ll last for about 1.6 km (1 mi) before the second set of switchbacks signals the final push to the lake.
3. Second Switchbacks to Laguna 69
There just always seems to be a big ascent you have to get through before you reach your destination. This final uphill part is going to be brutal. In only about 1.2 km (0.8 mi) you’ll gain about 240 m (787 ft) of elevation. Take it easy and go at a steady pace because Laguna 69 is waiting for you at the end of it.
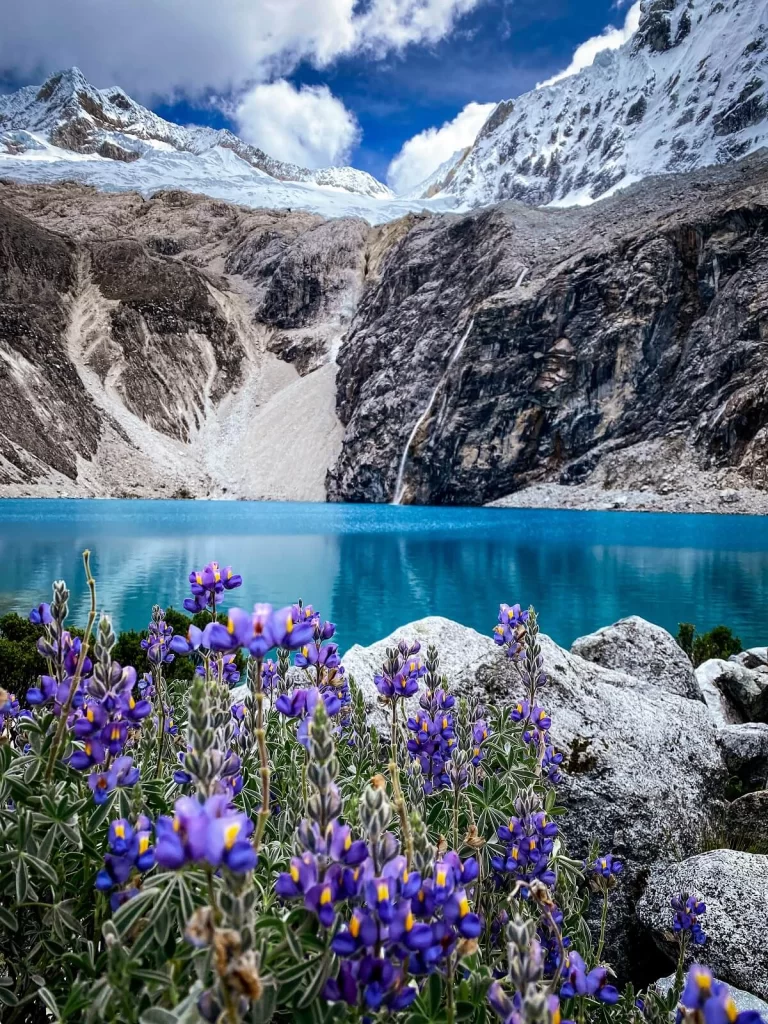
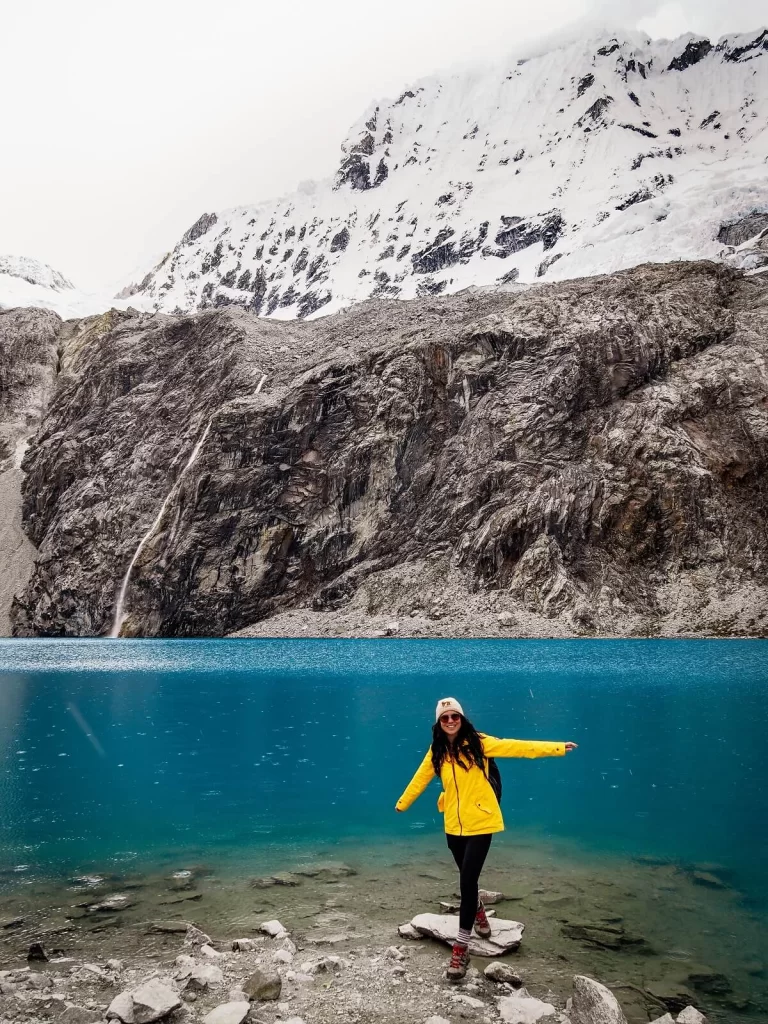
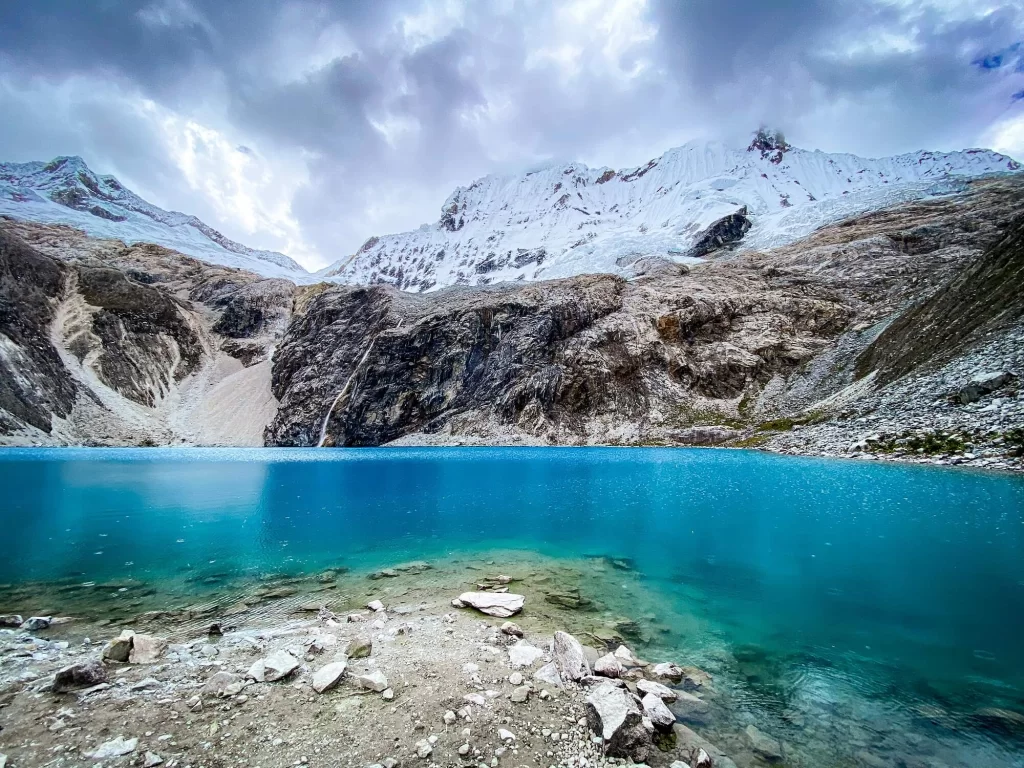
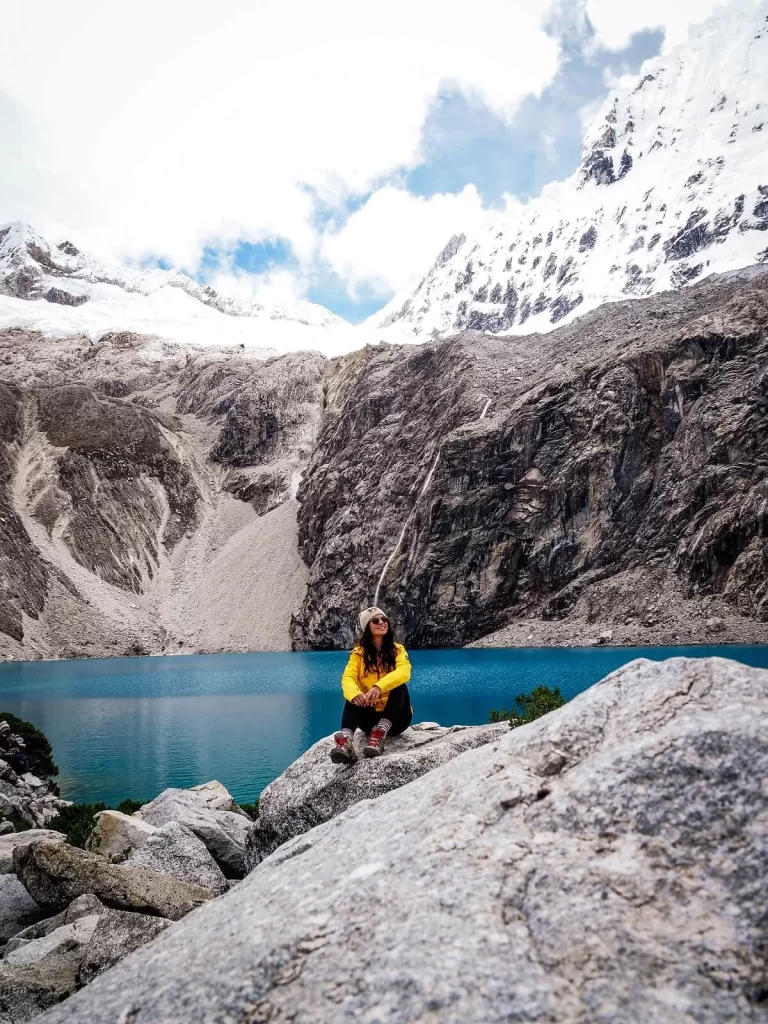
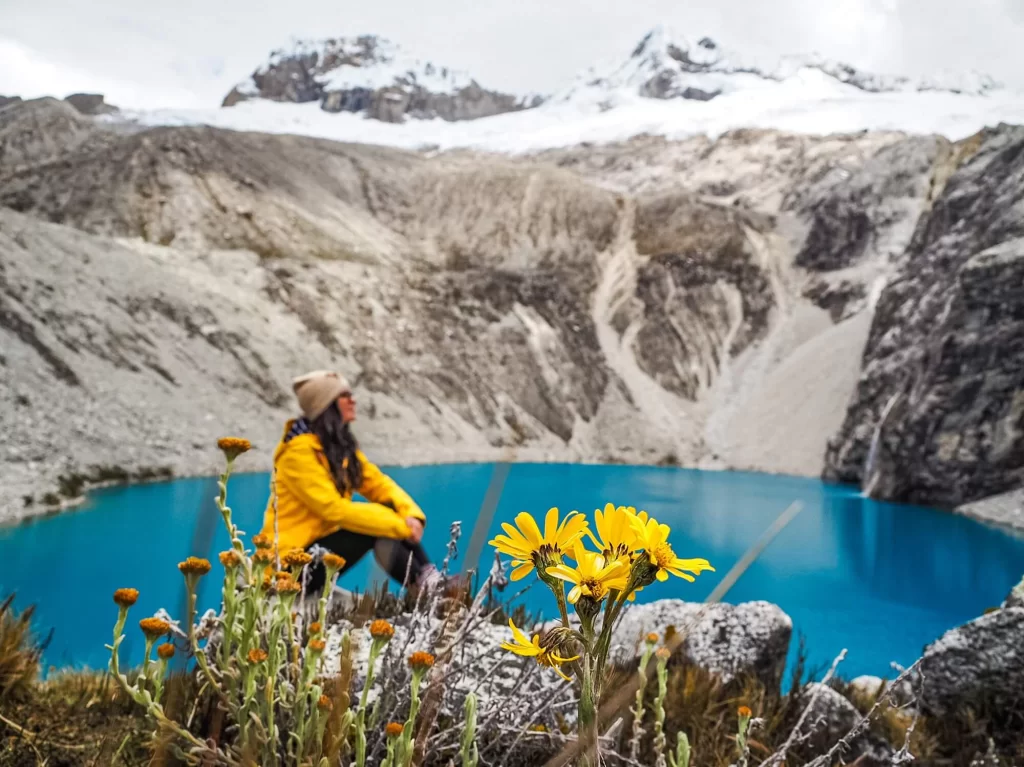
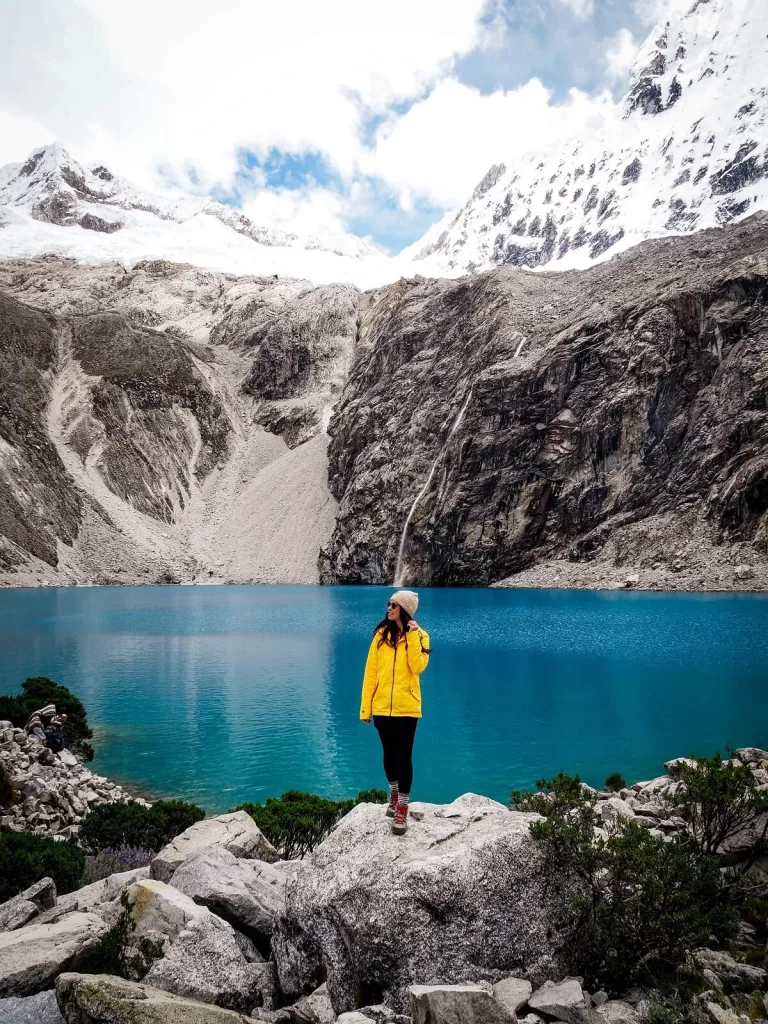
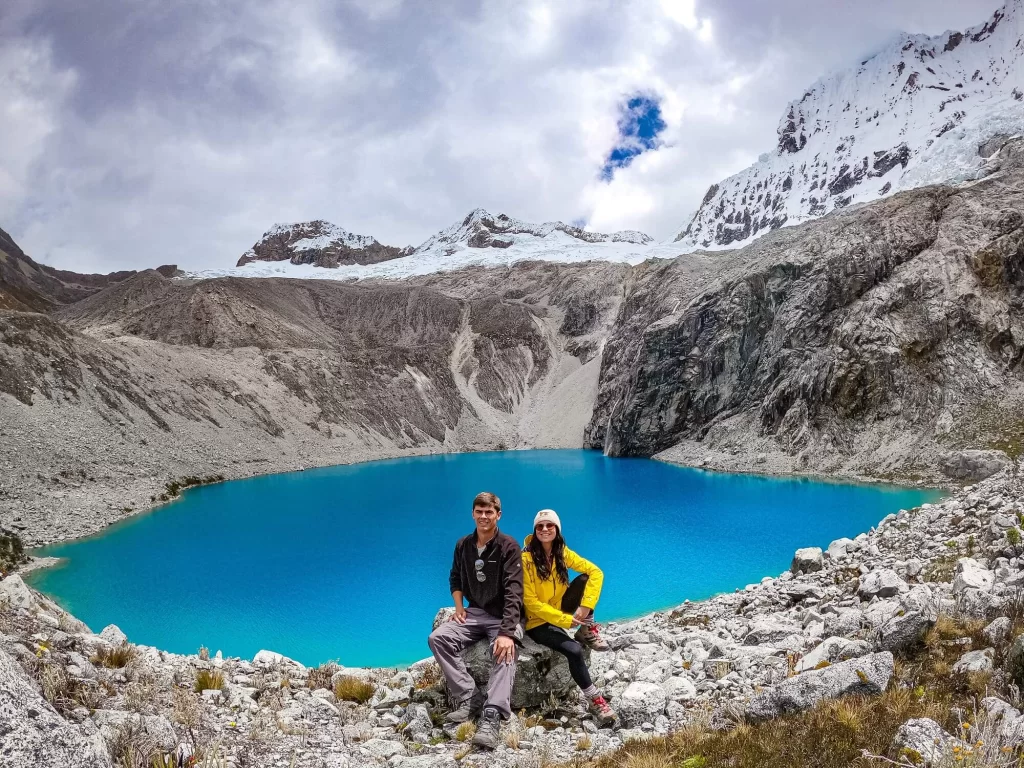
Just when you think you can’t go any further, you’ll see the sign that indicates that you’ve successfully reached your destination. Here you can find a quiet spot, have your well deserved lunch and take as many photos as you wish.
Make sure to check how your doing for time and spend as long as you can admiring this incredibly blue glacier lake.
4. Laguna 69 to Cebollapampa
Once it’s time to head back to the minivan, make sure that you’ve left nothing behind and make your way back along the same path. This section should take you less time to complete, but be careful because it can be hard on your knees.
Once you’re back at the trailhead, you can grab some refreshments from the stall and wait for the others to arrive before jumping back in the minivan for another 4 hour drive back to Huaraz.
How to Prepare for the Laguna 69 Hike in Huaraz
How Long is the Laguna 69 Hike
The Laguna 69 hike is a 14 km (8.7 mi) point-to-point hike. It normally takes about 3 hours to hike up to the lake and about 2 hours to hike back.
If you visit with an organised tour, you’ll have about an hour to spend around Laguna 69. If you’ve hiked at a good pace and made it within the 3-hour timeframe that is.
The distance of this trail might not seem that great but the altitude and elevation gain can really slow people down. If you’re generally slower when descending, that can easily add to your overall hiking time too. Plus, you’ll have less time to relax and enjoy the views at Laguna 69.
Lastly, let’s not forget that it takes quite a long time to get to the trailhead and back to Huaraz. You’ll leave Huaraz around 5AM and won’t really start the hike until around 9AM. Then you’ll spend another couple of hours in a minivan at the end before getting back to Huaraz around 6-7PM.
How Difficult is the Laguna 69 Hike
It is considered a moderate hike. Whilst the length of the trail is short, the main difficulty comes from the high altitude and elevation gain.
The first section of the trail is relatively flat which is a great opportunity to get used to walking at 3,800 m (12,467 ft) above sea level. The first hard section will be after about 3 km (1.8 mi). This is when you’ll start hiking up some steep switchbacks. Up until then you’ll have gained about 240 m (787 ft) of elevation. Along the switchbacks you’ll gain an additional 140 m (460 ft) of elevation.
Luckily, the next 1.6 km (1 mi) section will be relatively flat with only about 160 m (525 ft) of elevation gain. Then, just before you reach Laguna 69, you’ll have another steep uphill section. This part is only about 1.2 km (0.8 mi) long but you’ll gain about 240 m (787 ft) of elevation. The last section is definitely the hardest since you’ve already hiked the majority of the route and will likely be pretty tired by this point.
The way back is exactly the same and might seem easy for some. However, the downhill sections can be hard on the knees, so be careful and take it slow if needed. Weather conditions can also make this hike more challenging.

What is the Altitude and Elevation of the Laguna 69 Hike in Huaraz
The Laguna 69 hike starts at La Cebolla at an elevation of 3,800 m (12,467 ft) above sea level. The trailhead is already over 700 m higher than Huaraz’s elevation of 3,052 m (10,013 ft). The maximum altitude along the trek is 4,600 m (15,091 ft) at Laguna 69 itself.
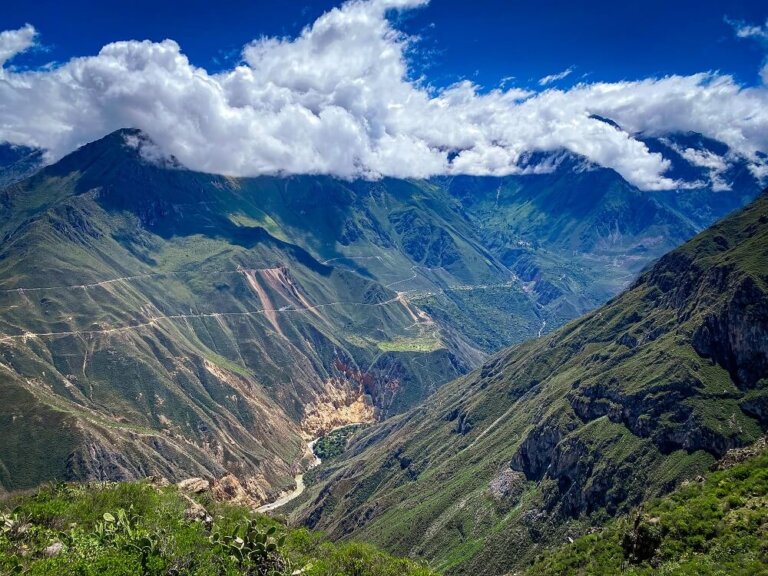
This means that during this short hike you’ll be gaining about 800 m (2,625 ft) of elevation. This isn’t much less than the 1,000 m (3,280 ft) of elevation gain we did on the last day of the Colca Canyon Trek to reach 3,287 m (10,784 ft). Don’t forget that Laguna 69’s trailhead sits much higher – at 3,800 m (12,467 ft). Even on the hardest day along the Salkantay Trek you’ll only gain around 730 m (2,395 ft) of elevation to reach the Salkantay Pass which is located around the same height as Laguna 69.
Altitude sickness is no joke, and you should make sure to acclimatise with less demanding hikes such as Laguna Wilcacocha (3,725 m / 12,221 ft) or Laguna Paron (4,155 m / 13,631 ft) first.
How to Prevent Altitude Sickness on the Laguna 69 Hike?
It is important to know that anyone can develop altitude sickness and its symptoms can be more or less severe depending on the person. Symptoms of altitude sickness include dehydration, dizziness, headaches, shortness of breath, heavy breathing, loss of appetite, nausea and vomiting.
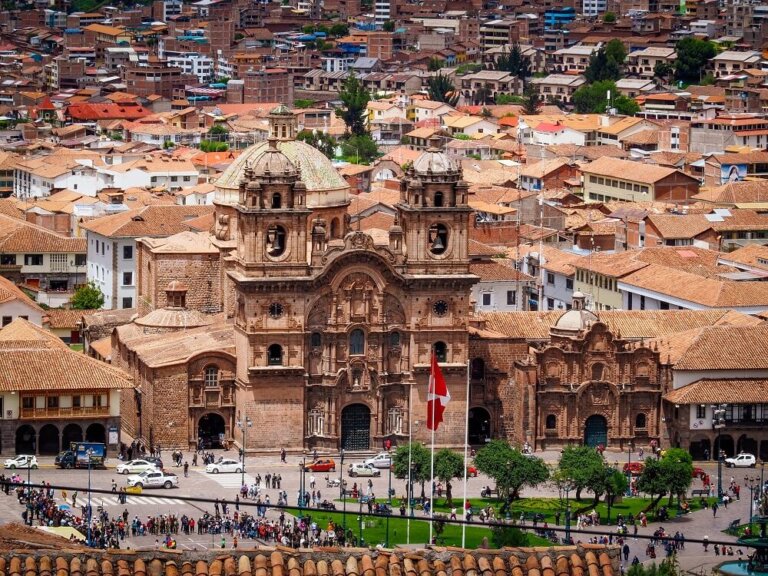
If you haven’t visited other high altitude places in Peru such as Cusco before arriving to Huaraz, we recommend taking it easy on your first day and not booking the Laguna 69 hike straight away. Starting with an easier day trip such as Laguna Wilcacocha (3,725 m / 12,221 ft) or Laguna Paron (4,155 m / 13,631 ft) is probably much better since these trails aren’t as long or physically demanding as the Laguna 69 one. This way you can acclimatise properly and avoid altitude sickness.
It’s also good to avoid drinking too much alcohol before your hike and don’t eat too many heavy foods either. Staying hydrated during the hike is very important to avoid dehydration and headaches. You can drink Coca tea like the locals do at high altitudes in Peru. In addition, you can also buy some altitude sickness tablets before you hike anywhere in Peru.
Of course, if you’ve done some high altitude hikes in Peru such as the Salkantay Trek, the Ausangate Trek to Rainbow Mountain or if you went on a 2 or 3-day Colca Canyon Trek, then you’ll most likely be fine booking the Laguna 69 hike straight away.
What to Wear and Pack for Hiking Laguna 69 in Huaraz
It’s important to talk about what to wear on the Laguna 69 hike because we saw some outfit choices that might pass on a city break in Peru but perhaps not on a 14km high altitude hike in the Andes.
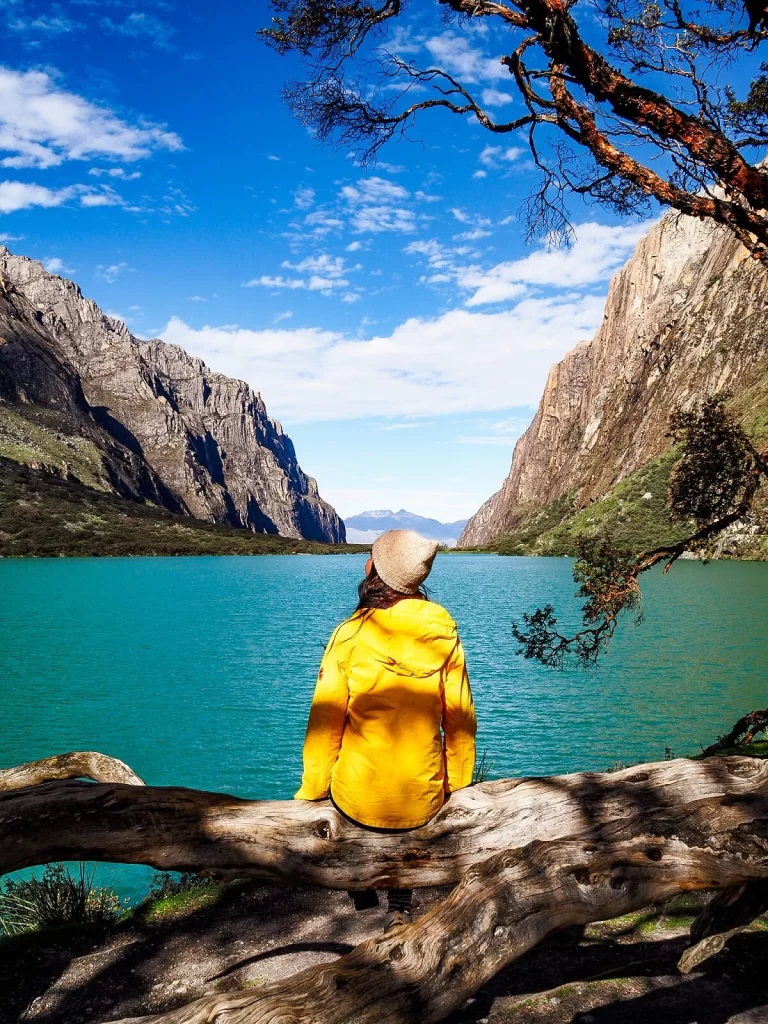
We recommend dressing for colder temperatures. Depending on the time of the year you’re visiting, you’ll most likely need long trousers, a fleece, and even a hat and gloves on this hike. The temperatures will change a lot during the day so definitely wear layers. You’ll likely get warm as you climb up along the switchbacks but it can feel much cooler once you stop at the top.
Make sure to also pack waterproofs like a rain jacket. When we visited in early May we got caught in a heavy downpour on our way down. Don’t forget to pack a waterproof cover for your backpack too.
In terms of footwear, it’s important to wear hiking boots or shoes that have good grip and support. Leave your white trainers at your accommodation if you still want them to be white by the end of the day. Even after a quick downpour the trail became more of a river, so supportive shoes were an absolute must.
We recommend carrying a daypack with all the essentials you might need for a day hike. Pack your lunch to eat at the lake and enough snacks and water to stay hydrated. Don’t forget your camera gear either and perhaps bring a portable charger for your phone.
Make sure to use sun-cream, a hat or cap and sunglasses for protection. Also have enough cash on you to pay for anything extra such as toilets, snacks at the trailhead and tips for the guide / driver.
We suggest having a basic first-aid kit with you with some painkillers, altitude tablets, band-aids and any prescribed medications in.
Facilities Along the Laguna 69 Hike
Toilet. There’s a toilet available at the start of the trailhead for S\.1. Make sure to bring some change if you’d like to use these toilets. There won’t be any toilets once you get on your way though.
Cafes / Restaurants. There’s a small refreshment stall at the start of the trailhead where you can buy some hot drinks like coca tea and a few snacks. We do recommend bringing your own packed lunch that you can eat at Laguna 69.
Final Thoughts on Hiking Laguna 69 in Huaraz, Peru
We can totally appreciate why Laguna 69 has become such a popular day trip from Huaraz. The lake is absolutely stunning and if you enjoy hiking, then this is going to be the best day hike you can go on. We loved that the ratio between travel time and time spent in the national park was pretty equal compared to other day trips we did such as Laguna Paron or Pastoruri Glacier.
For us the hike was just challenging enough, especially after completing so many other hikes in Peru. The only downside of the day tour was the different levels of fitness of our group. This meant that we had a long wait at the end, but luckily we could bond with other like-minded people in the meantime. Although we probably would’ve packed a few more snacks if we knew that our dinner time would be much later than initially planned.
Have you ever visited Huaraz and hiked to Laguna 69? If so, what was your experience like? If not, would you add this hike to your Peru itinerary? Let us know in the comments below.
Now, let your adventure begin,

Our Top Travel Resources
Accommodation: For hotels we always use Booking.com and Hostelworld for hostels. We also book longer stays on Airbnb or Vrbo.
Flights: To find the best flight prices we always check Skyscanner, Google Flights or WayAway. Then we also check the airlines’ websites too for comparison.
Car Rentals: We use Discover Cars when we want to rent a car as it compares local, national and international companies.
Activities: If we book organised tours we always check either GetYourGuide or Viator.
Foreign Currency: Whenever we can we prefer to pay in local currency and for that we always use our Wise card. We can easily withdraw money from the ATM or pay by card at most shops and restaurants.
Travel Insurance: We never go anywhere without travel insurance. You never know what will happen on your trip, so good travel insurance like SafetyWing can protect you in case of injury, illness, theft and cancellations.
eSIM and VPN: To get data abroad we use Airalo which is an app that allows you to download a prepaid eSIM to your phone in over 190 countries. Make sure to have a VPN to avoid hackers accessing your personal data when using public WIFI. We use Surfshark which is the only VPN that offers one account on unlimited devices.
Remember…It all starts with a Pin…


Looks amazing !! I’ll have to add it to my Peru list . Thx for the detailed tips!
My goodness, what beautiful photos! This looks like it would be such a gorgeous hike!
This looks like an incredible experience. So much useful info! It’s good to know that the guide doesn’t actually guide or tell you about the area. I definitely think there are more pros than cons but it’s great to have the info so you can adjust your expectations. Thank you so much!
I would love to do this sometime day. Thank you for highlighting the altitude sickness, this is something that scares me.
Ahhh, Huaraz… What a wonderful place! I am surprised it has become so popular nowadays, I remember I visited 12 years ago and there were barely any tourists there… It definitely is worth spending time in the city, doing Laguna 69 and exploring the beautiful mountainous surroundings.
The photos alone make me want to visit this place! and very well written post.
Thank you so much Shreya. We really loved our time in Huaraz. It’s such a stunning part of Peru.
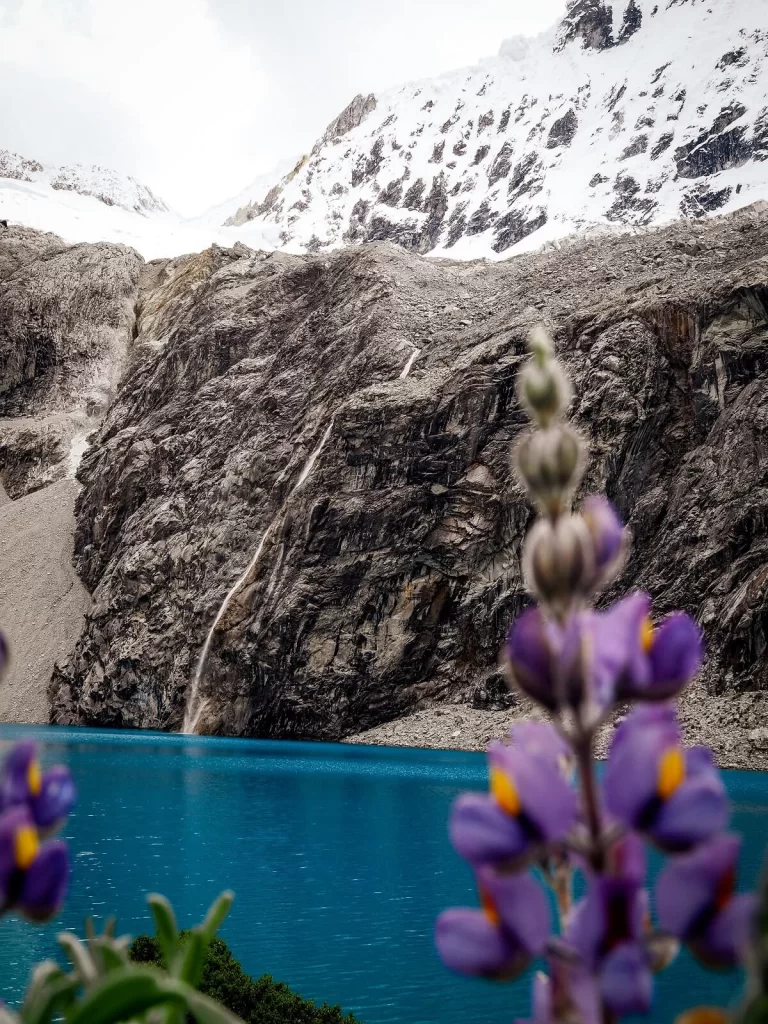
I cannot get over the color of the water and the stunning beautiful of this part of Peru… My sister in law and brother are planning a trip for next summer.. I will definitely share your recs with them!
Yes, the colour was so beautiful we couldn’t believe our own eyes! We hope our guides will help your bother and his wife to plan their Peru trip. I’m sure they will enjoy their visit too.
Hello and thank you for sharing your trip! Appreciate the details. Did you see anyone parking a rental car anywhere near the start of this hike? Was going to have a rental and not seeing much about parking online. Know if that was an option or focus on bus/tour?
Thank you!
Hi Keith, thank you for your comment. We can’t recall seeing any rental cars, and after a search online we’re not having much luck finding information about it either. However, since the tour buses park nearby too and you can pay for a private taxi ride there with the driver waiting for you, we assume you could park your own rental car there as well. Just make sure your rental can handle the bumpy roads leading to the trailhead. It’s always worth asking around in Huaraz before your day trip.