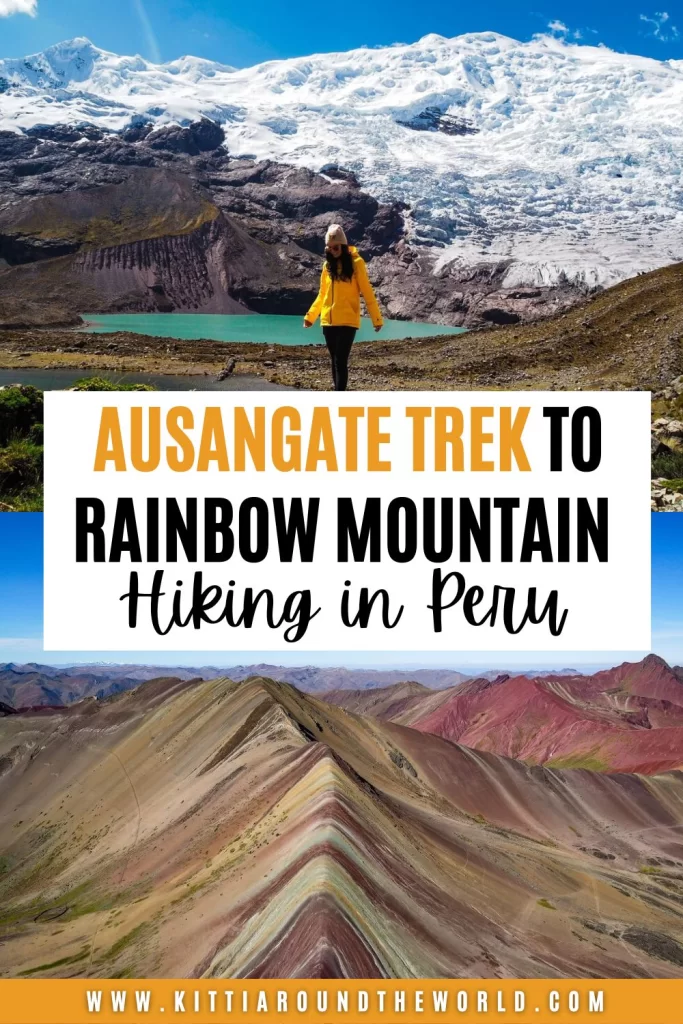
2-Day Ausangate Trek to Rainbow Mountain, Peru – A Complete Hiking Guide
In this blog post we’ll tell you everything you need to know about hiking the 2-day Ausangate Trek to Rainbow Mountain.
This particular trek brings you up close to Ausangate Mountain, the highest peak in the Cusco region. It also takes you to the popular Rainbow Mountain that’s mostly visited as part of a day trip from Cusco.
If you enjoy trekking and would love to escape the crowds you get on the Inca Trail or Salkantay Trek, then this hike is for you! In this guide we’ll answer every question you may have about altitude, level of difficulty, accommodation, food options and what to wear and pack for an unforgettable adventure in the Andes.
If you’d like to see our adventures, then check out the Ausangate to Rainbow Mountain hiking video on our YouTube Channel. For more Peru videos check out our Peru Playlist.
Disclosure: This post may contain affiliate links, which means we may receive a small commission if you click a link and purchase something. Clicking these links won’t cost you anything, but it will help us to keep this site up and running! Learn more about our affiliate policy.
About Ausangate Mountain
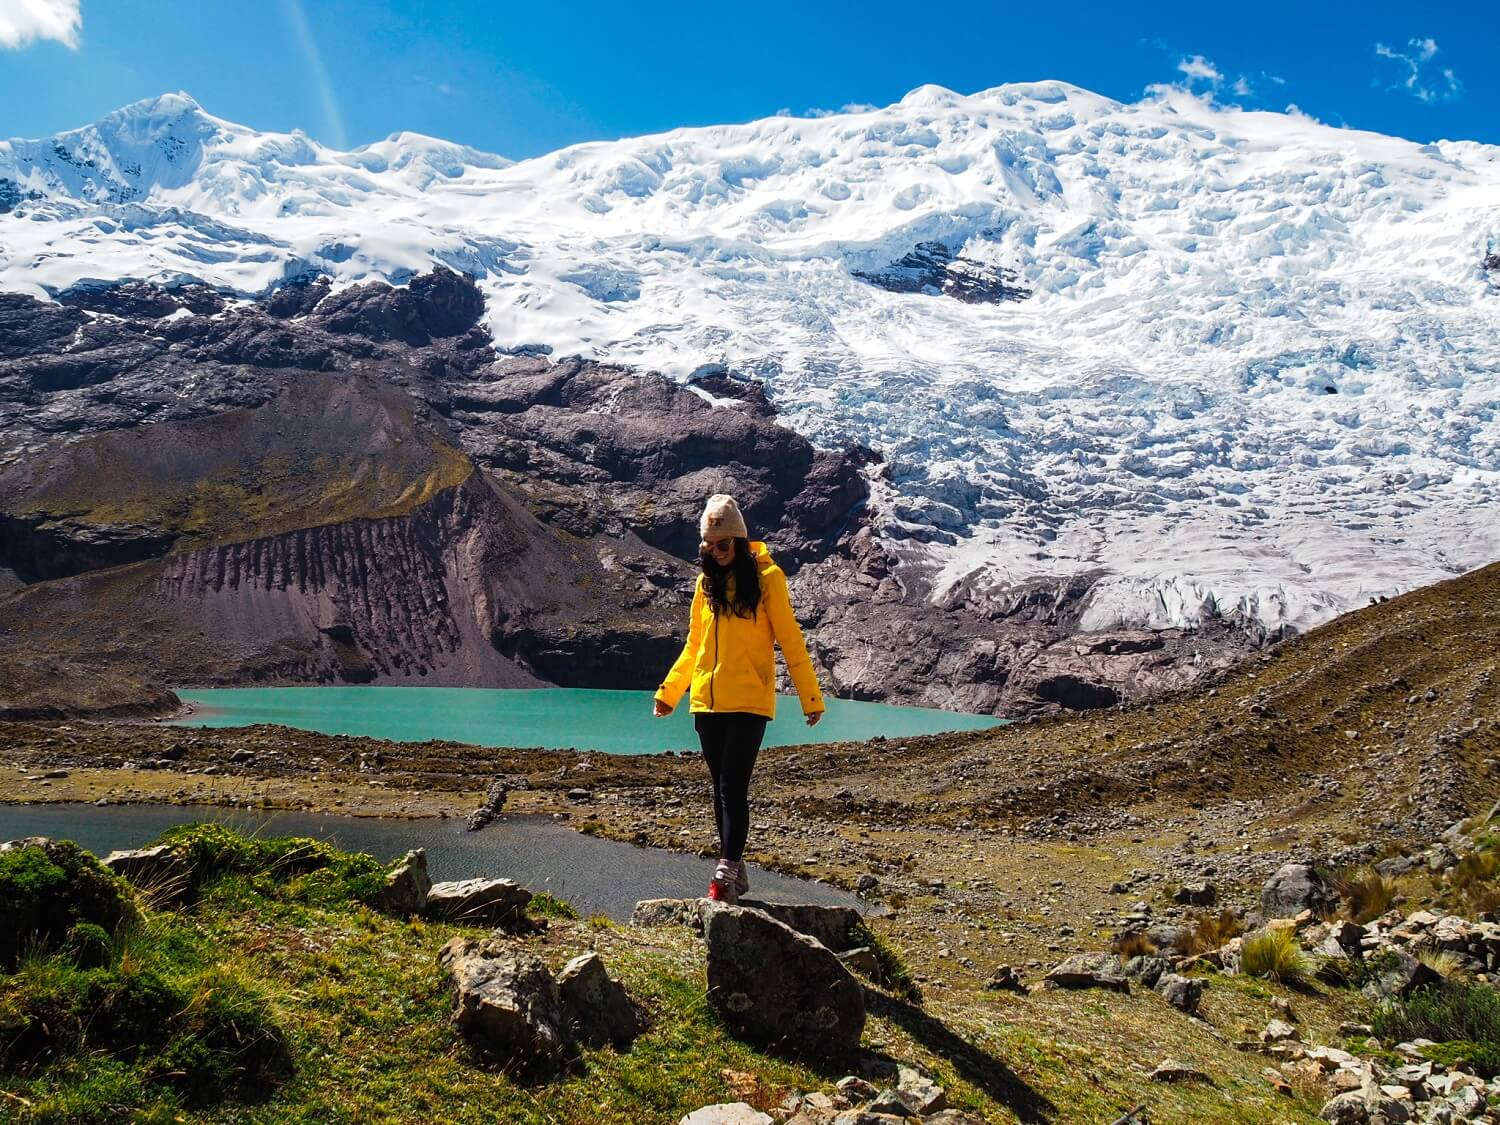
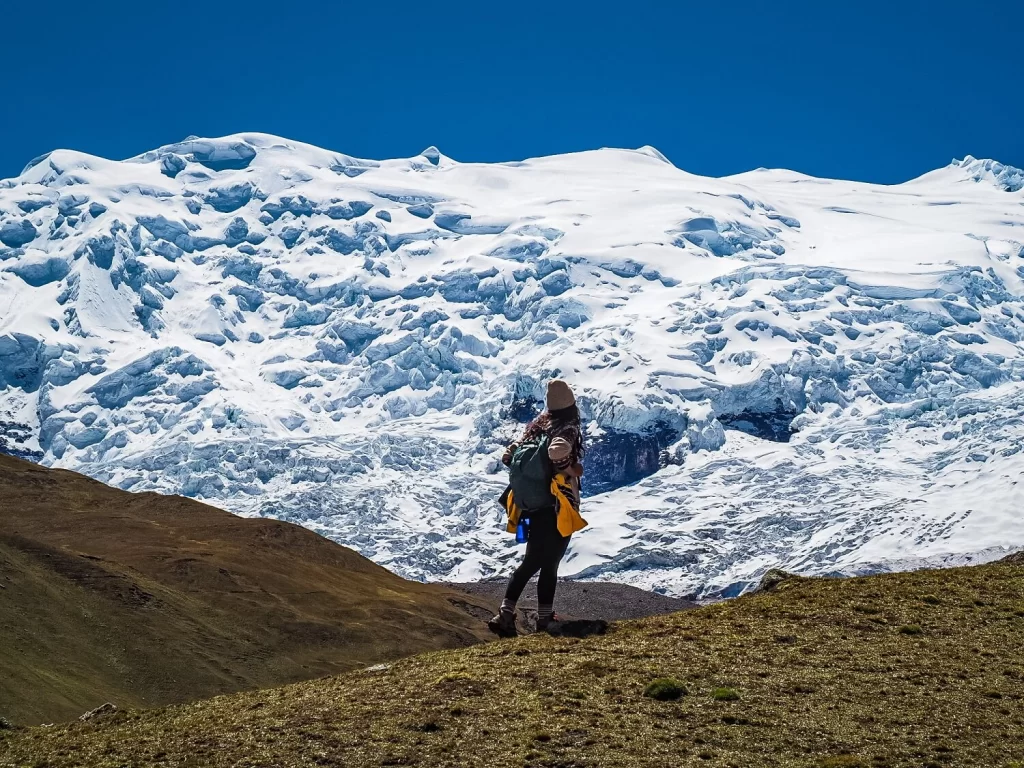
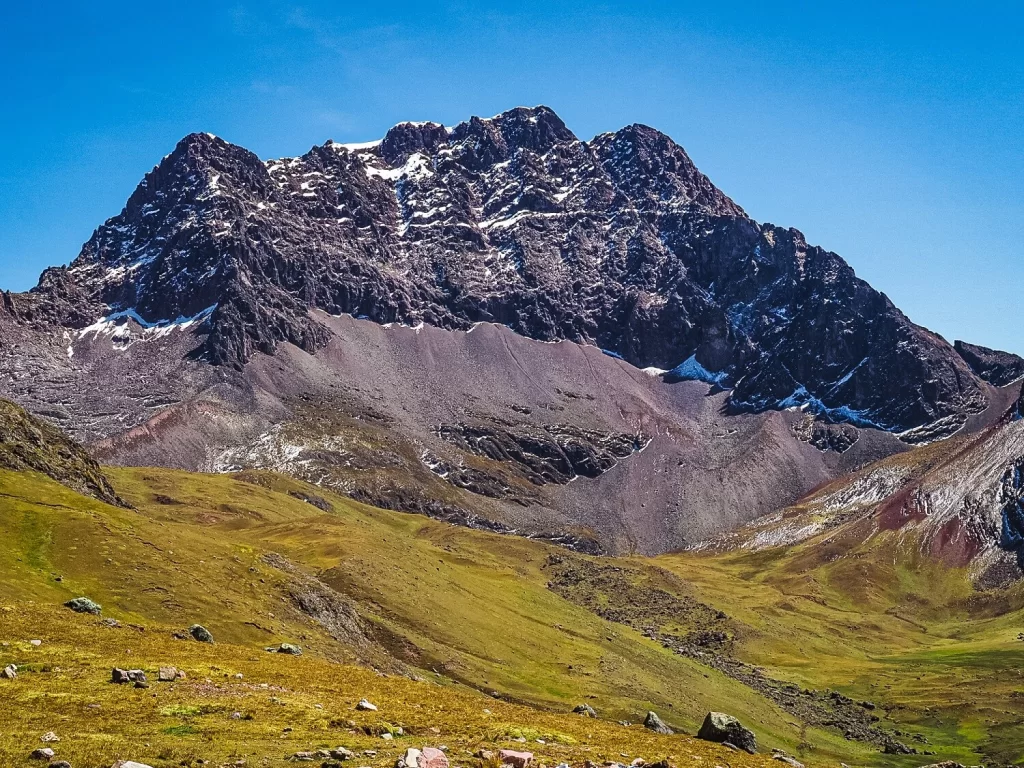
The Ausangate trek is named after the Ausangate Mountain located around 100 km (62 mi) southeast of the city of Cusco. It is part of the Vilcanota mountain range and at 6,384 m (20,944 ft) it’s the highest mountain in the Cusco region and the fifth highest mountain in Peru. Apparently, you can even see it from the Sacsayhuaman Inca site in Cusco.
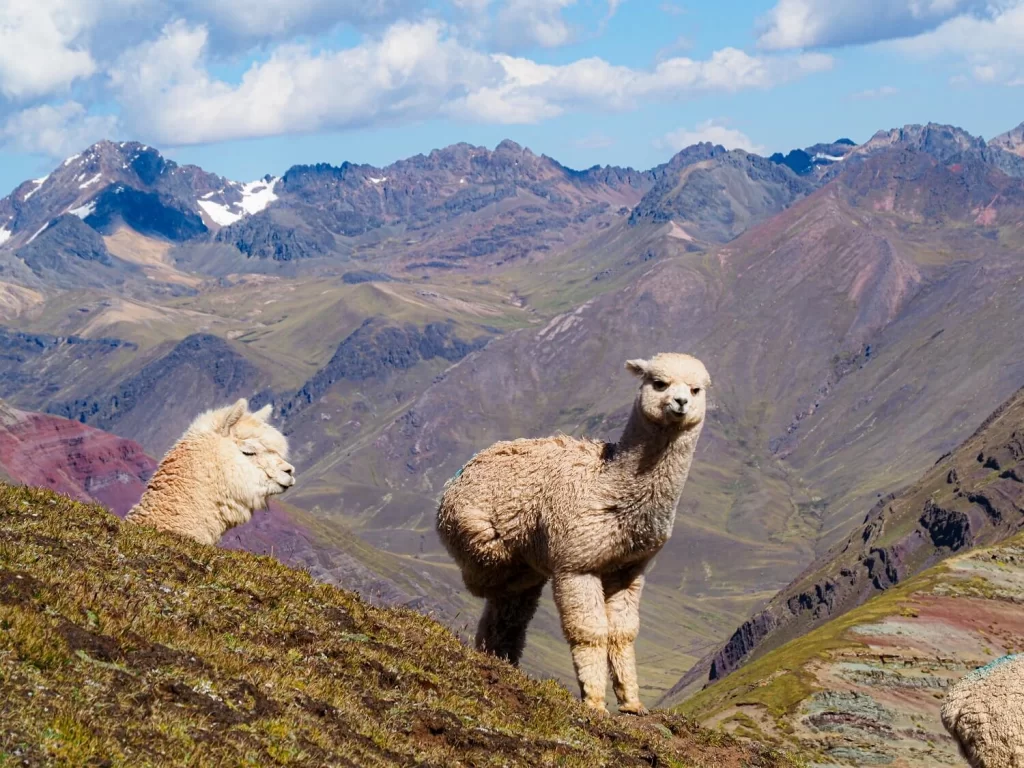
Ausangate is also one of the sacred mountains of the Andes, also known as ‘apus’. The area around Ausangate consists of vast plains, glaciers and turquoise lakes like Sibinacocha and is inhabited by llama and alpaca herding communities.
According to Inca legends, Ausangate and Salkantay were brothers living in Cusco. They ventured out to save Cusco after a dry season. Apparently Salkantay went north where he found the Amazon Jungle whereas Ausangate went south and found the typical food of the highlands.
Every year, a week before the Corpus Christi feast, a festival takes place near Ausangate called Qoyllur Rit’i or ‘Snow Star’. During this festival thousands of people make a pilgrimage to the temple of Sinakara. Since 2004 this pilgrimage has been named an Intangible Cultural Heritage of Humanity by UNESCO.
Summitting Ausangate normally takes 5 days, which makes it one of the most challenging trekking routes in the Peruvian Andes. The first expedition to scale the mountain was in 1950. A few years after the first attempt, a German expedition managed to scale the southern slope. The northern face had never been climbed until May 2023, when Yudai Suzuki and Kei Narita from Japan made the very first ascent. They named the route ‘Japones Directo’.
About Rainbow Mountain
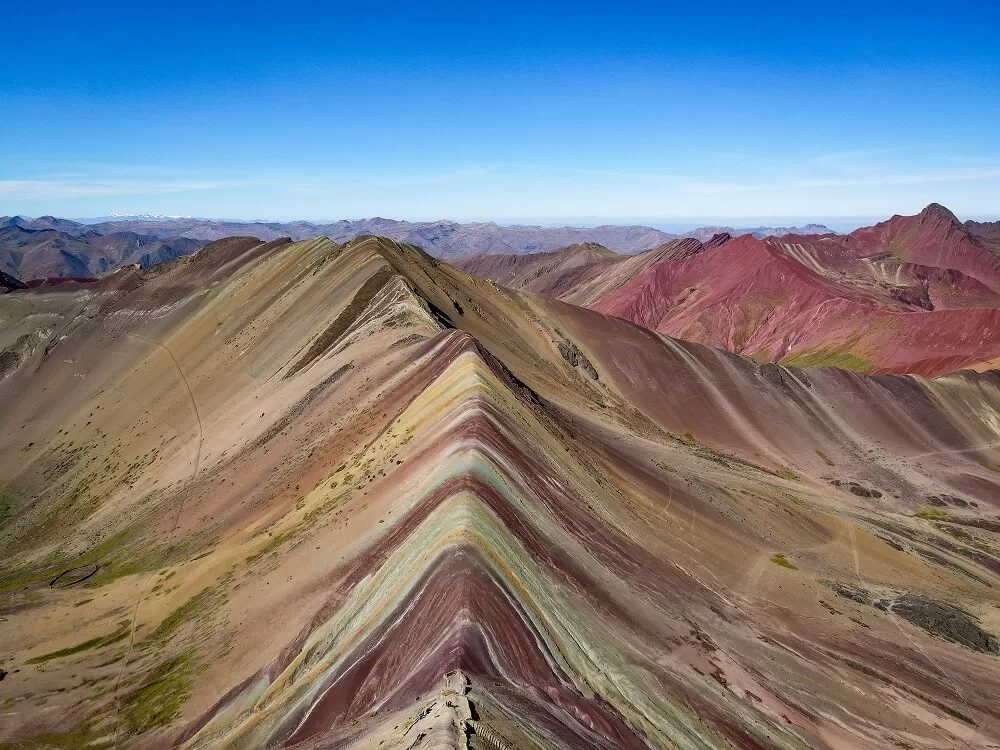
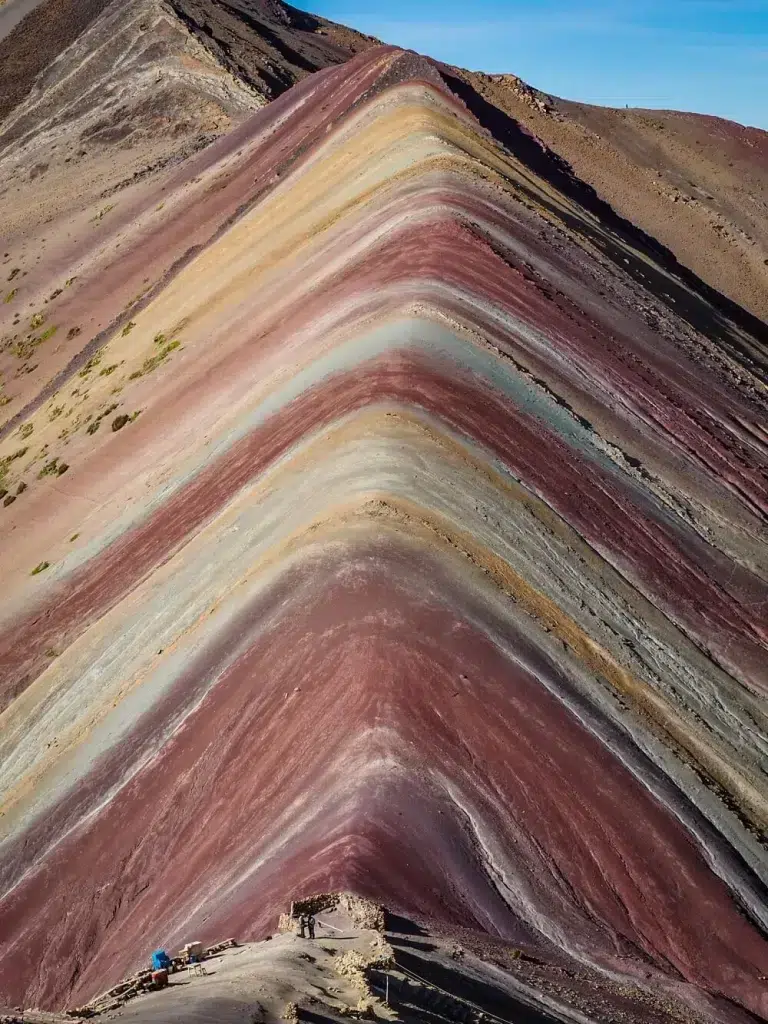
Possibly the second most popular day trip from Cusco, after Machu Picchu, is the Rainbow Mountain. The mountain is also known as Vinicunca, Winikunka, Montaña de Siete Colores, and Montaña de Colores.
Vinicunca Rainbow Mountain wasn’t even visible until about 2015. This is because it was covered in a thick layer of snow and ice. Then, due to climate change, the snow melted and revealed the colourful mountain beneath.
The subduction of the Nazca and South American plates which created the Andes mountains also produced volcanism and varied mineralogy. Over time the sedimentary deposits and environmental conditions formed a series of colourful layers such as red, orange, turquoise, blue and green.
Booking the Ausangate to Rainbow Mountain Trek
Below are a few important facts you should read before booking the Ausangate Trek as not all of them include Rainbow Mountain in their itineraries.
Different Ausangate Trek Packages
There isn’t just one version of the trek you can book. The 2-day trek is the shortest one, but you can opt for an even longer version if you wish.
The Classic Ausangate Trek (5 Days)
During the Classic 5 days 4 nights Ausangate Trek, you’ll be trekking for over 55 km (34 mi). The trek will take you over at least 4 different mountain passes, past colourful lakes, incredible views and small Andean communities. The highest point along this trek is 5,200 m (17,060 ft) and you’ll be hiking close to 5,000 m (16,400 ft) most days, so this trek isn’t for beginners. It also doesn’t go to Rainbow Mountain.
Ausangate Trek to Rainbow Mountain (4 Days)
This 4-day trek will take you to Rainbow Mountain. You’ll have to hike for about 38 km (24 mi) and will reach Rainbow Mountain on your last day. The highest elevation will be around 5,100 m (16,732 ft) at Rainbow Mountain. Depending on the tour you book, you can also take a short hike in the Red Valley.
Ausangate Trek to Rainbow Mountain (3 Days)
This is a slightly shorter version of the 4-day trek. You’ll be hiking around 34 km (21 mi) which isn’t much shorter than you’d be hiking on the 4-day version itself. You’ll get to Rainbow Mountain on your last day which is also going to be the highest elevation you’ll reach along the entire trek.
Ausangate Trek to Rainbow Mountain (2 Days)
This is the shortest version of the Ausangate Trek that would also take you to Rainbow Mountain. You’ll only be walking for around 18 km (11 mi) over the course of the two days. We’ll describe this exact trek in more detail below.
Ausangate and Sibinacocha Trek (7 Days)
Trekking enthusiasts can also embark on a 7 day long adventure around the Ausangate Mountain and Sibinacocha Lake. The max altitude along this trek will be around 5,400 m (17,716 ft) so it’s not for the faint hearted. Note that this trek doesn’t include Rainbow Mountain.
Do You Need a Guided Trek or Can You Hike the Ausangate Trek Independently?
You can hike the Ausangate Trek without a guide. However, we only recommend doing this if you’re an experienced hiker and have completed many treks independently before.
Depending on which route you’re completing this trek is generally pretty remote. There are some lodges available, so it’s worth checking if you can book these for the night. We definitely saw one on our 2-day trek not far from where we camped.
If you’re planning on doing a longer trek, then you should have your own camping gear and food with you. Carrying that load at such high altitudes isn’t easy, so you have to be sure that you’re fit and capable enough.
Lastly, if you’re hiking without a guide, you’ll likely have to pay entry fees to the park or even a small fee to camp or walk along the trails. It’s good to know a few words in Spanish or Quechua and have offline Google Translate on your phone because you won’t have much signal out there.
The lack of signal is also why it’s important to let others know about your itinerary and if you can, don’t hike alone.
Best Time to Hike the Ausangate Trek
The best time to hike around Ausangate is between the months of April to October. Peru has two main seasons, dry and rainy. The rainy season is normally from November to April and the dry season is from May to October.
As you would expect, during the rainy season the trail can be pretty muddy and just not that enjoyable to camp and hike on. Mudslides are also common, which could make the trail dangerous or impassable in places. For this reason, we recommend avoiding the wet season especially from November to mid-March.
Between April and October you’ll have a higher chance of a sunny and enjoyable trek. However, the dry season has its challenges too.
The nights can become very cold so you’ll need to prepare with warm layers. It’s hard enough to sleep at such high altitude without being freezing all night. This also means that the ground can very well be frozen in the morning or even covered with snow.
Generally speaking, you’ll be hiking in high altitudes, and close to the mountain, therefore the weather can still be unpredictable.
How Much Does the Ausangate Trek Cost?
Depending on the company you’re doing it with, the average cost of the 2-day Ausangate Trek is around $200-$250 USD per person.
If you opt for a longer trek, the price will automatically increase. The above price range is also more likely to include one night camping. If you go with a company that offers a lodge stay, then expect the price to be higher.
Normally the price won’t include sleeping bags, walking poles or tips for your guide, horseman and cook. Make sure to calculate this extra cost into the final price when booking.
We suggest reading a bit more about the company and how they treat their staff. If a tour is too cheap they probably don’t pay their staff fairly, and you might want to opt for a more expensive one or tip the staff well. They deserve much better compensation than what they get for their hard work.
Do you Need Special Travel Insurance to Hike the Ausangate Trek to Rainbow Mountain
We cannot emphasize enough how important it is to have travel insurance before any trip you make abroad. Now, most travel insurance won’t automatically include cover for all the activities you’re planning on doing during your travels.
For example, if you’re visiting Peru, and planning on hiking in high altitudes, then you should have cover for high altitude trekking in your insurance policy. Make sure to shop around to find the most suitable one. You just never know what could happen and it’s better to be safe than sorry.
Best Ausangate Trek Tour Companies
There are quite a few companies you can choose from. We read good reviews about the following companies:
- Salkantay Trekking,
- Peru Hike,
- Alpaca Expeditions,
- Ausangate Trekking, and
- Conde Travel.
These are just a few of many. For reference, we went with Peru Hike and had a great experience. As always, we recommend reading about what’s included in the tour, any additional costs and a bit more about the company’s background before booking.
Accommodation Options Along the Ausangate Trek
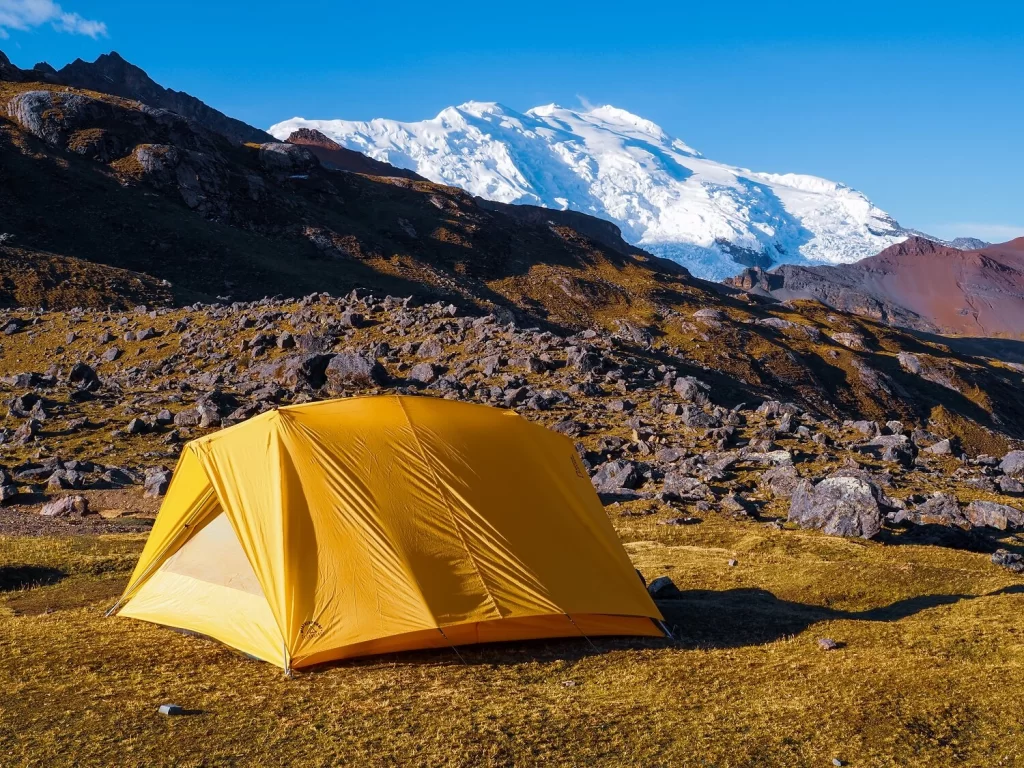
Most versions of the Ausangate Trek will include camping. Tents are normally included in the tour cost, but you’ll have to rent additional items such as sleeping bags.
Top Tip – If you know that you’ll be completing a few treks in Peru, then you can pack your own sleeping bag to save on renting one each time you sign up for a new trek.
Some treks might include a lodge stay, such as at Anantapata Lodge. If you don’t want to camp, then make sure to find a company that offers a lodge or cabin stay. Just note that these will generally be more expensive.
Food and Water Options Along the Ausangate Trek
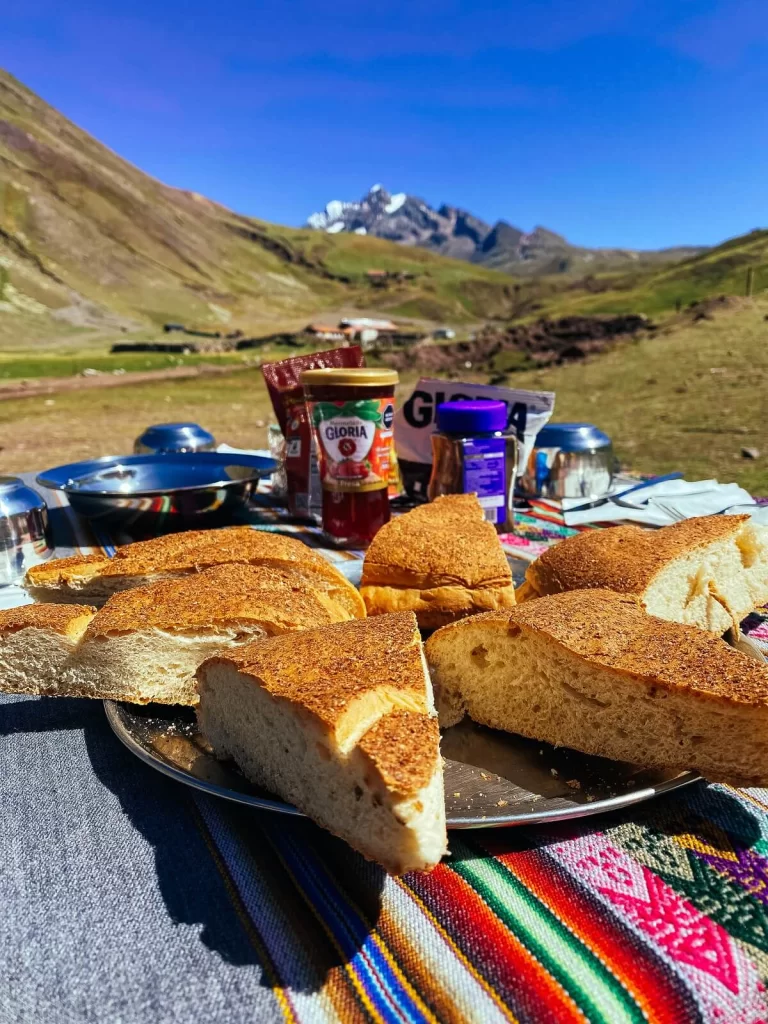
Depending on the company you book with, food is normally included in the price. You’ll be provided with breakfast, lunch and dinner on your hike. Some companies won’t include breakfast on the first day of your hike or dinner on your last day.
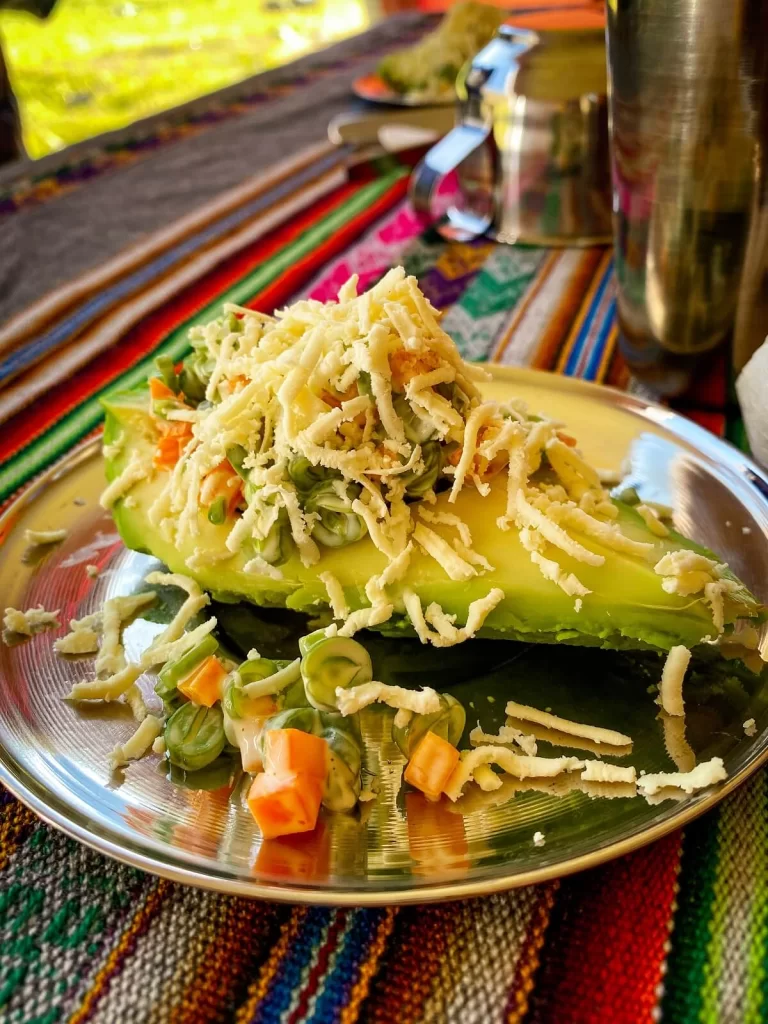
Normally the cooks will cater for a variety of diets, so you won’t have any issues if your vegetarian or vegan. We don’t have any personal experience with allergies, so it’s worth reaching out to companies to see how they can accommodate you.
The cooks are basically magicians, and can somehow create the most flavourful dishes out in the middle of nowhere.
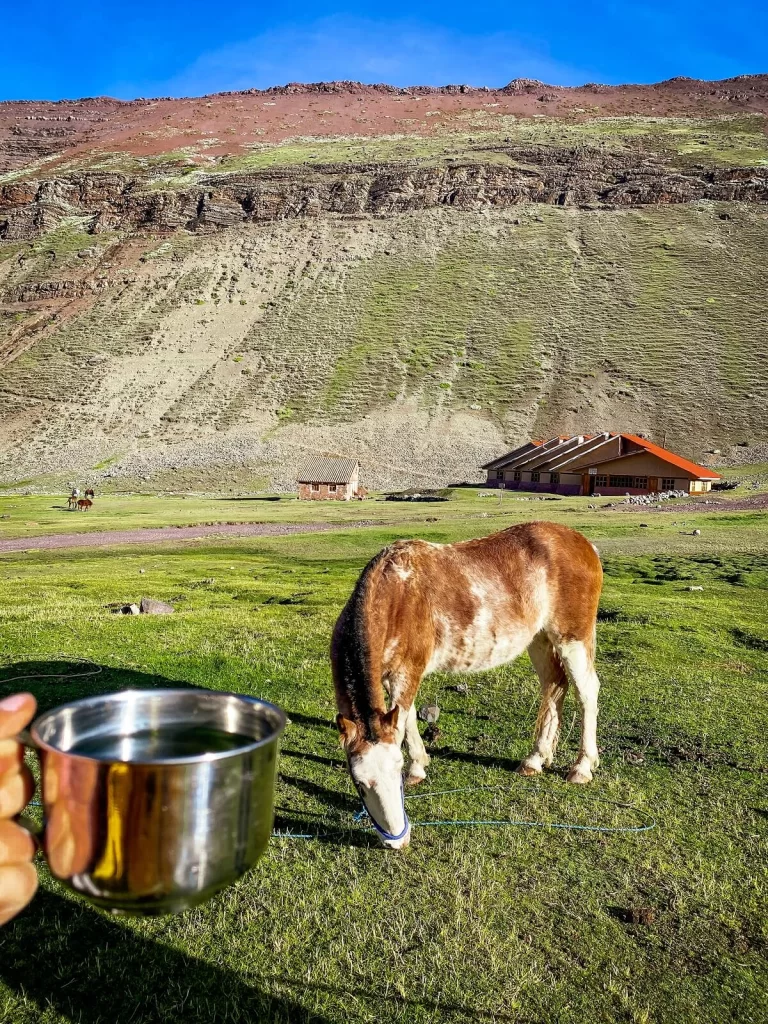
In terms of drinking water, cooks will normally boil the amount of water each hiker from the group will need between meals. We didn’t have any issues drinking this water, but we had a water purifier bottle for extra security.
What to Wear and Pack for the 2-Day Ausangate Trek
Let’s talk about what to pack for the Ausangate Trek. Ideally, you’ll want to carry a daypack that fits everything you’ll need for one night.
Clothing Items
In terms of a hiking outfit, we recommend packing for cold temperatures. You’ll definitely need long trousers, fleece, hat and gloves on this hike. The temperatures will change a lot during the day so definitely wear layers. Make sure to also pack waterproofs like a rain jacket.
In terms of footwear, it’s important to wear hiking boots or shoes that have good grip and support. You can pack some flip-flops or slides that you can change into after your hike when you’re around the campsite.
Obviously, make sure to pack everything you need for a night such as pyjamas, and a few basic toiletries.
Electronics
In terms of electronics, don’t forget to pack your phone and camera gear. If you’re camping you won’t be able to charge your devices, so we recommend taking a portable charger.
Bring a torch or headlamp! They will be essential when moving around the campsite after dark and in the morning when you’ll start the hike at the crack of dawn.
Accessories and Other Items
In terms of accessories for the hike, we recommend taking a reusable water bottle, sun-cream, a hat or cap and sunglasses for protection. Lastly, but most importantly, have enough cash on you to pay for anything extra such as tips for the guides.
We suggest having a basic first-aid kit with you containing some painkillers, altitude tablets, band-aids and any prescribed medications.
Make sure to have your ID card or passport with you in a waterproof case.
All in all, try to pack as lightly as you can because, unlike with the Inca Trail or Salkantay Trek, in most cases the horseman will only carry your camping gear and food. So, you’ll have to carry all personal belongings on your own.
Can You Visit Rainbow Mountain Without Trekking?
Yes, you can. If trekking isn’t your ideal way to reach Rainbow Mountain, then you can just opt for an organised day tour leaving from Cusco. Rainbow Mountain is probably the second most popular day trip from Cusco after Machu Picchu, so there are plenty of companies you can choose from to take you there.
We put together a detailed guide on everything you need to know about your visit to Rainbow Mountain. Make sure to read it to arrive prepared.
2-Day Ausangate Trek to Rainbow Mountain Itinerary
Day 1: Quesiuno – Pucacocha Pass – Anantapata or Surina Qocha Camp
You’ll have a very early alarm and a 4AM pick up from your hotel or the closest main square in Cusco. Depending on the group size, a minivan or a small car will drive you to Quesiuno about 3 hours away from Cusco.
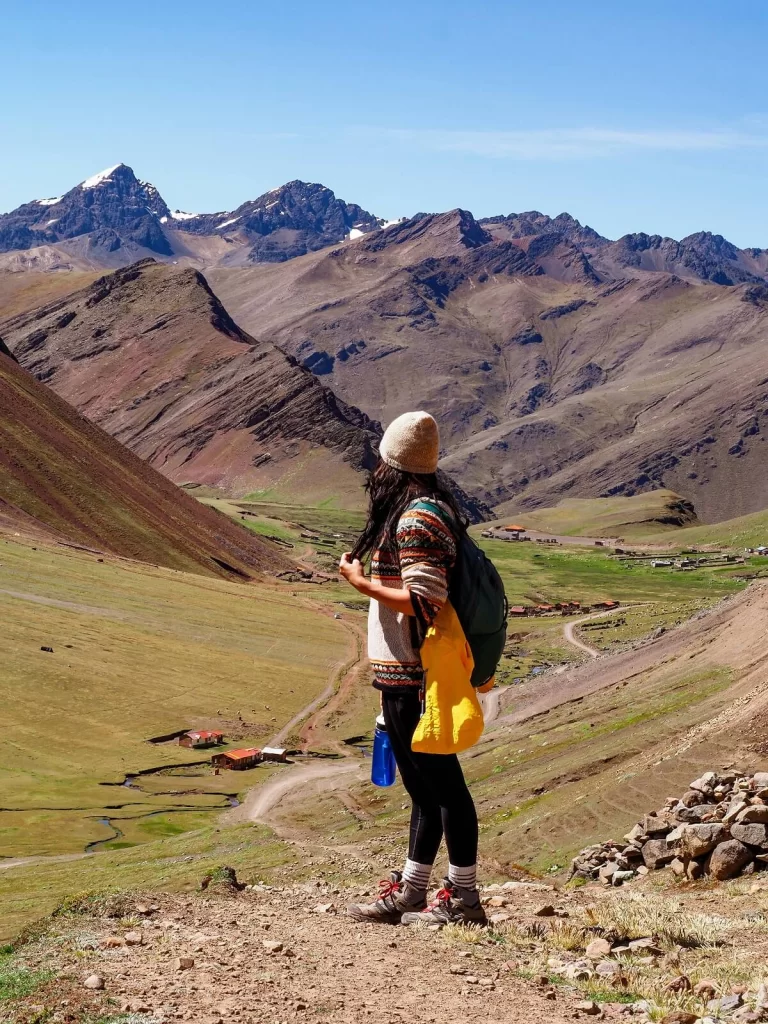
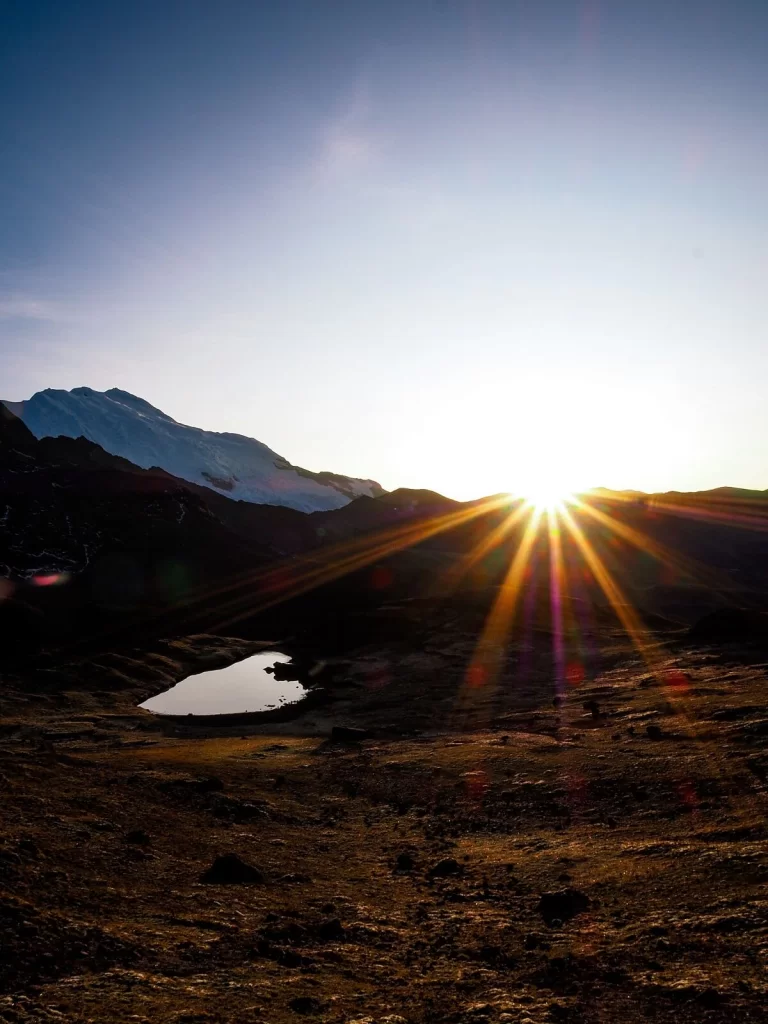
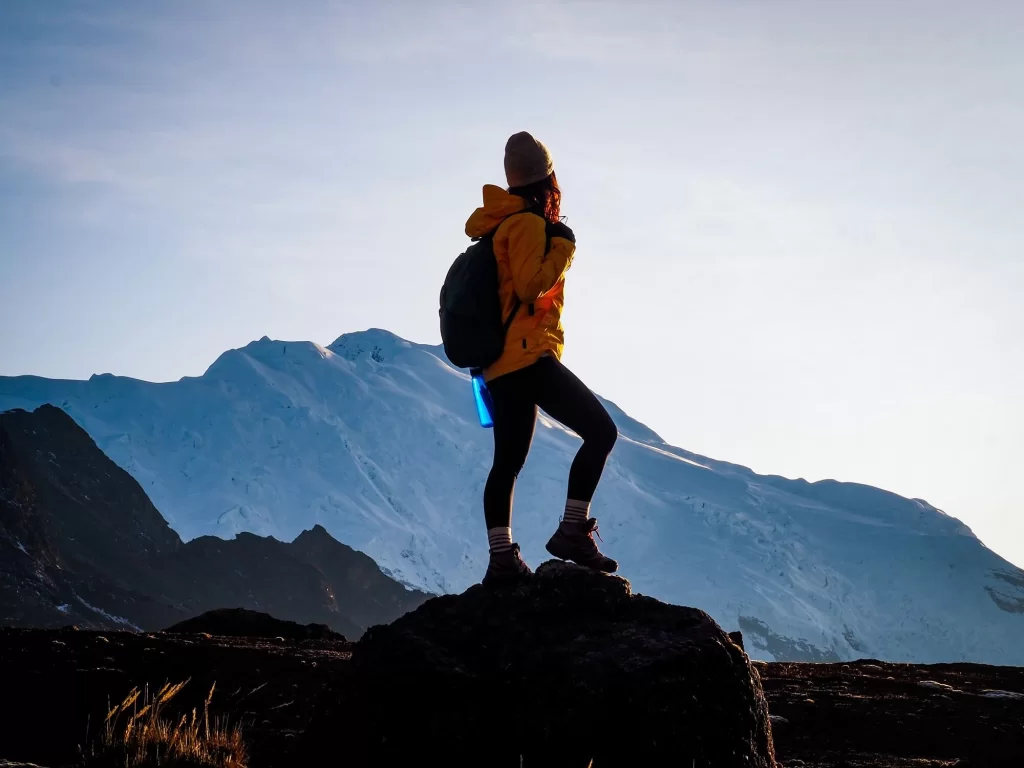
Here you’ll have a quick breakfast with some beautiful views of Ausangate in the distance. Then you’ll start your trek up to the first pass. This first section is pretty gradual, perfect to warm up and get slowly acclimatised to the high altitude.
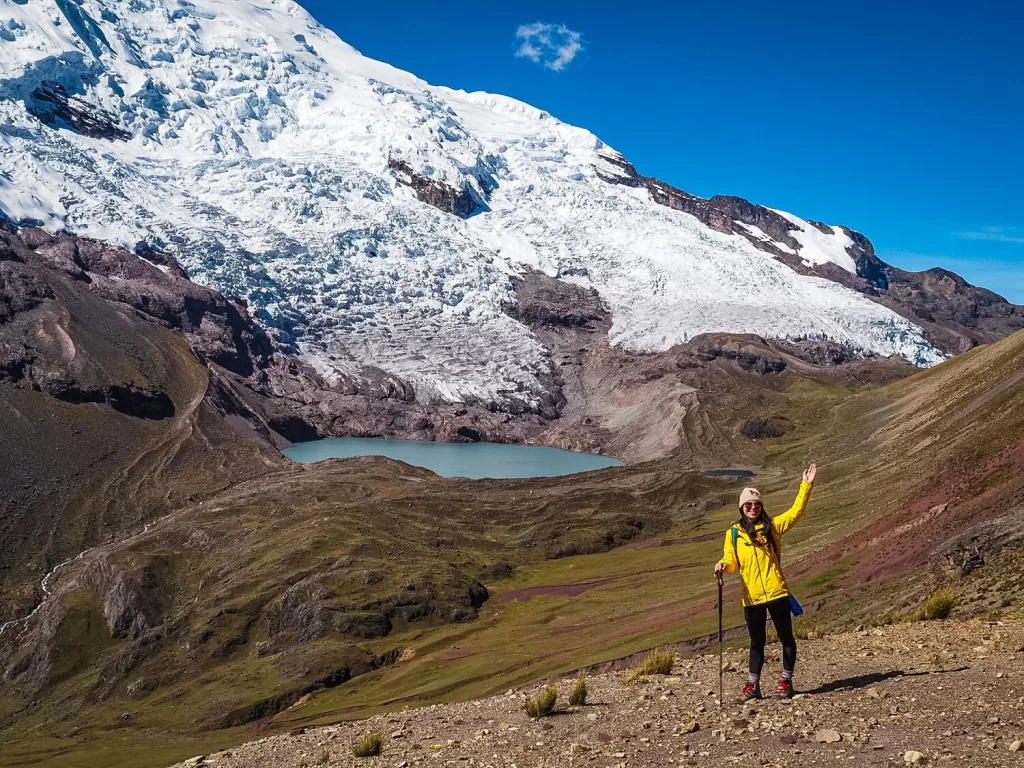
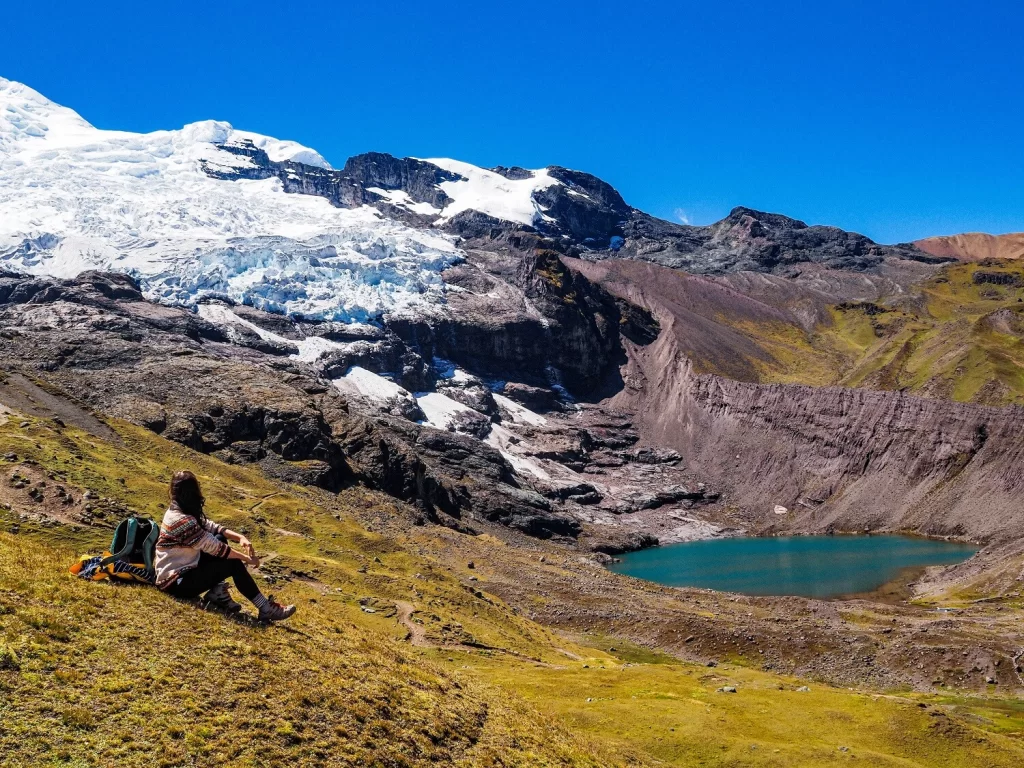
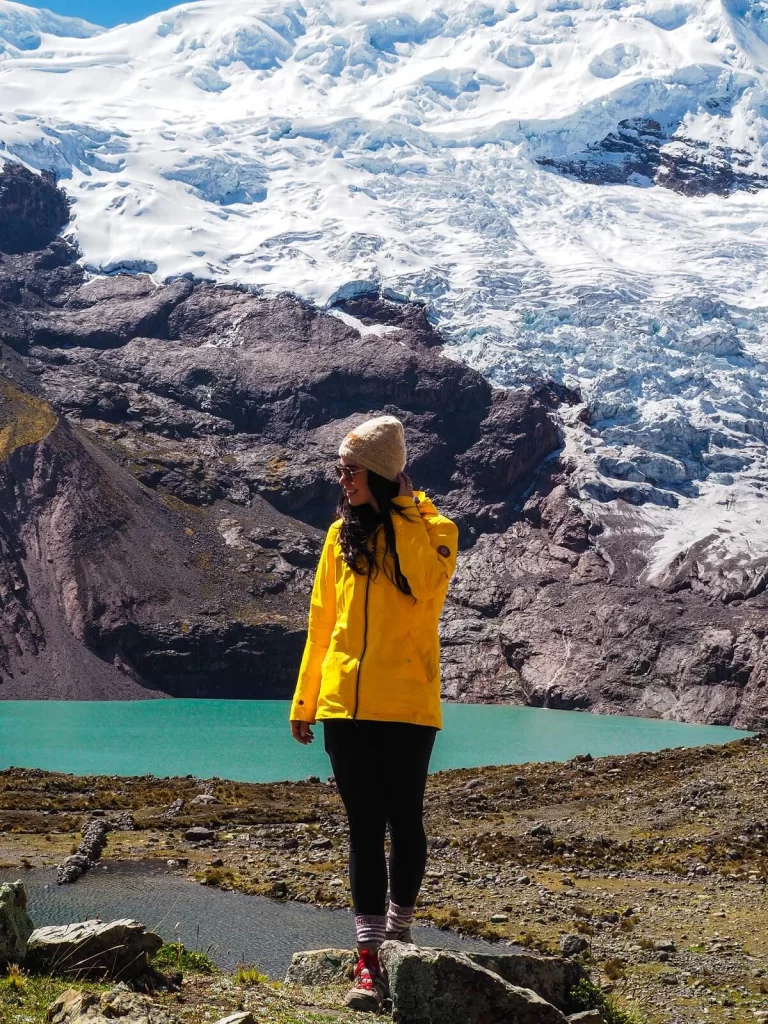
After a while, the trail will get steeper and steeper before passing the first lake called Laguna Ausangatecocha. You’ll soon reach the top of the first pass along the trek called Abra Apuchata (~4,900 m / 16,077 ft). A short distance from this pass, you’ll reach the second one, called Pucacocha Pass, from where you’ll get some jaw-dropping views of Ausangate Mountain and the lagoons in front of it.
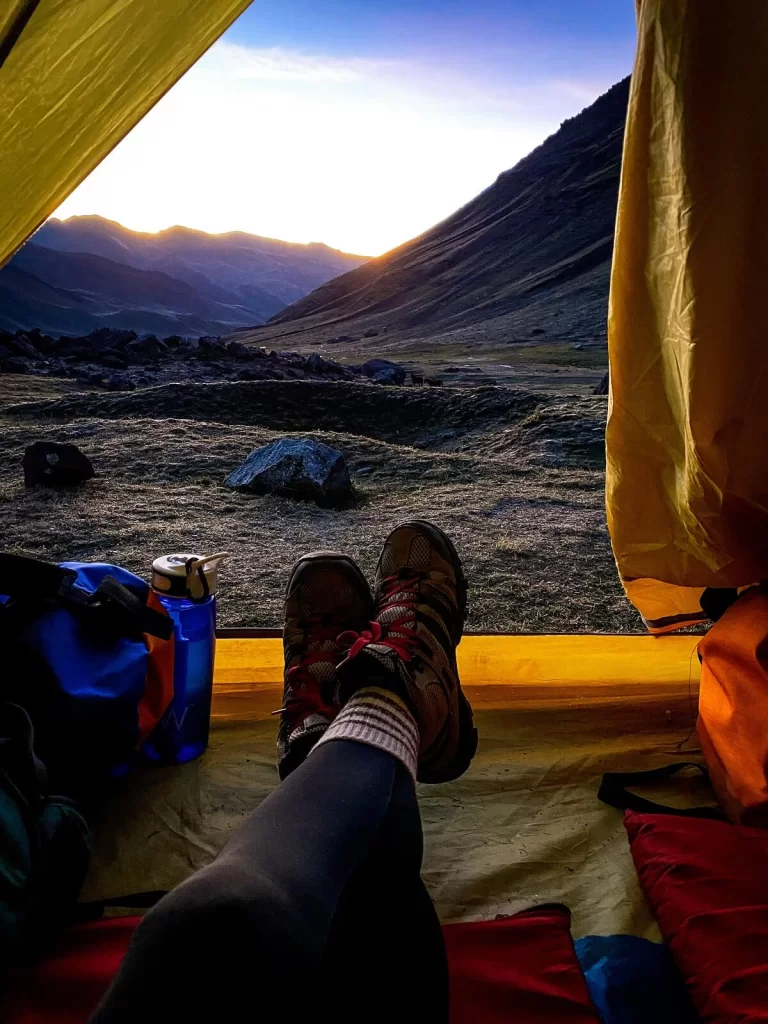
After admiring the incredible views, you’ll slowly make your way to Anantapata. Along the way you’ll likely walk past some curious or skittish llamas and alpacas. Make sure to also say ‘hi’ to the shepherds too. At Anantapata you’ll normally have lunch before carrying on for another 3 hours to your campsite at Surina Qocha. We actually decided to camp at Anantapata and set off earlier to Rainbow Mountain the next morning. It was an amazing camping spot, and we recommend spending the night here if you can.
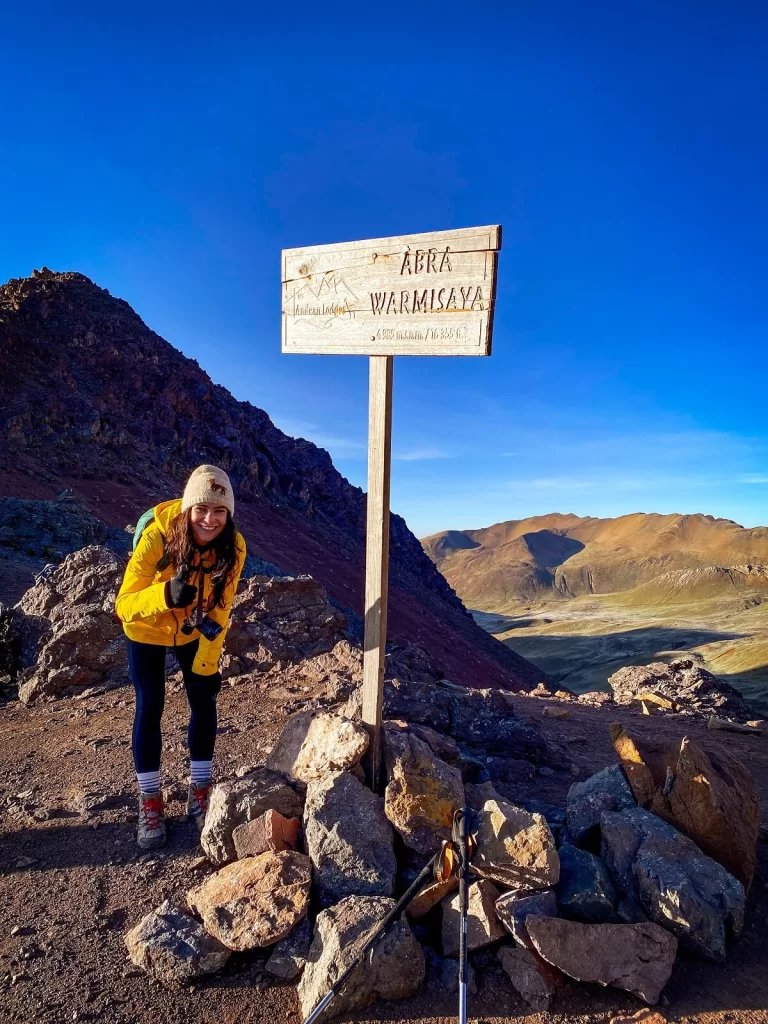
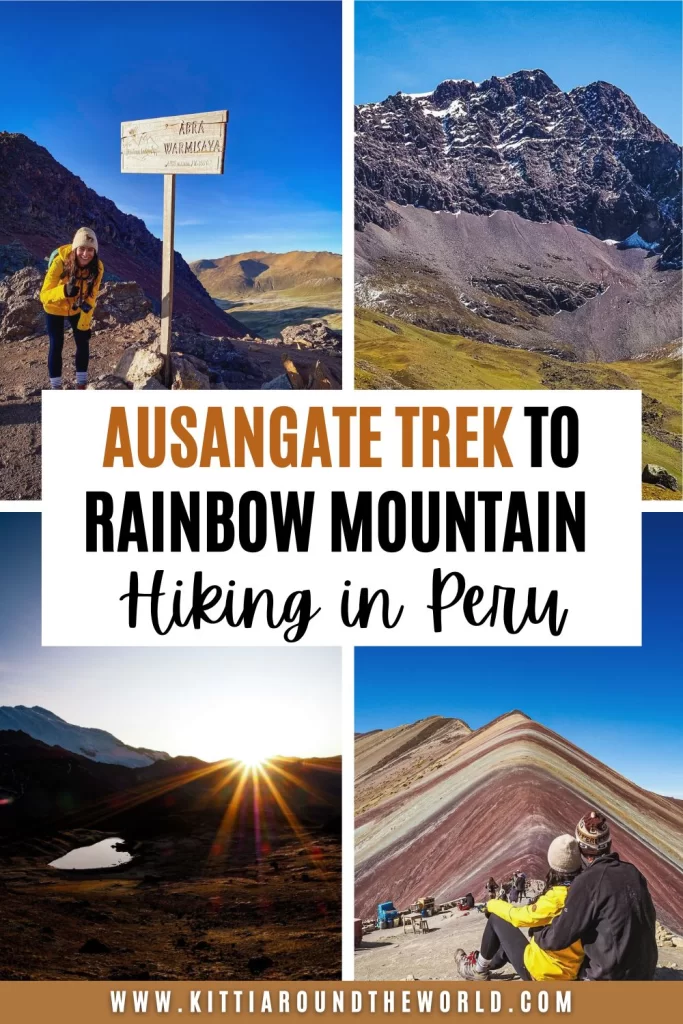
Day 2: Anantapata – Warmisaya Pass – Surina Qocha – Rainbow Mountain
If you end up spending the night at Anantapata, then you’ll have an early wake-up call (4AM) the next morning. This is necessary if you’d like to beat the first tour groups arriving to Vinicunca Rainbow Mountain.
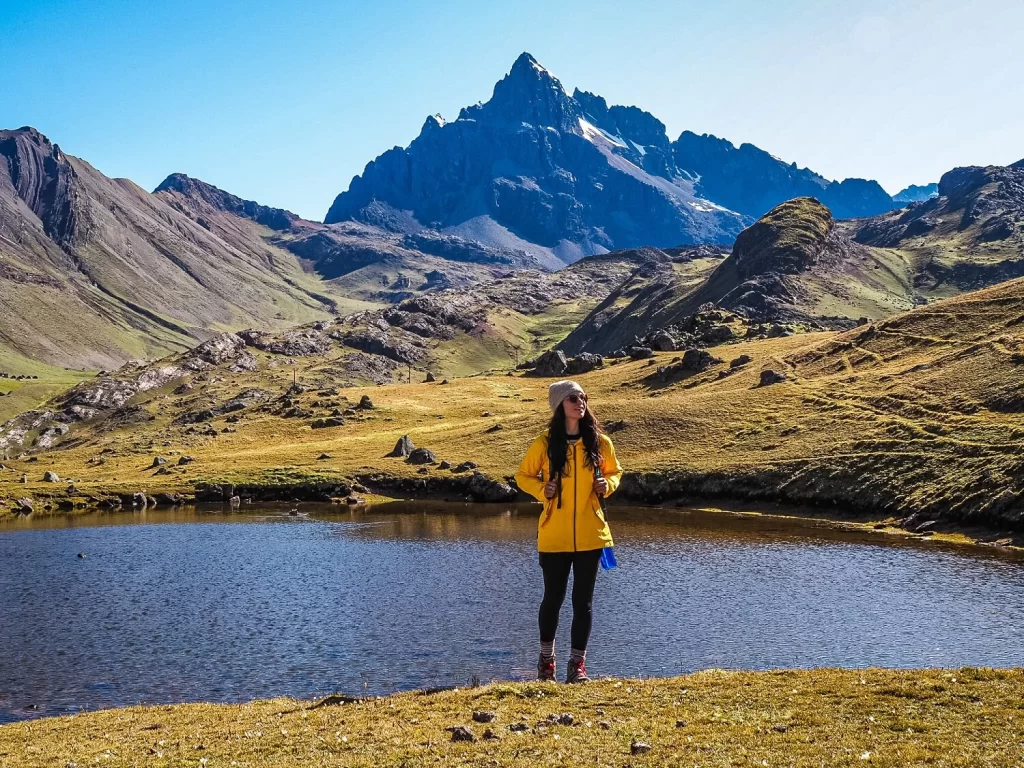
After a quick breakfast, you’ll make your way up to Warmisaya Pass (Minasniyuc Pass) located at 4,955 m (16,257 ft). From the top of the pass you’ll be able to get your first glimpse of Rainbow Mountain in the distance.
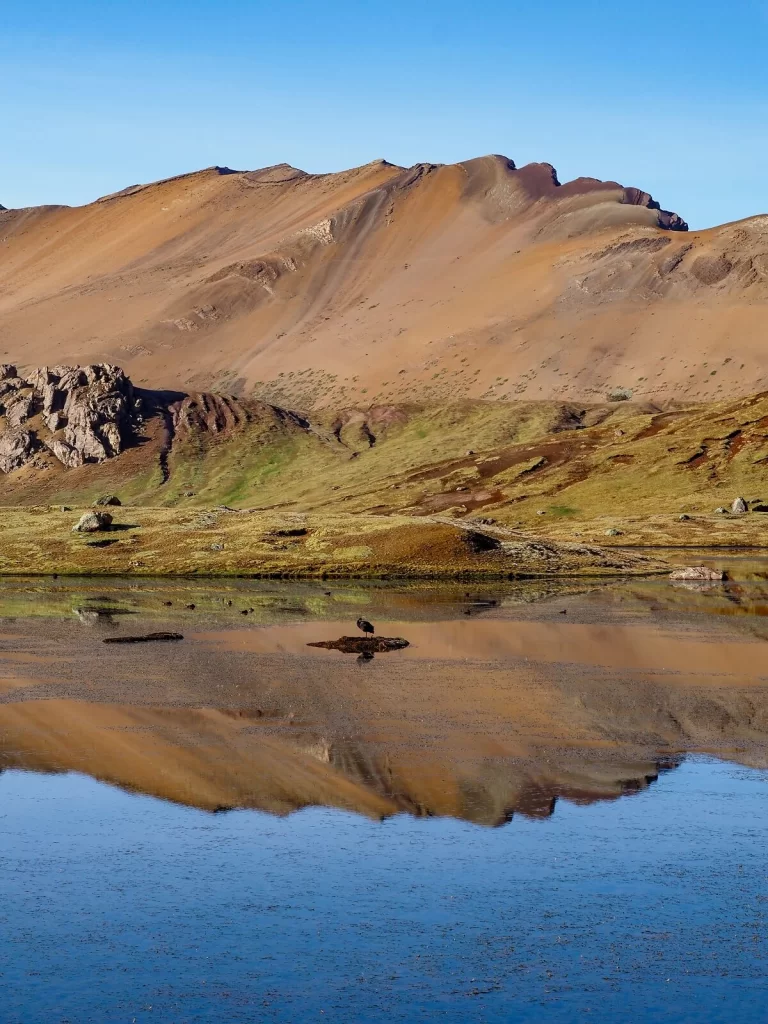
You’ll make your way down the side of the mountain and past Surineqocha Lagoon where you could’ve camped the night before. We personally think that the campsite at Anantapata has a much better view.
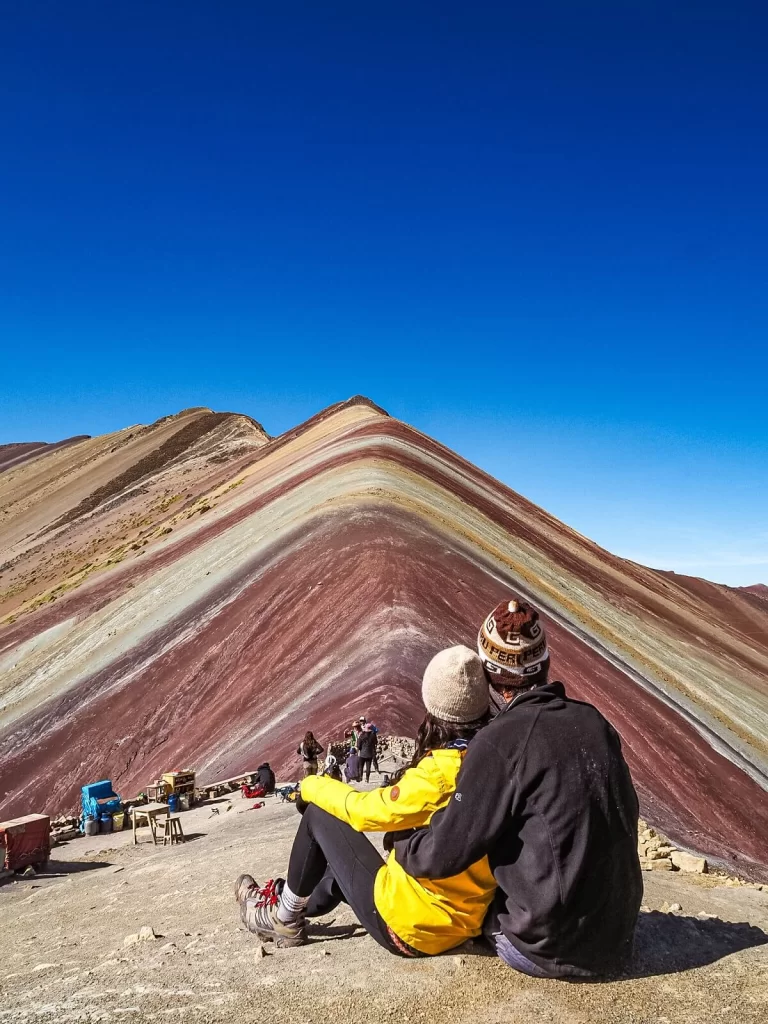
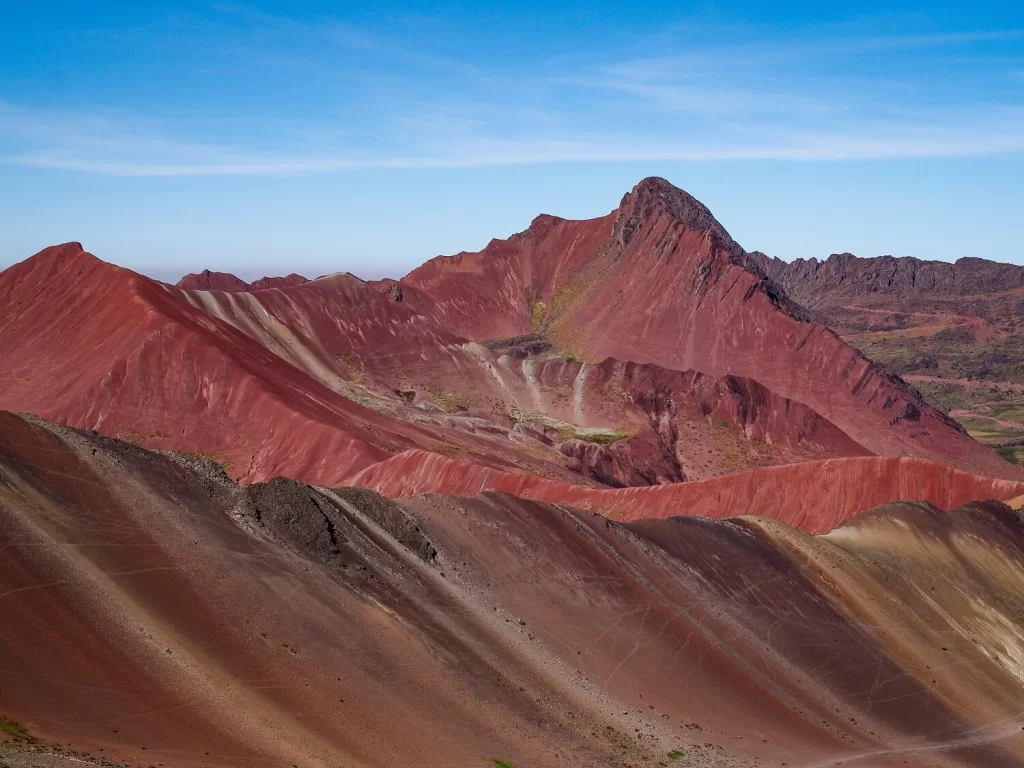
After passing the lagoon, you’ll have a gradual 45 minute long uphill hike to reach Rainbow Mountain Viewpoint. The 360-degree views from here will be mind-blowing and seeing Rainbow Mountain and the Red Valley will make you feel like you’ve trekked to another planet.
Once you’ve taken hundreds of photos, you’ll have the chance to do a short hike within the Red Valley. Unfortunately, it was closed at the time of our visit. After your hike, you’ll slowly make your way back to the road you were dropped off on the day before. There you’ll have lunch and will get in a transport back to Cusco.
Information About the 2-Day Ausangate Trek to Rainbow Mountain
1. Length of the 2-Day Ausangate Trek
This 2-day Ausangate Trek is a 24 km / 14 mi long trek. It is a relatively short one and spread across two days, so you won’t be hiking for too long each day.
The first day will be the longest especially if you have to hike all the way to Surina Qocha camp. You’ll hike around 2 to 3 hours to reach the first few passes and then another hour and a half to reach your lunch spot at Anantapata.
If you spend the night at Surina Qocha camp, then you’ll have another nearly 3-hour long trek ahead of you the following day. Don’t forget though that if you spend the night at Anantapata, you’ll add an additional 3-hour’s of hiking onto your final day. We were personally much happier about hiking an extra couple of hours in the morning after resting a bit the night before.
On the final day then, you’ll either have a nearly 4 hour hike to Rainbow Mountain or just under an hour. Then from the viewpoint, you’ll be hiking in the Red Valley for a few hours before making your way back to your pick up location about 2 hours away.
2. Level of Difficulty
This 2-day Ausangate Trek to Rainbow Mountain is a moderate to challenging hike, and it’s definitely not for a first-time hiker either. We’ll detail below all the challenges you can face on this route, so make sure to be realistic about your abilities and don’t underestimate this trek.
Elevation and Altitude:
Altitude and elevation are probably the main challenges you’ll face during your 2-day Ausangate Trek to Rainbow Mountain. Quesiuno, where you start your hike, is located at 4,370 m (14,350 ft) above sea level. This is already pretty high, especially if you compare that to the highest point along the Inca Trail which is only 4,215 m (13,829 ft). The Salkantay Pass along the Salkantay Trek is not much higher than your starting point at 4,630 m (15,190 ft).
Most passes along this trek will be around 5,000 m / 16,400 ft. This means that you can get altitude sickness if you’re not acclimatised properly before attempting this hike. You’ll also have to sleep at this height too which can be pretty hard and you might feel less rested the next morning.
There are many symptoms of altitude sickness, including dehydration, dizziness, headaches, shortness of breath, heavy breathing, loss of appetite, nausea and vomiting. It’s good to remember that anyone can develop altitude sickness and its symptoms can be less or more severe depending on the person.
For this reason we highly recommend spending a few nights in Cusco first and perhaps completing the Inca Trail or Salkantay Trek before this one to see how you’re coping with the altitude.
Temperatures and Weather Conditions:
If the altitude wasn’t enough to deal with, you’ll also have to be mindful of the temperatures too when trekking. The sun can be pretty intense, especially in the dry season. There are no trees to offer shade, so it’s important to wear a hat, sunglasses and sun-cream.
During the dry season the temperatures can drop during the night, so you’ll have to prepare for that if you’re camping. Believe us, the combination of freezing temperatures and high altitude doesn’t guarantee a good night’s sleep!
If you visit in the shoulder or rainy season, you’ll also have to be ready for potential rain. Whilst a little rain is just a bit of an inconvenience, a lot of it can make the trail quite dangerous. For this reason, make sure to time your visit outside the rainy season. Nobody enjoys trekking in the pouring rain with low visibility.
Other Posts You May Like:
- Vinicunca or Palccoyo? – Which Rainbow Mountain to Visit in Peru
- 10 Best Day Trips from Cusco
- All You Need to Know Before Hiking the Salkantay Trek to Machu Picchu
- Hiking in the Sacred Valley Without a Guide or Tour (Ollantaytambo, Maras, Moray and Pisac)
- The Ultimate 3 Week Peru Itinerary – How to Plan a Trip to Peru
Final Thoughts on the Ausangate Trek to Rainbow Mountain
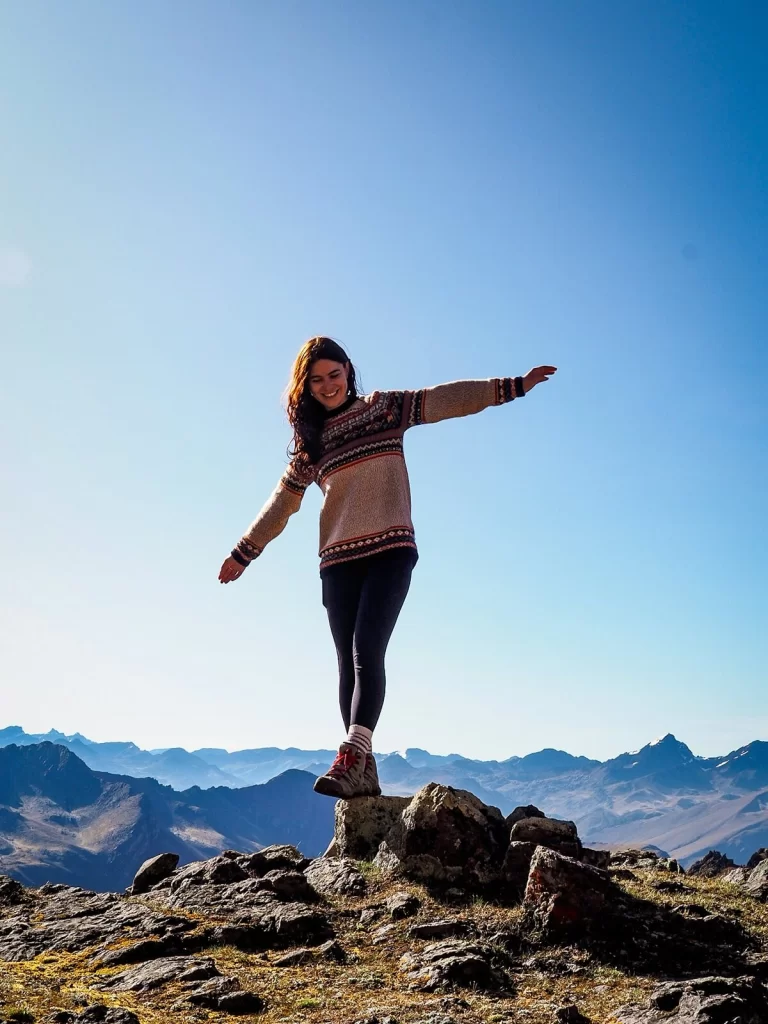
We absolutely loved our 2-day Ausangate Trek to Rainbow Mountain. Whilst we found the trek a bit challenging due to the high altitude, it was a really great way to push our bodies and see what they can do. Since we didn’t camp along the Salkantay Trek, it was also fun to spend a night in a tent under the star-lit sky. Of course, sleeping at 5,000 m wasn’t easy, but we still woke up with plenty of energy and adrenaline for another day of trekking.
We actually ended up having a private trek, which allowed us to bond with our guide and cook more than we could’ve done in a larger group.
It was also a fantastic and less crowded way to reach Rainbow Mountain. Getting to the viewpoint before everyone else made the entire trek even more special.
Have you ever hiked the Ausangate Trek to Rainbow Mountain? If so, which length of trek did you pick and what was your experience? If not, would you complete this trek to visit Rainbow Mountain or would you just opt for a day trip there? Let us know in the comments below.
Now, let your adventure begin,
Our Top Travel Resources
Accommodation: For hotels we always use Booking.com and Hostelworld for hostels. We also book longer stays on Airbnb or Vrbo.
Flights: To find the best flight prices we always check Skyscanner, Google Flights or WayAway. Then we also check the airlines’ websites too for comparison.
Car Rentals: We use Discover Cars when we want to rent a car as it compares local, national and international companies.
Activities: If we book organised tours we always check either GetYourGuide or Viator.
Foreign Currency: Whenever we can we prefer to pay in local currency and for that we always use our Wise card. We can easily withdraw money from the ATM or pay by card at most shops and restaurants.
Travel Insurance: We never go anywhere without travel insurance. You never know what will happen on your trip, so good travel insurance like SafetyWing can protect you in case of injury, illness, theft and cancellations.
eSIM and VPN: To get data abroad we use Airalo which is an app that allows you to download a prepaid eSIM to your phone in over 190 countries. Make sure to have a VPN to avoid hackers accessing your personal data when using public WIFI. We use Surfshark which is the only VPN that offers one account on unlimited devices.
Remember…It all starts with a Pin…

The pics and video are all amazing. What an awesome trip you did. I really enjoyed watching the video – it gives you a totally different aspect on the hike. The drone shots were excellent. Thanks for sharing!
I did Salkantay, Inca, and Rainbow Mountain but missed Ausangate while I was in Peru for a summer a few years back. Loved the area. One of the prettiest places I’ve been.
Sounds like such a great adventure! The area is absolutely gorgeous!
This looks like a solid adventure I’m into! Very detailed post and loved reading it!
The views on this hike looks like a dream! Amazing photos!
2 days, wow! I did this for a full day and I was extremely tired! I was actually surprised that many people can take that high altitude. Some people in my group did not even make it halfway and went back because of altitude sickness. I did not even know you can do a 2-day hike. What physical preparations did you do before the hike?
Thanks Trisha and well done for doing the one-day hike! The 2-day one was probably the most challenging hikes we did so far, but it was worth the effort! I think being in high altitude for about 3 months helped a lot, plus we did many multi-day treks before this one, such as the Salkantay Trek. Those definitely helped to get used to the environment. You can get pretty sick if you don’t acclimatise properly, and unfortunately everyone reacts to altitude differently.