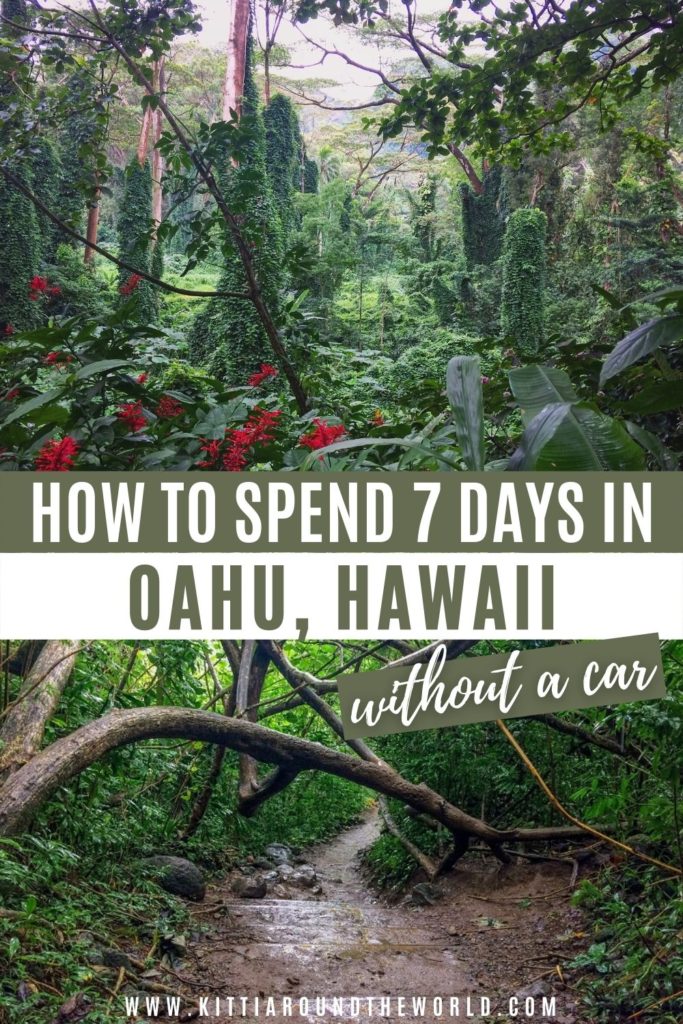
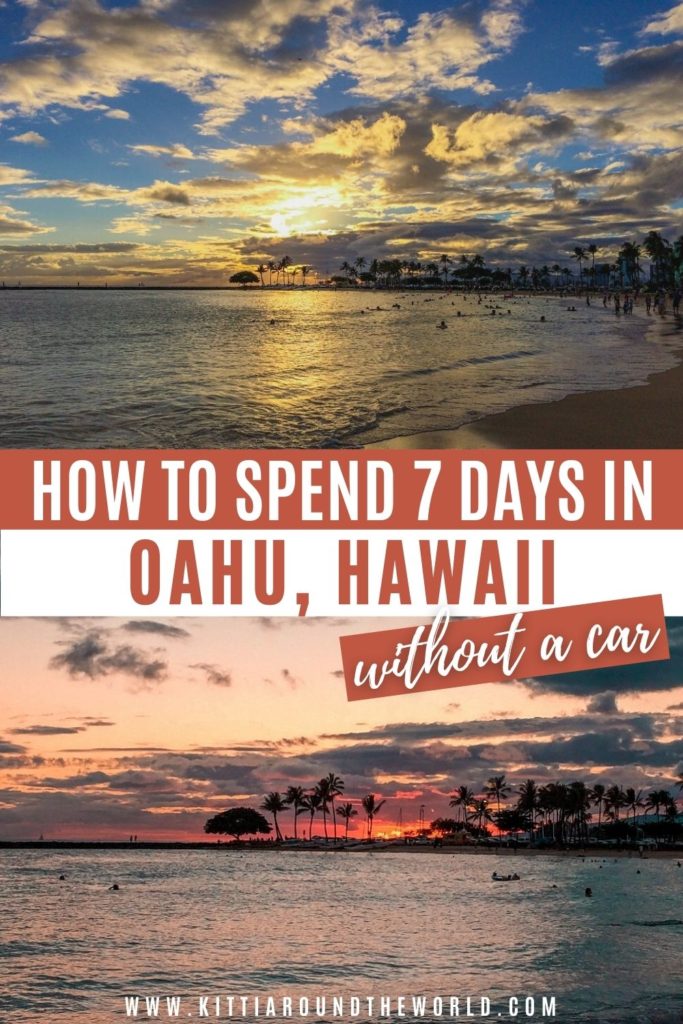
One Week in Oahu Hawaii without a Car
In this blog post you can find out how to spend a full week exploring the stunning island of Oahu, Hawaii without renting a car. Yes, you can spend a full week completing many amazing hiking trails and still have time to chill on some beautiful beaches without a car.
Disclosure: This post may contain affiliate links, which means we may receive a small commission if you click a link and purchase something. Clicking these links won’t cost you anything, but it will help us to keep this site up and running! Learn more about our affiliate policy.
A little background story…
Imagine you’ve just landed at Seattle – Tacoma International Airport. You head to the car rental area to hire your car for the week. The plan is to do an amazing road trip along the Pacific coast all the way to San Diego! Stops would include beautiful destinations such as Portland and Yosemite….then 2 hours later you have a flight ticket to Honolulu! We were headed to Oahu, Hawaii, leaving in less than two-days…wait what?
So we were at Seattle Airport, trying to persuade the car rental place that we had enough money. Our minor issues were that one, we didn’t have a credit card. Two, our US bank was a tiny local one. Three, the driver was under 25 and the one who was over 25 (me) didn’t have a licence. (FYI, I have passed my driving test since then).
My other half was trying to negotiate the almost $3000 rental fee for a week (with the ‘underage’ insurance…). I was looking for flight tickets to Oahu, Hawaii and found a cheap one! (Considering that we needed to leave and arrive on a certain date to a completely different city, around $500 was cheap!) Then as luck would have it, I also saw a great and cheap Airbnb for the whole week. Within 15 minutes, our plan took a 180 degree turn and we were headed to Oahu, Hawaii in two-days’ time!

Top Tip – Book your flight ticket with WayAway, a flight aggregator that provides you with the best rates on airline tickets.
Click here to get 10% off from your WayAway Plus membership plan, which gives cashback on flights, accommodation, car rentals, tours, and more.
One Week Oahu, Hawaii Itinerary without a Car
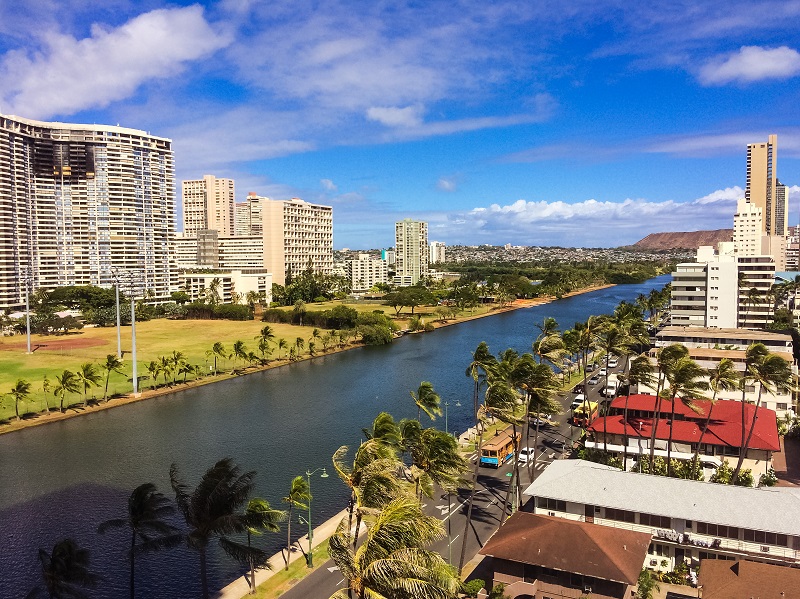
Day 1 (Afternoon) – Head to Waikiki Beach
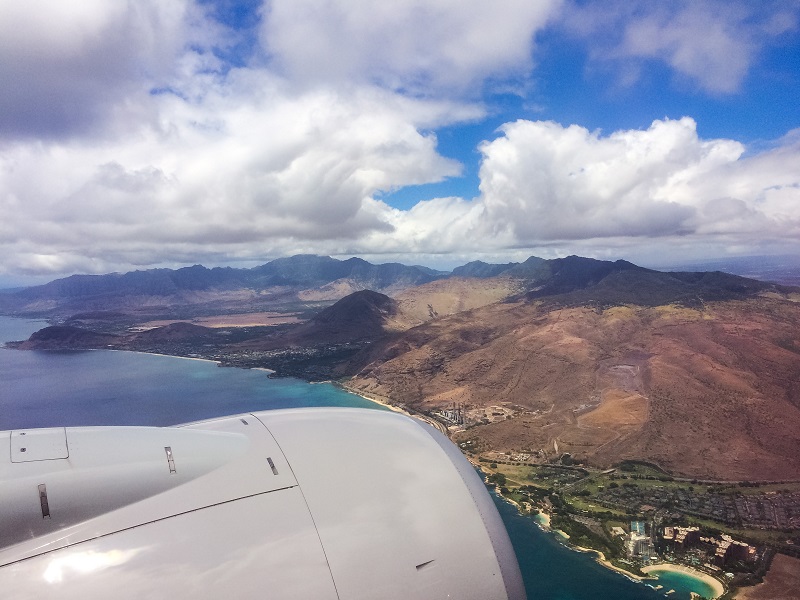
We landed at Honolulu International Airport. Then we had to wait for a bus that was willing to let us on board with our luggage. (Apparently the bus only lets you on board if you can hold onto your belongings and don’t block the aisle. So, we just had to wait for a nice driver to let us on). After finding the key for our Airbnb and dropping our bags in the room, we headed straight to Waikiki Beach. Luckily it was only about 10-15 minutes’ walk from our place. We felt incredibly happy and lucky about being there so we decided to treat ourselves to a burger with pineapple. (I feel like you get pineapple with literally everything in Hawaii, which I wasn’t complaining about at all).
We had no money to rent a car (we lived on cheerios and pot noodles and only ate out twice throughout the whole week)! So, that first night we planned what we could reasonably do by either walking or using public transport. Our days were pretty much the same from there. We rose early and headed out for a hike, then just chilled on a beach in the afternoon. (For reference, the sun was up around 5 in the morning and went down around 5 in the evening).
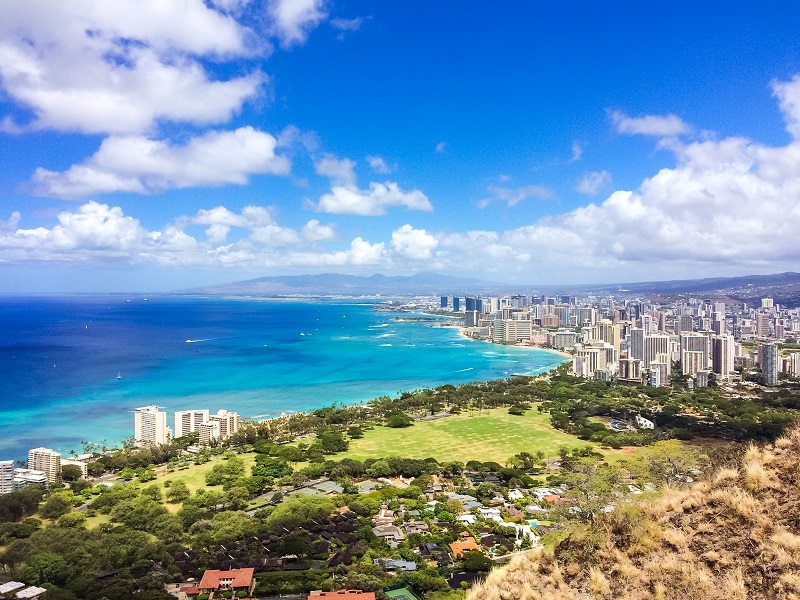
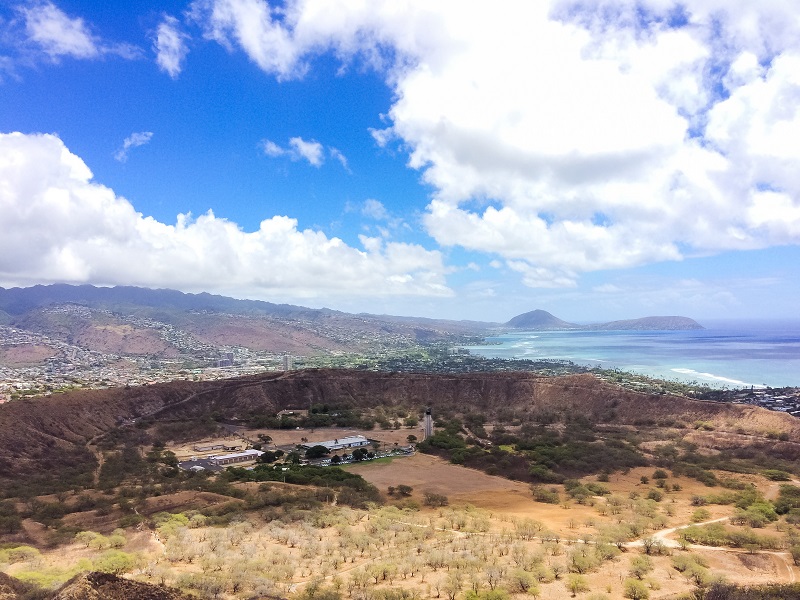
Day 2 – Hike Diamond Head Crater
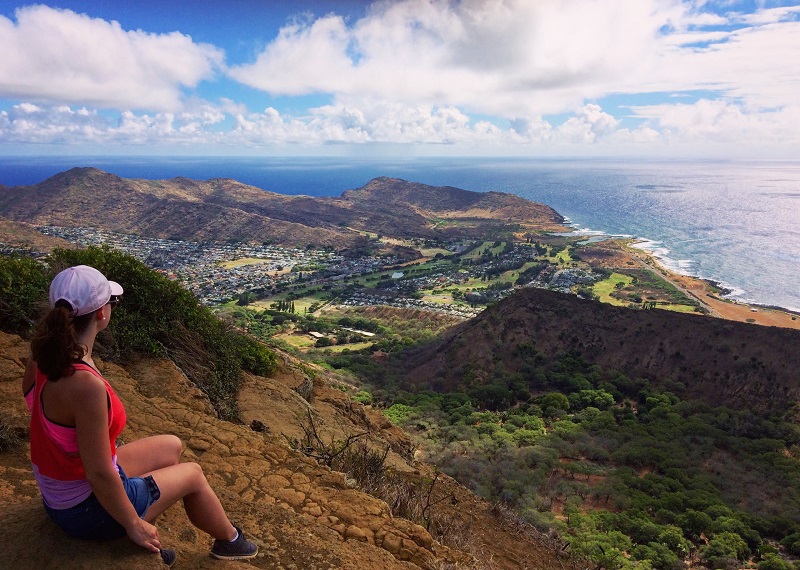
From our Airbnb we could see Diamond Head Crater. It is a very popular place in Oahu, Hawaii so we decided to head there first. We got up at the crack of dawn and walked there. It took us almost an hour just to get to the crater! We then had to hike up to the top which can take another hour depending on your speed. By the time we got to the entrance of the trail there were already a lot of people! After that it got busier by the minute. You need to pay $1 if you arrive on foot, and a little bit more if you arrive by car. Once we reached the top, we could enjoy the amazing view of Honolulu, Waikiki Beach and the surrounding areas. It was a great first day hike!
Good to know before you go
Top Tip – If you’d like to do this hike I highly recommend getting there as early as you can. Mainly to avoid a massive crowd, but also the trail isn’t shaded. So, the later you go the more likely it is that you get a big dose of sun. Pack plenty of sun-cream and water with you. At the bottom there was a stand selling fresh coconut and pineapple juice. Ideal for something refreshing after your hike! Also make sure you choose the right footwear because the trail is uneven and can be slippery sometimes. Oh, and be ready for some steep steps too! 227 in total to reach the summit – after all you’re going up to 560 feet!
Did you know? – About 300,000 years ago an eruption created this crater with two others on Oahu, Hawaii (Punchbowl and Koko Head) and only became extinct about 150,000 years ago. Furthermore, the locals call the crater Le’Ahi (‘brow of the tuna fish’). It was named Diamond Head when Brits thought the calcite crystals shining on the crater were diamonds.

Day 3 – Walk the Mānoa Falls Trail
The next day we ventured into the amazing rainforest to see the 150-foot-tall Mānoa waterfall. (Unfortunately, I couldn’t find a great picture of the fall as it was a bit busy with people. You can swim in the pool around it, but I think the trail itself was amazing too). We took a public bus from Honolulu. It deposits you close to the entrance of the trail and takes about 20 minutes from the city centre. I think the trail is easy and relaxing. It takes an hour to get there and back, all depending on how long you are spending at the falls.
Of course, being a rainforest we got caught up in a shower on our way back. This led to the trail becoming quite muddy, so again just wear the right footwear and not flip flops. (Especially if the rain causes flash floods, flip flops can be dangerous). Luckily our clothes had dried by the time we reached the bus stop.

Good to know before you go
Top Tip – Remember when I said I couldn’t take a decent photo of the falls because so many people were swimming in the pool in front of it? It’s not advised to swim there. Not just due to falling rocks but because you could easily catch Leptospirosis which can cause flu-like symptoms. So just be careful!
Did you know? – Obviously, it’s common knowledge that the Hawaiian Islands were used in popular movies and TV shows. So, if you watched movies like Jurassic Park (or World) and Lost, the trail will look familiar! Expect a reptile’s head to poke up at any moment, because the trail itself was used as a filming location.
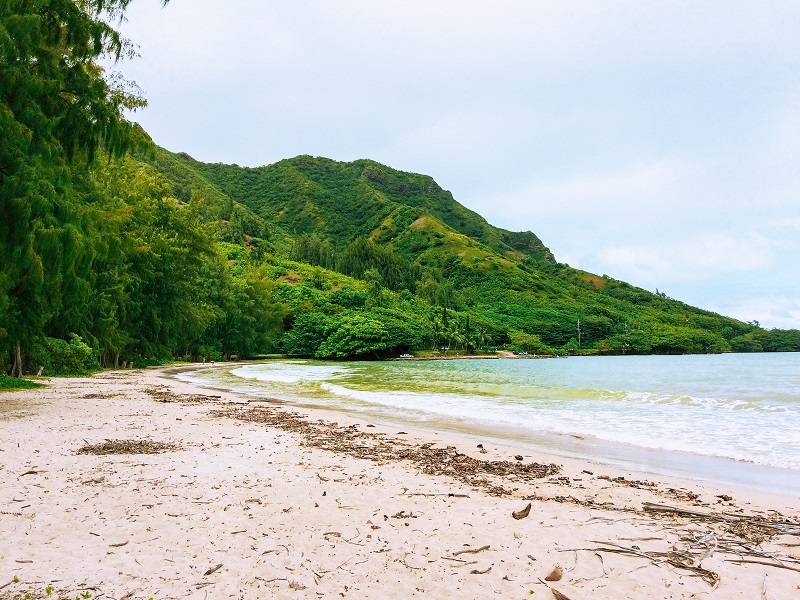
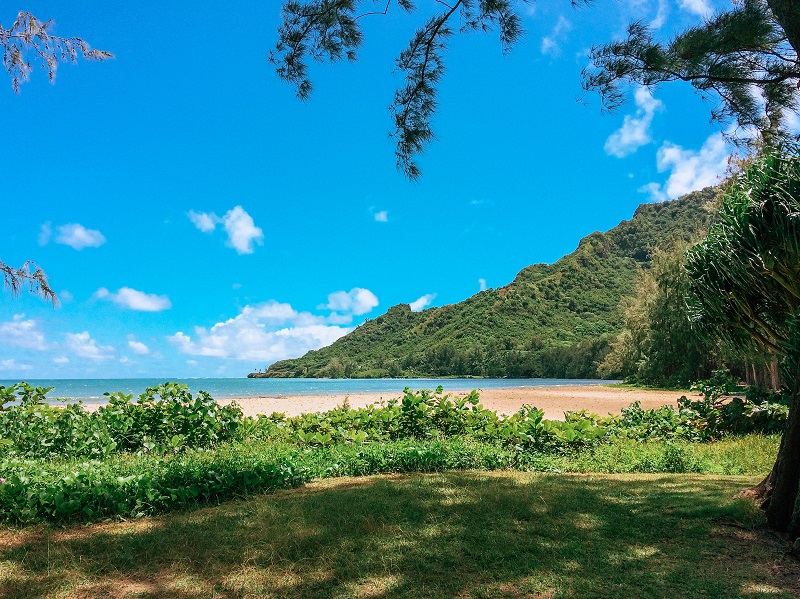
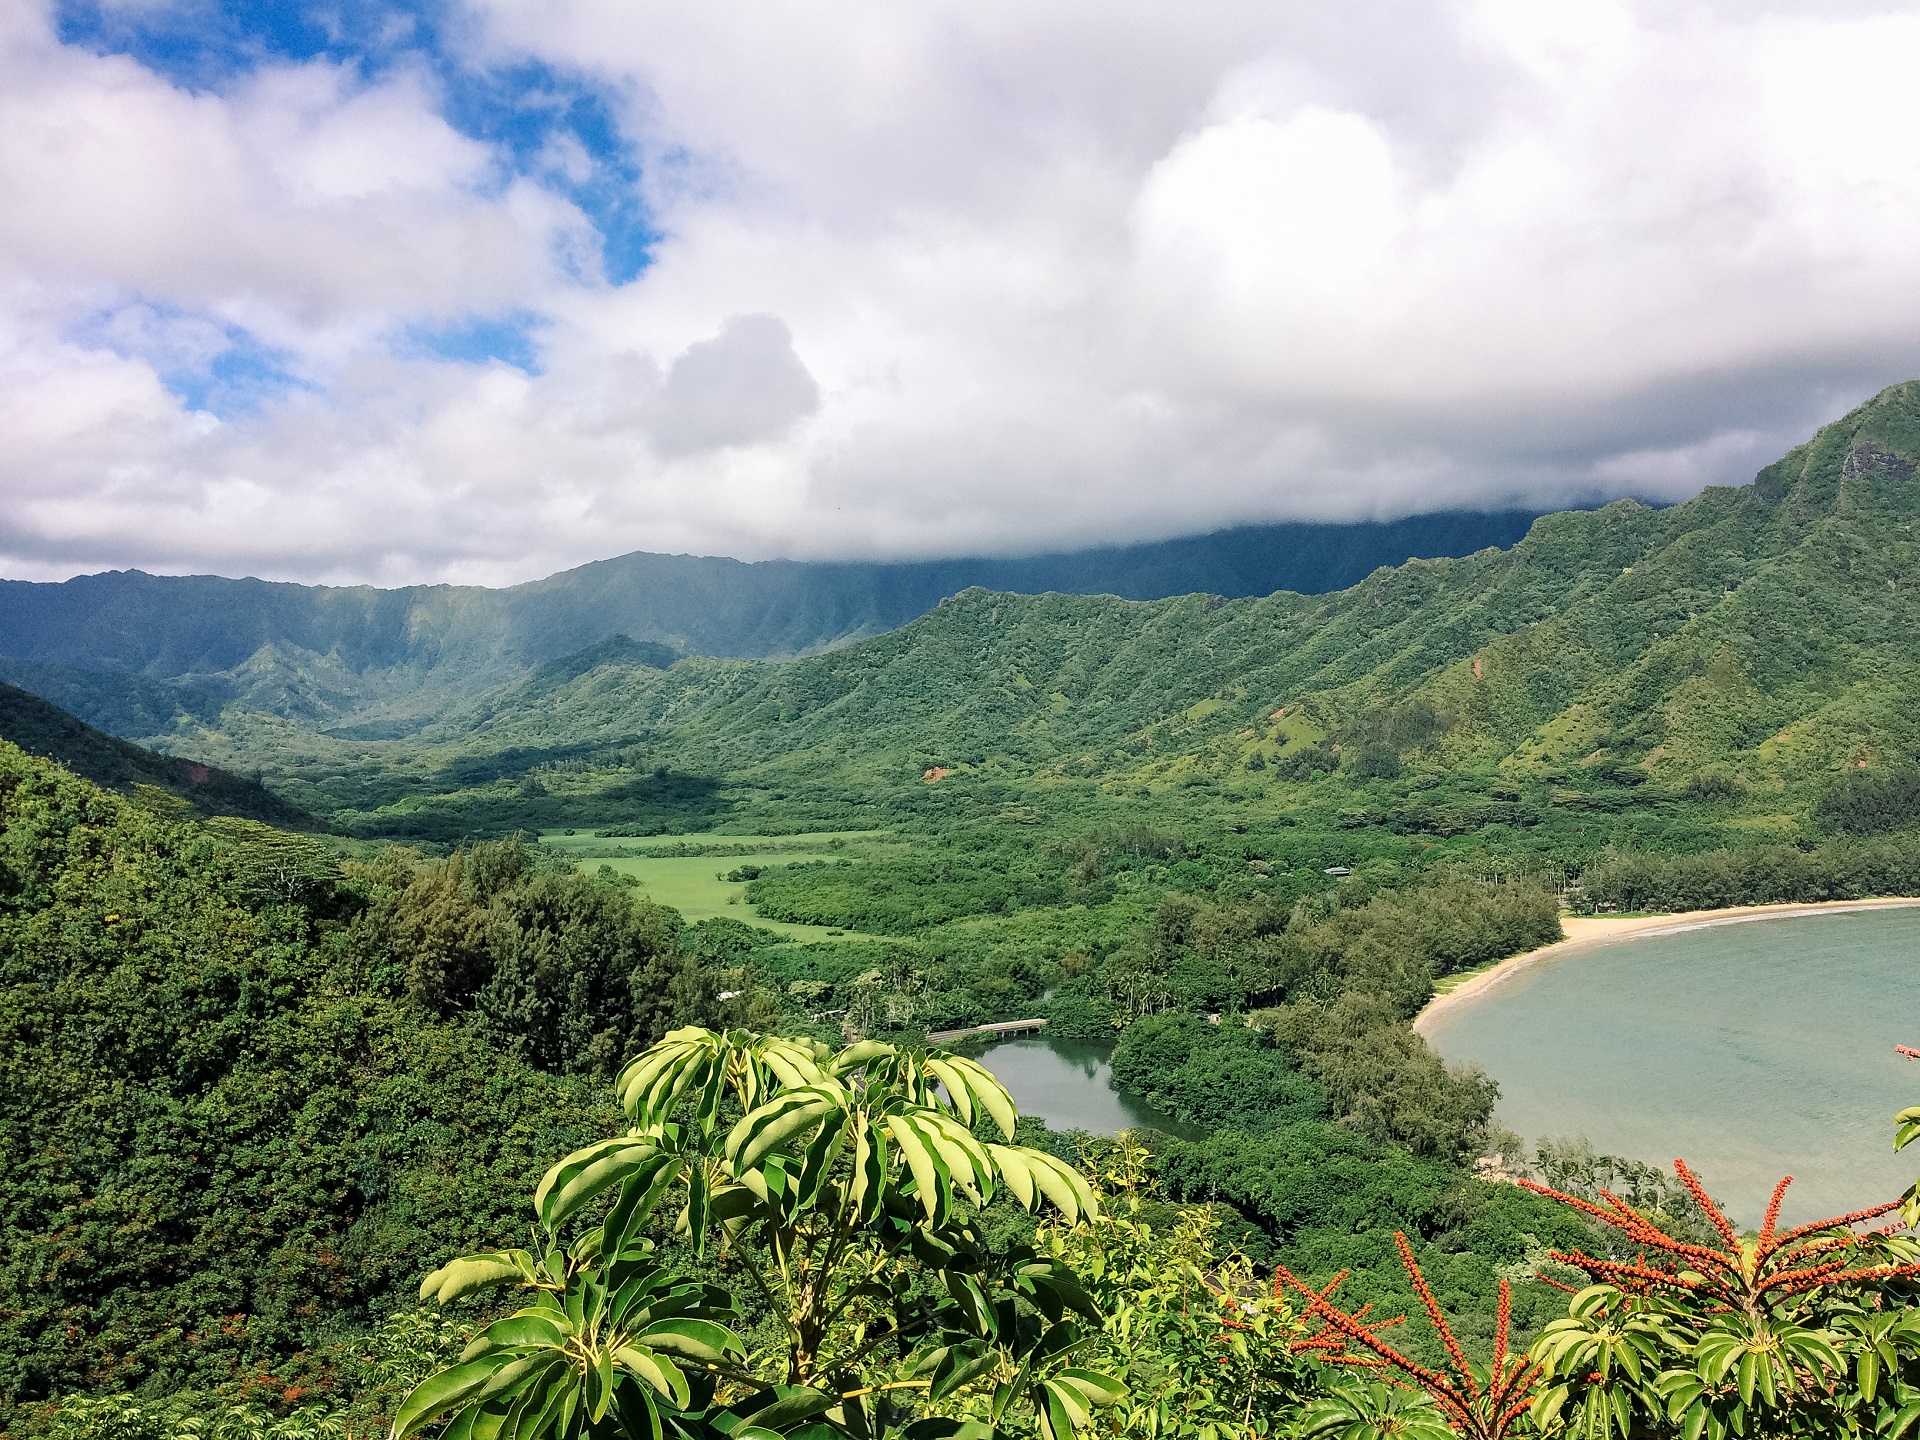
Day 4 – Visit Kahana Beach
If you’d like to get away from the crowds on Waikiki Beach, then you can take a little trip to Kahana Beach. Surrounded by the Ko’olau Mountains, this bay is definitely a little gem.
Whilst it wasn’t the nicest sandy beach like in Waikiki, it felt untouched with twigs from trees and other debris the ocean left behind mixed in with the sand.
As a bonus, we had the whole beach just to ourselves and the view was incredible! It really was like being in paradise.

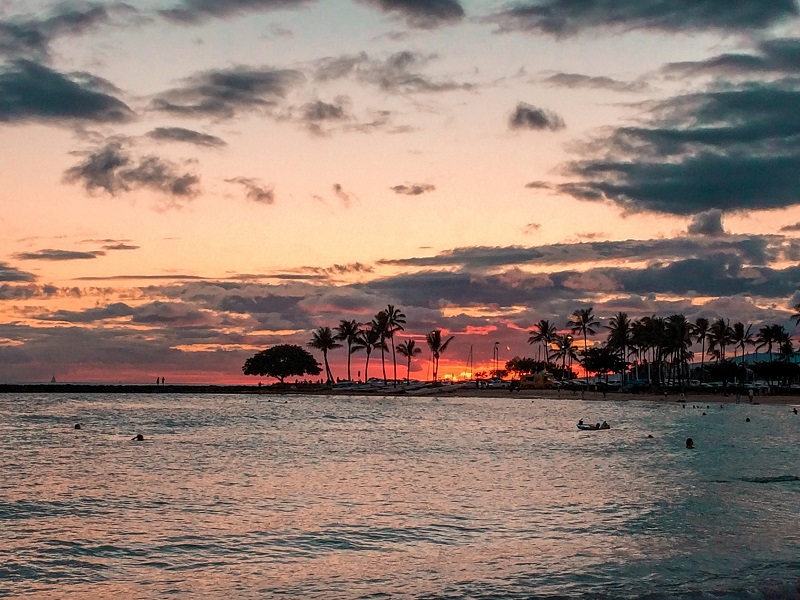
Day 5 – Spend a full day on Waikiki Beach
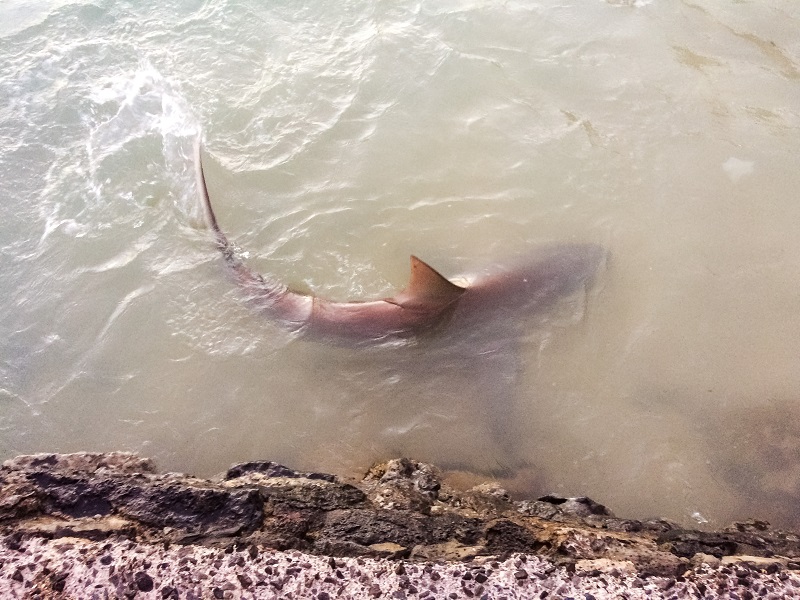
After all the hikes we had done over the past few days we just wanted a rest day. Therefore, we decided to spend Day 5 on Waikiki Beach. We ended up walking the whole length of the beach that day. (When I say relaxing, I mean only staying put for about an hour before needing to do something again). Waikiki Beach is around 2 miles long, so we still managed to get some steps in! In between we sunbathed and swam with sea turtles in the beautifully blue water.
I always say that sometimes you must be in the right place at the right time. During our walk along the beach we were lucky enough to see some sea turtles that swam up close. Later on, while we were waiting for the sunset, a little shark also swam really close to the beach. This was pretty cool as this was the closest I’ve ever been to a shark in the wild.
After the sunset we stayed at the beach and waited for the free firework show. This is organised by the Hilton Hawaiian Village and takes place every Friday night. So, if you’re visiting Honolulu make sure that you head there on a Friday evening. Pack a picnic, find a good spot on the beach and watch both the sunset and the fireworks. After that we ended up watching a live entertainment show organised by the hotel before walking back to our place.
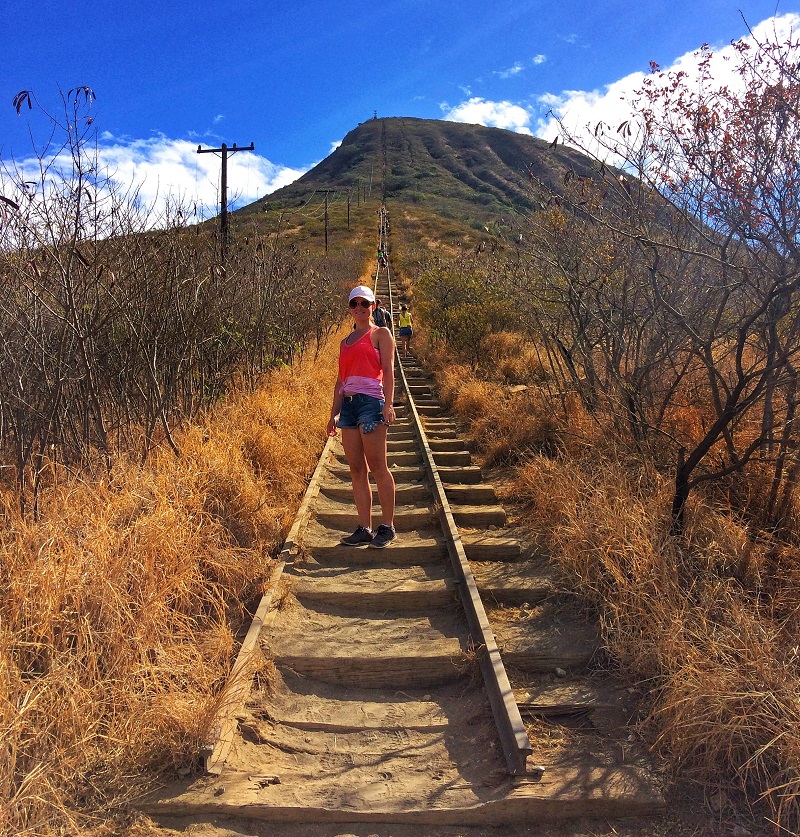
Day 6 – Hike Koko Head Crater
The way up
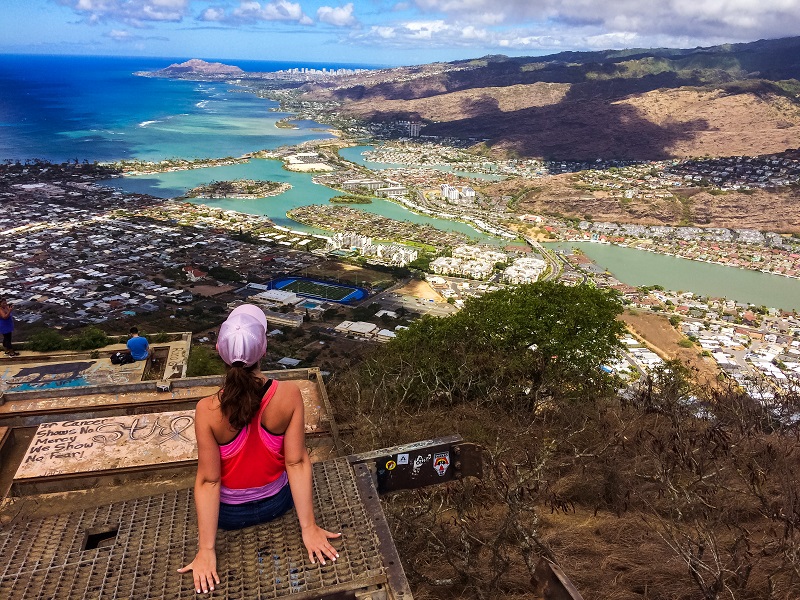
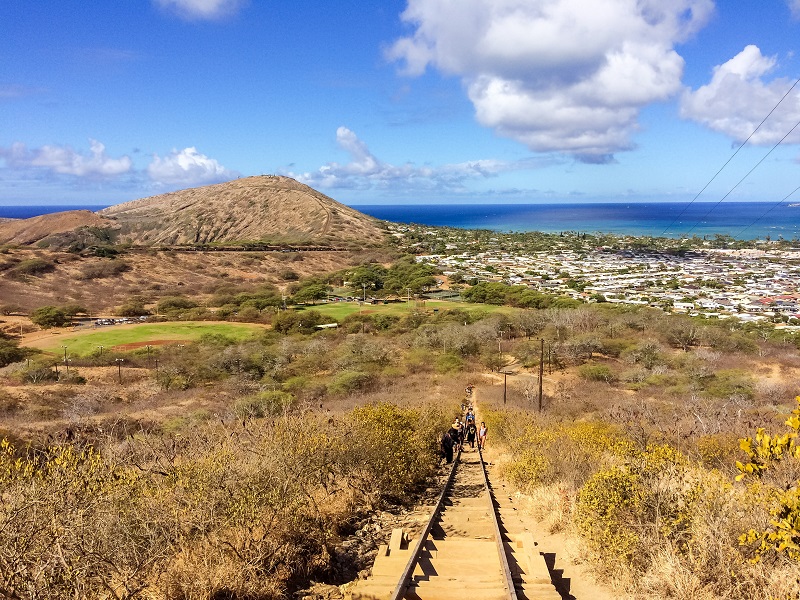
After a beach day we were more than ready to hike again. We decided to do the 0.7-mile trail to Koko Head Crater taking you to over 1,200 feet above sea level. Again, do not be fooled by the 1.5 miles round-trip. You’ll need to climb 1,048 railroad ties to reach the summit! So, if you’re up for a killer workout with dramatic views as your reward than this hike is for you.
The first part of the hike is not too bad. But believe me, it will get even steeper for the last half. Make sure that whilst continuously looking up to see how much of the trail is left before you reach the top you don’t forget to look back often to see how far you’ve already come. Just enjoy the view that gets better and better with each step you take.
Did you know? – You’re probably wondering why and how on earth a railway ended up on the side of the crater right? Well, during World War II bunkers were built by the military on top of the crater. To transfer people and supplies they had to build a railway track that went up and down this steep hill. Pretty impressive don’t you think?
The way down
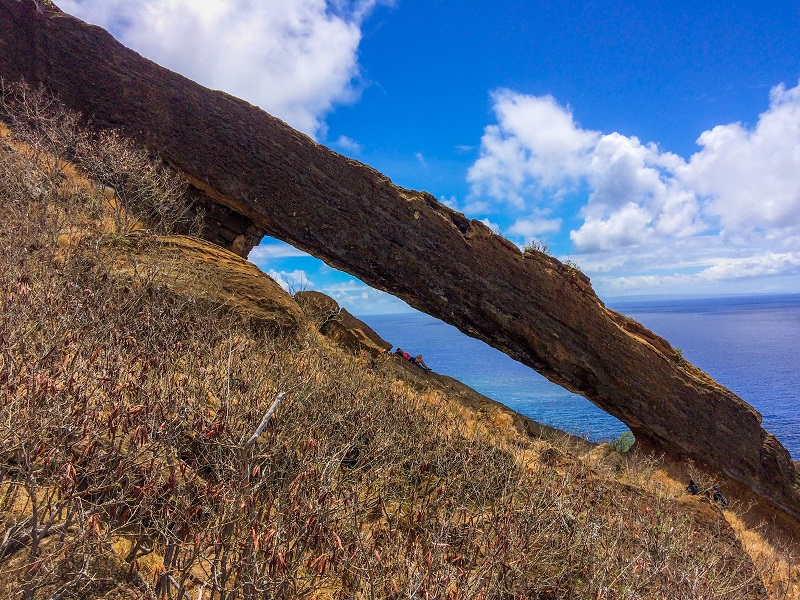
Whenever we can, we try to do a round trip and avoid going back the same way we came. So when we saw that we could actually carry on walking along the ridge before descending, we didn’t hesitate much. (Especially considering that we didn’t have a car waiting for us at a car park, we felt free and adventurous.) What a great decision it was! We continued to hike along the crater admiring the views from the summit before it was time to head down.
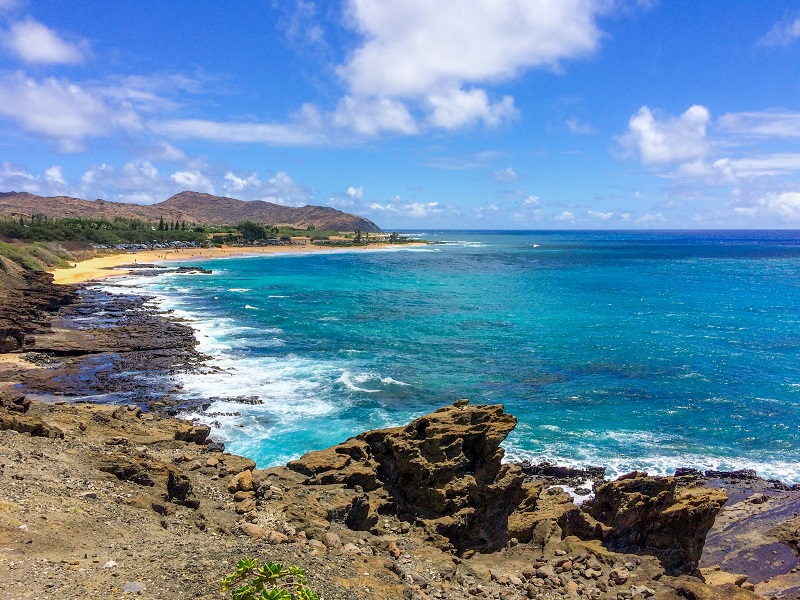
The path wasn’t always clear, but that made it more exciting. If you choose to do the same, you’ll eventually reach a massive natural arch called Koko Crater Arch. (No joke it was huge.) At that point we had to crawl down on our butts because the arch was rather slippery. Honestly, it was so much fun! Eventually we reached the main road with Sandy Beach located further along. There we could enjoy some fresh pineapple juice and watched surfers riding huge waves. If you must rely on public transport, there is a bus stop across from the beach. Buses are fairly regular and will take you back to the city
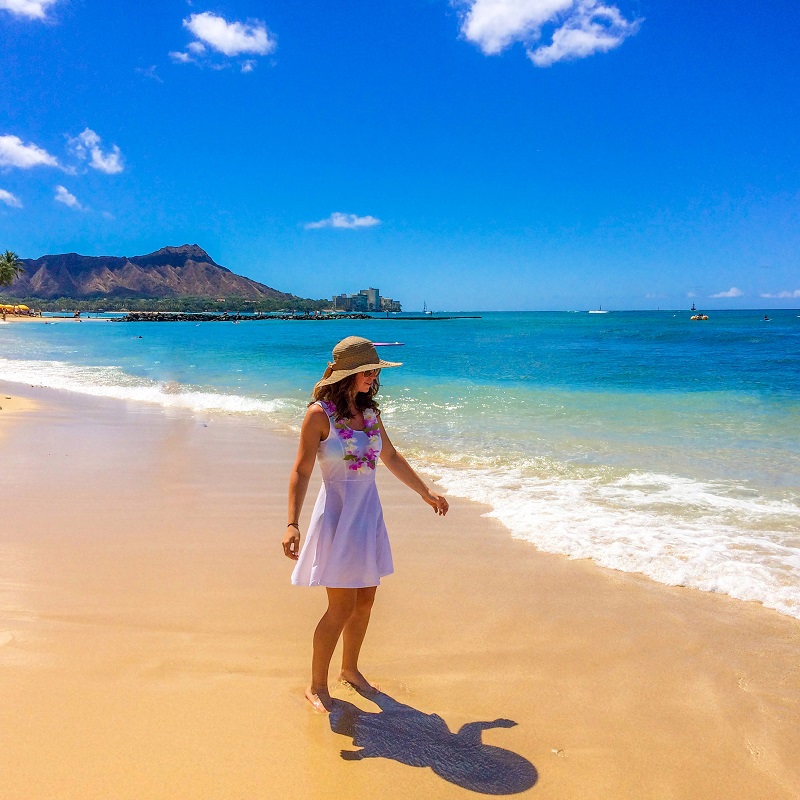
Day 7 (Morning) – Waikiki Beach
Where else would we have spent our last few hours before leaving for the airport than at Waikiki Beach! We enjoyed the sand, the sunshine and just appreciated how lucky we were to be able to visit this paradise.
As you can see one week was enough to fall in love with Hawaii. It was nowhere near enough to explore an entire island though! And that’s before you consider the other amazing islands such as Hawaii, Kauai, Maui and the rest. Most of the time, when it comes to choosing between going back to a place we’ve already been or going somewhere new, I choose to go somewhere new. However, this isn’t the case with Hawaii! We would go back there in a heartbeat as there’s so much more to see and explore there! So, you’ll surely see another blog post about it in the near future.
Final Thoughts on Oahu, Hawaii without a car
As you can see we managed to do so much without renting a car. So if you have a tight budged like us, but life gives you a chance to visit this magnificent island, then take it. You will have an unforgettable trip.
Finally, here is a map of our trip showing the places in Oahu we managed to visit in a week without a car. (It looks a bit bare but we’re aiming to add more places to this map). Have you been to Hawaii before? How much of the Hawaiian Islands did you manage to explore? Let me know in the comments section below.
Now, let your adventure begin,

Our Top Travel Resources
Accommodation: For hotels we always use Booking.com and Hostelworld for hostels. We also book longer stays on Airbnb or Vrbo.
Flights: To find the best flight prices we always check Skyscanner, Google Flights or WayAway. Then we also check the airlines’ websites too for comparison.
Car Rentals: We use Discover Cars when we want to rent a car as it compares local, national and international companies.
Activities: If we book organised tours we always check either GetYourGuide or Viator.
Foreign Currency: Whenever we can we prefer to pay in local currency and for that we always use our Wise card. We can easily withdraw money from the ATM or pay by card at most shops and restaurants.
Travel Insurance: We never go anywhere without travel insurance. You never know what will happen on your trip, so good travel insurance like SafetyWing can protect you in case of injury, illness, theft and cancellations.
eSIM and VPN: To get data abroad we use Airalo which is an app that allows you to download a prepaid eSIM to your phone in over 190 countries. Make sure to have a VPN to avoid hackers accessing your personal data when using public WIFI. We use Surfshark which is the only VPN that offers one account on unlimited devices.
Remember…It all starts with a Pin…
How did you get out to Kahana beach?
Hi Katrina, we took a bus (bus 60) from Honolulu that dropped us off at the Bay. It takes around an hour. Hope this helps.