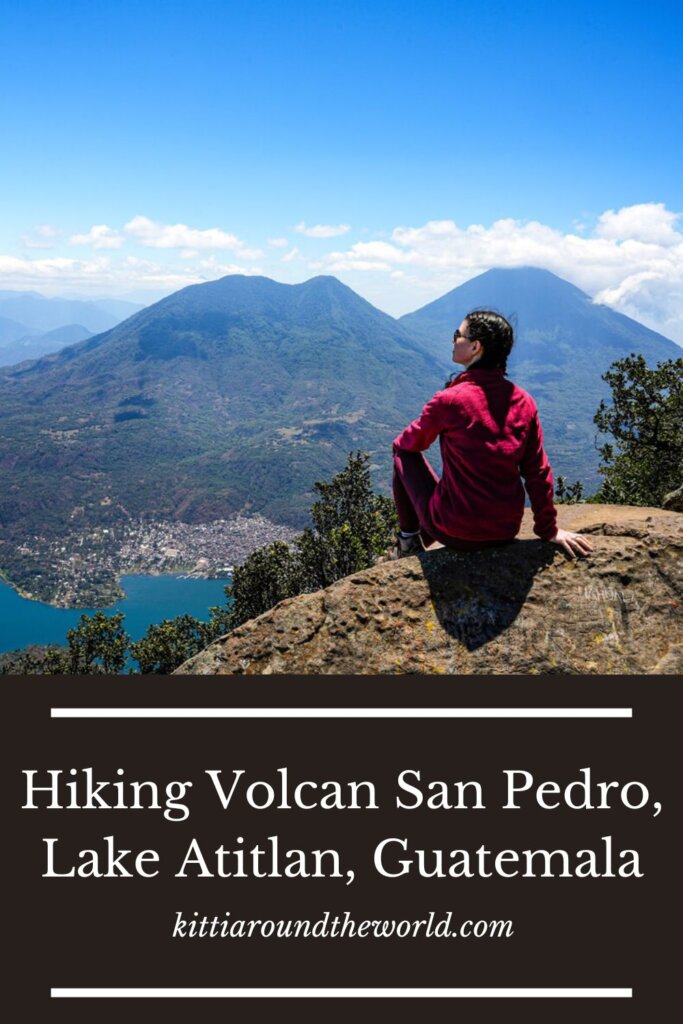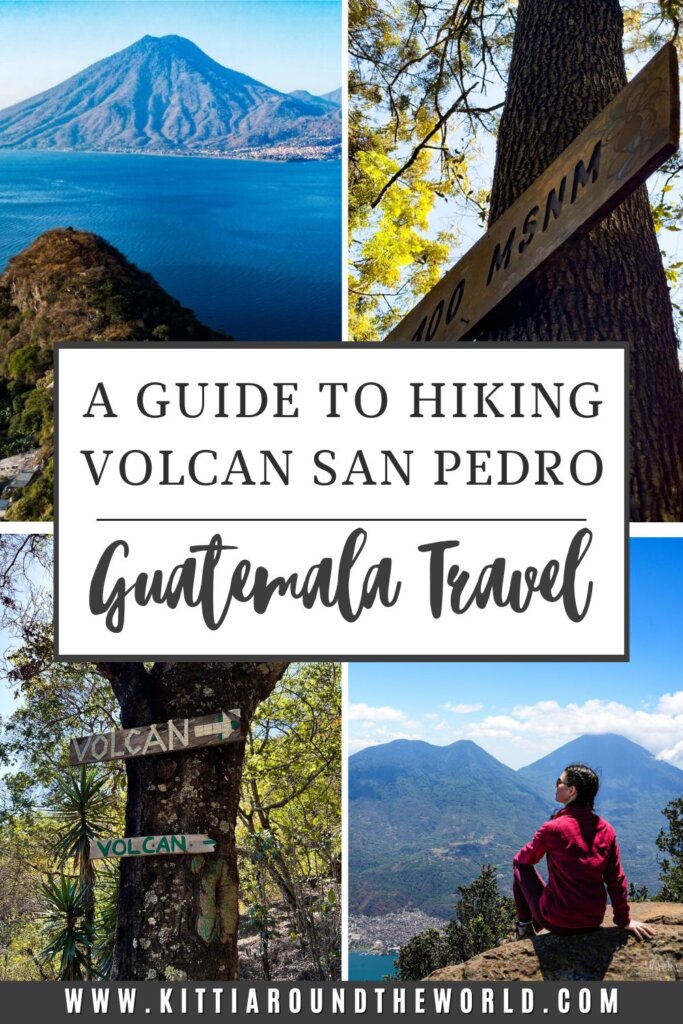
A Guide to Hiking Volcan San Pedro, Lake Atitlan, Guatemala
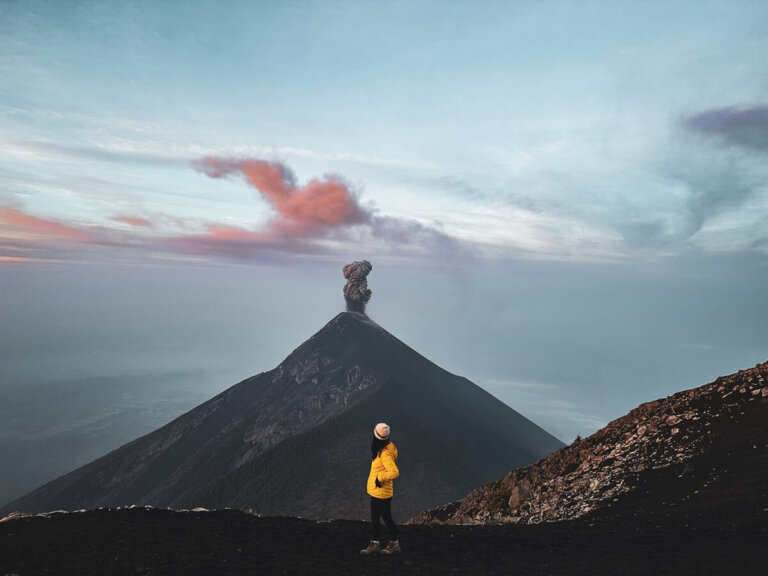
If you’d like to do something a little more challenging during your stay around Lake Atitlan in Guatemala, then consider hiking Volcan San Pedro, one of the 37 volcanoes dotted across the country. We wanted to summit it the minute we saw just how magnificent it looked from the shores of the lake. So, on a clear morning during our 2-week stay we set off to hike up yet another Guatemalan volcano.
This particular volcano is probably one of the riskier ones we’ve attempted due to safety issues associated with it. We made sure to do thorough research before we left and made the judgement call that it would be okay to summit by ourselves. In this guide you’ll find details about how we came to that decision as well as the usual information on trail length, level of difficulty, when the best time to do it is and what to wear and bring with you for your adventure. We’ll also provide you with a brief trail description in case you decide to attempt it without a guide like we did.
If you’d also like to see us summiting Volcan San Pedro, then make sure to watch our dedicated Lake Atitlan video on our YouTube channel. For more Guatemala videos, you can also check out our Guatemala series.
Disclosure: This post may contain affiliate links, which means we may receive a small commission if you click a link and purchase something. Clicking these links won’t cost you anything, but it will help us to keep this site up and running! Learn more about our affiliate policy.
About Volcan San Pedro
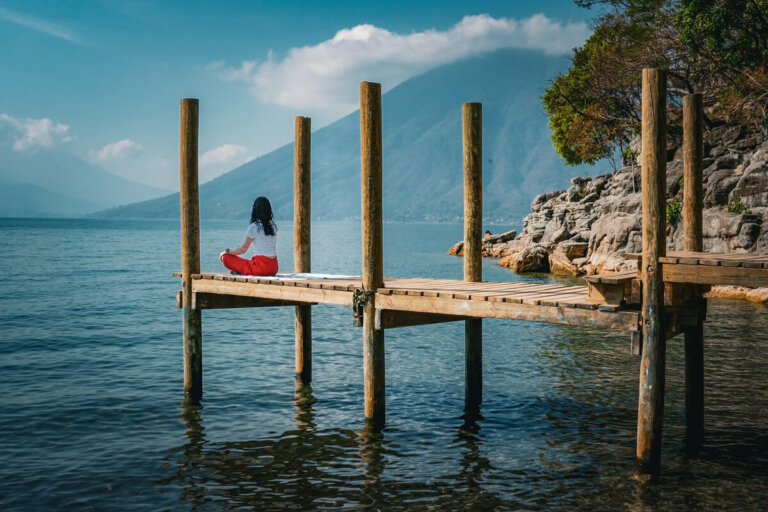
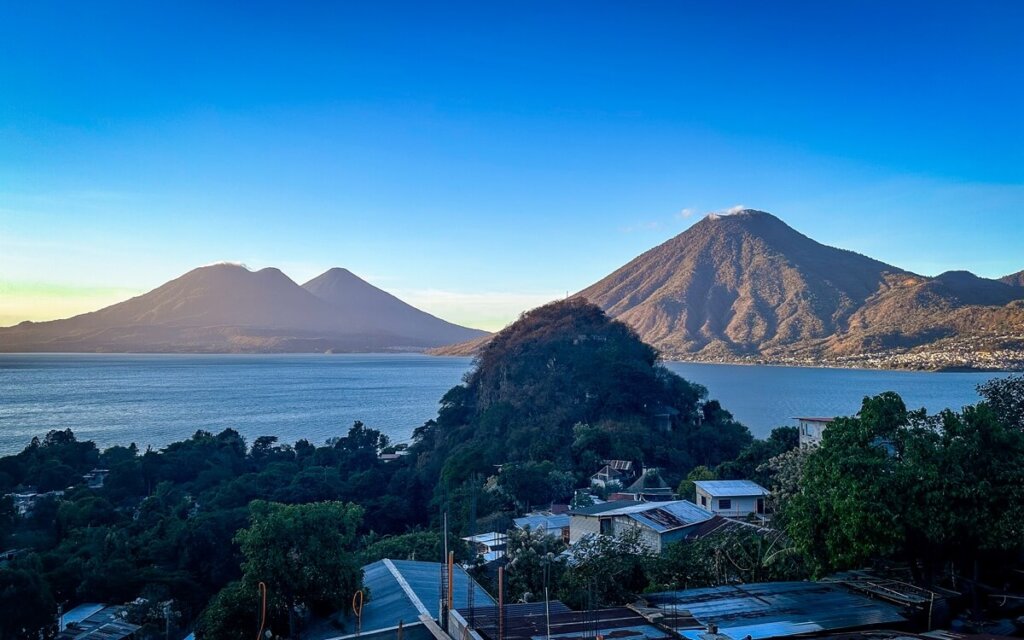
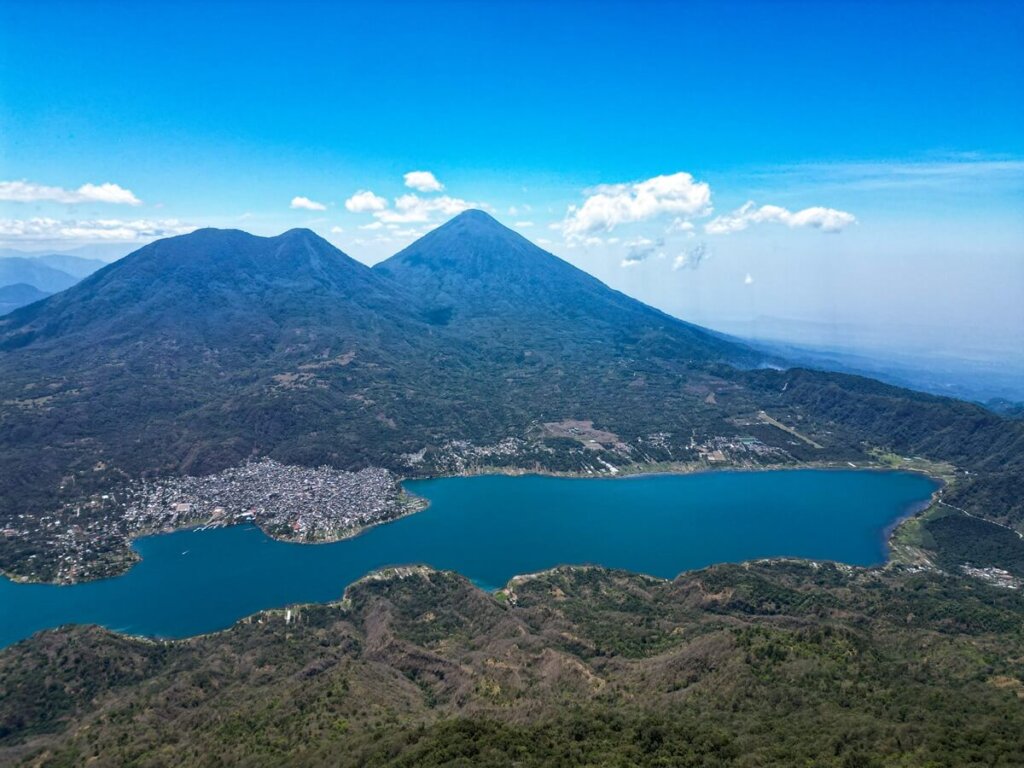
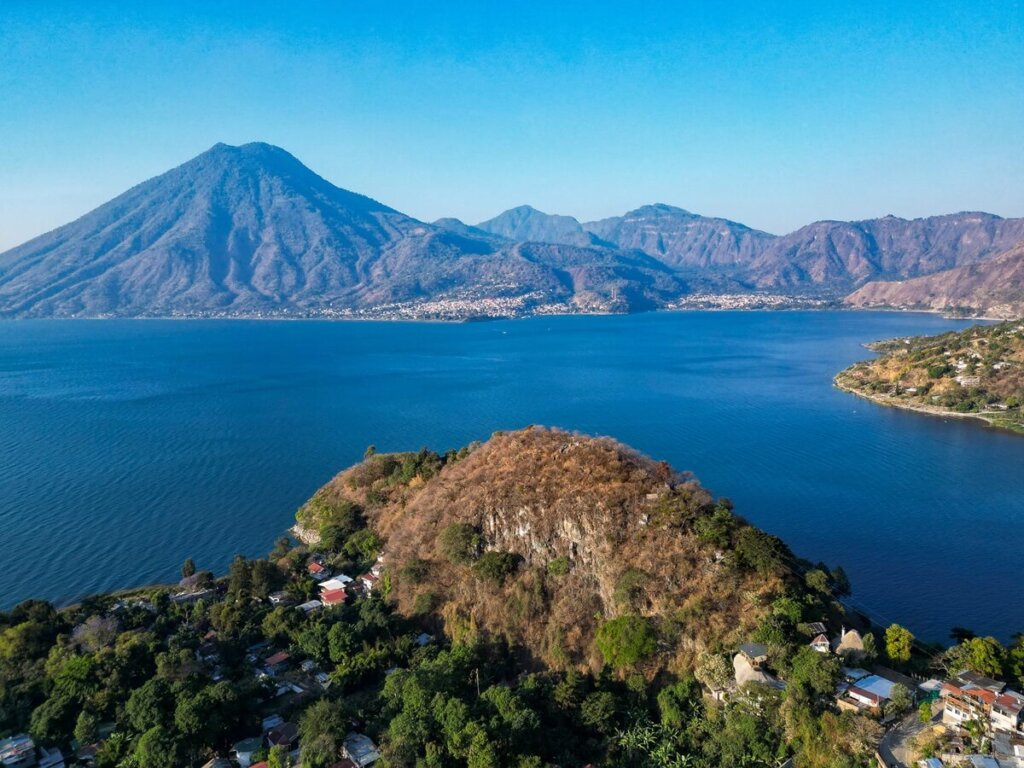
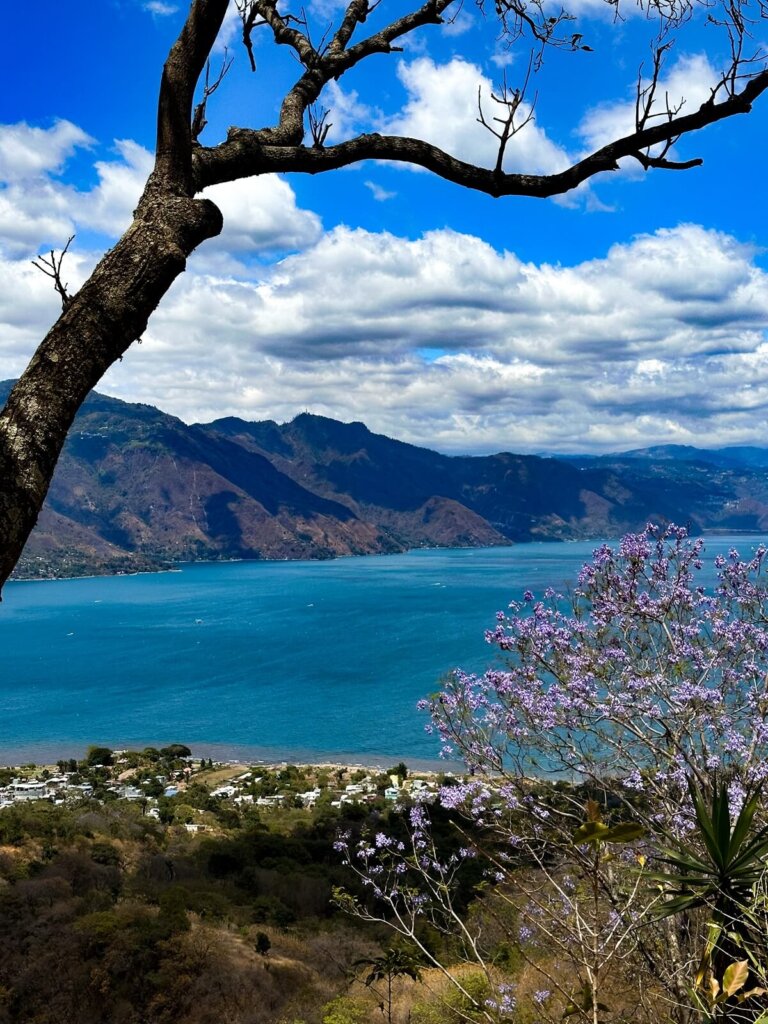
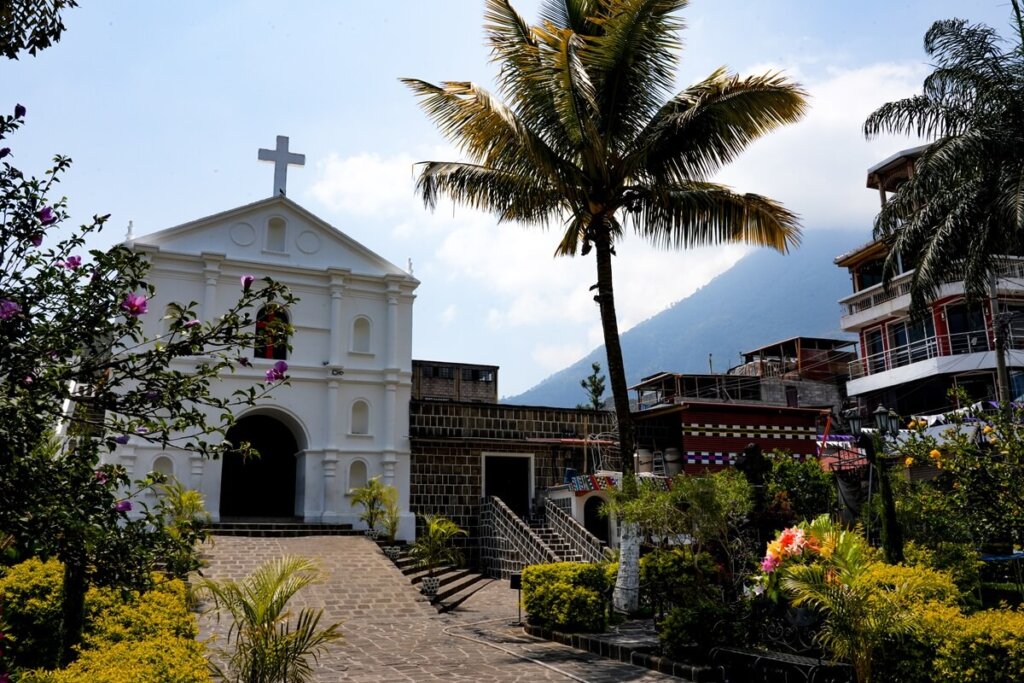
Lake Atitlan (Lago de Atitlán) is located in the highlands of Guatemala at 1,562 m / 5,125 ft above sea level. The lake is surrounded by three huge volcanoes: San Pedro, Toliman, and Atitlan.
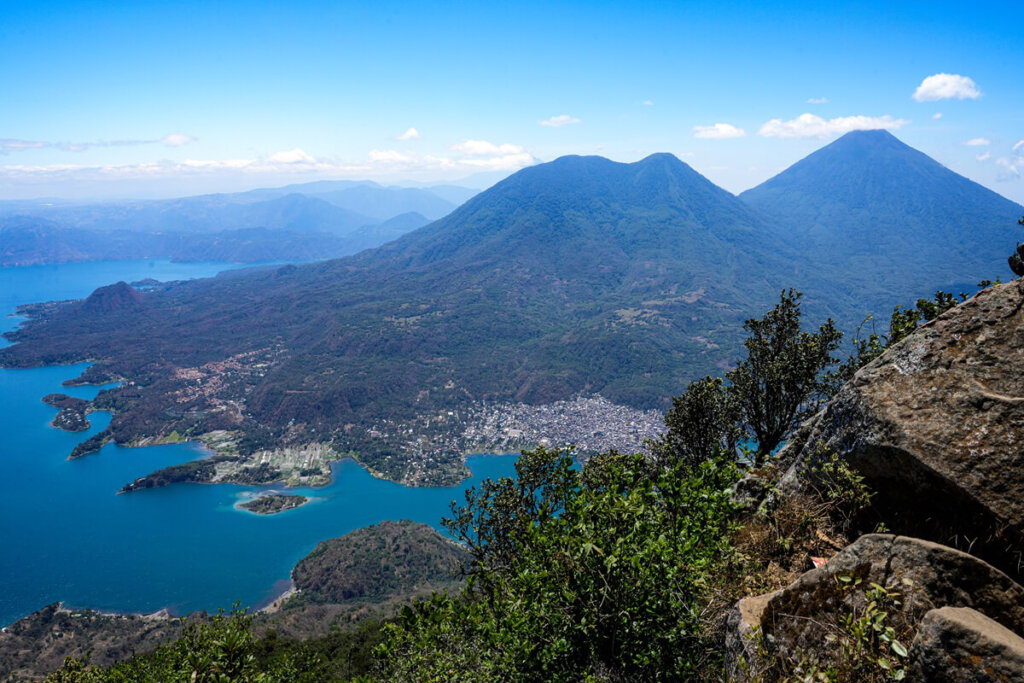
Volcan San Pedro is separated from Toliman and Atitlan by Santiago Bay, a narrow 8-km-long inlet. With a height of 3,020 m / 9,908 ft, this stratovolcano is actually the smallest of the three.
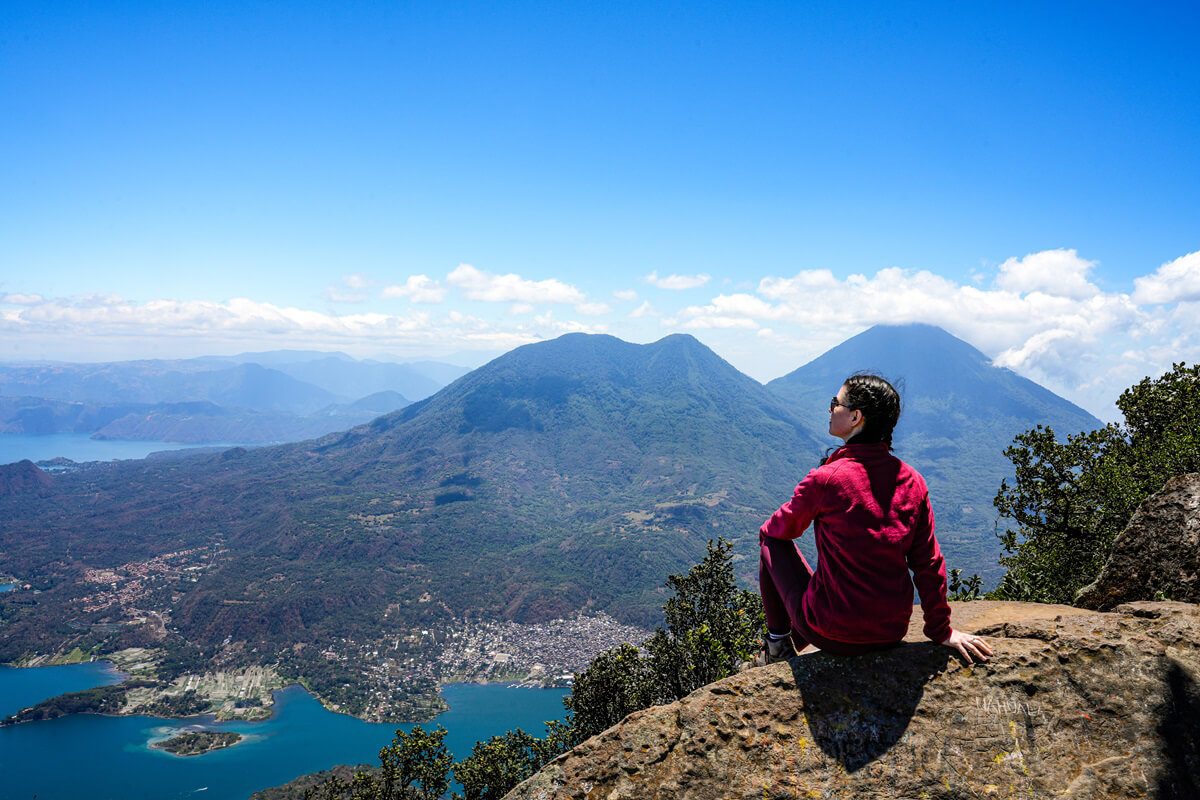
From the summit, the volcano provides panoramic views of Toliman and Atitlan volcanoes as well as most of the towns scattered along the shores of Lake Atitlan. That is if you make it up there before the clouds settle in.
Practical Information Before Hiking Volcan San Pedro
Hiking Route Map
San Pedro Volcano Hike Stats:
- Trail length: ~8 km / 5 miles from the trailhead (out-and-back)
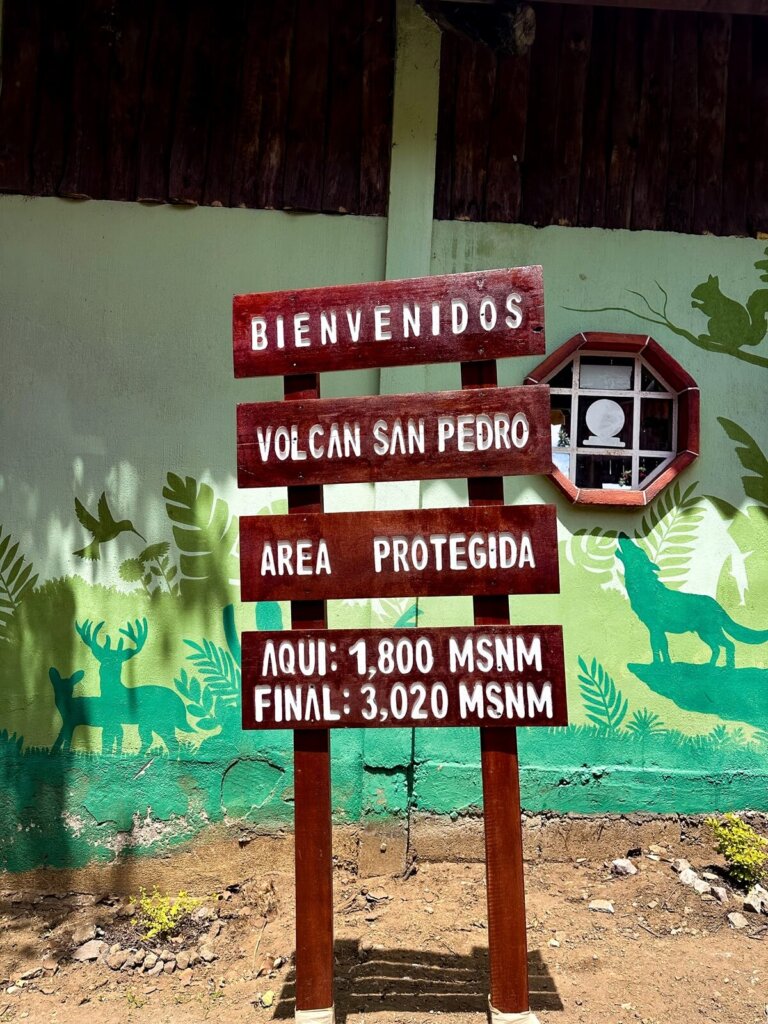
- Trailhead: San Pedro La Laguna (1,800 m / 5,905 ft)
- Summit of San Pedro: 3,020 m / 9,908 ft
- Elevation Gain: ~1,200 m / 3,937 ft from the trailhead
- Level of Difficulty: Hard
Length of the San Pedro Volcano Hike
The San Pedro Volcano hike is an 8 km (5 mile) out-and-back trail. The trailhead starts in San Pedro La Laguna, the ‘backpacker hub’ of Lake Atitlan. You can take a tuk-tuk up to the trailhead from the town centre to save yourself nearly 240 m (787 ft) of additional elevation gain and an extra 2 km (1.2 mi) of walking.
We started the hike from the trailhead around 8:15 AM and got to the summit around 11 AM. So, overall it took us under 3 hours to hike up including plenty of breaks for photos and to catch our breath. We stayed for a good 30-40 minutes at the top before heading down. The descent was much quicker and we got back to the trailhead in less than 2 hours. From there, we also walked all the way back to San Pedro La Laguna, which added another 30 minutes to our overall time.
Note. If you have bad knees, or are generally slower on the downhills, then perhaps add some extra time for that.
Level of Difficulty of the San Pedro Volcano Hike
Hiking Volcan San Pedro is considered a strenuous hike and we can confirm that it isn’t a walk in the park (even though it kind of felt like that compared to hiking Volcan Santa Maria). Whilst the length of the trail is short, the main difficulty for us came from the elevation gain. Below we’ll discuss all the challenges we faced on this route, so make sure to be realistic about your abilities and don’t underestimate this hike.
Altitude
The highest point along the hike will be at the summit of San Pedro, which is 3,020 m / 9,908 ft above sea level. This means that you can get altitude sickness if you haven’t acclimatised properly before attempting this hike. There are many symptoms of altitude sickness, including dehydration, dizziness, headaches, shortness of breath, heavy breathing, loss of appetite, nausea and vomiting. It’s good to remember that anyone can develop altitude sickness and its symptoms can be less or more severe depending on the person.
Lake Atitlan is located 1,562 m / 5,125 ft above sea level, so make sure to spend a few days there before attempting this hike.
Elevation Gain
Apart from the altitude, you should also be aware of the elevation gain when hiking Volcan San Pedro. The trailhead is located at 1,800 m / 5,905 ft above sea level. This means that you’ll be gaining around 1,200 m / 3,937 ft of elevation. Now, if you’ve hiked a cone shaped volcano before, it won’t come as a surprise to you that you’ll be gaining this pretty quickly on steep, switchback trails.
We had very similar elevation gain when we hiked up to Santa Maria Volcano near Xela. Before that, the last time we’d gained so much elevation in such a short amount of time was on the final morning of our 3-day trek in the Colca Canyon in Peru, and even then it was ‘only’ about 1,000 m / 3280 ft.
Temperatures and Weather Conditions
If the altitude and elevation gain weren’t enough to deal with, you’ll also have to be mindful of the temperatures when trekking too. The sun can be pretty intense, especially in the dry season. Luckily, there are trees that offer shade, but it’s still important to wear a hat, sunglasses and sun-cream.
If you’re here in the wet season, then you need to be mindful of the amount of rain that’s fallen before attempting this trail.
Trail Conditions
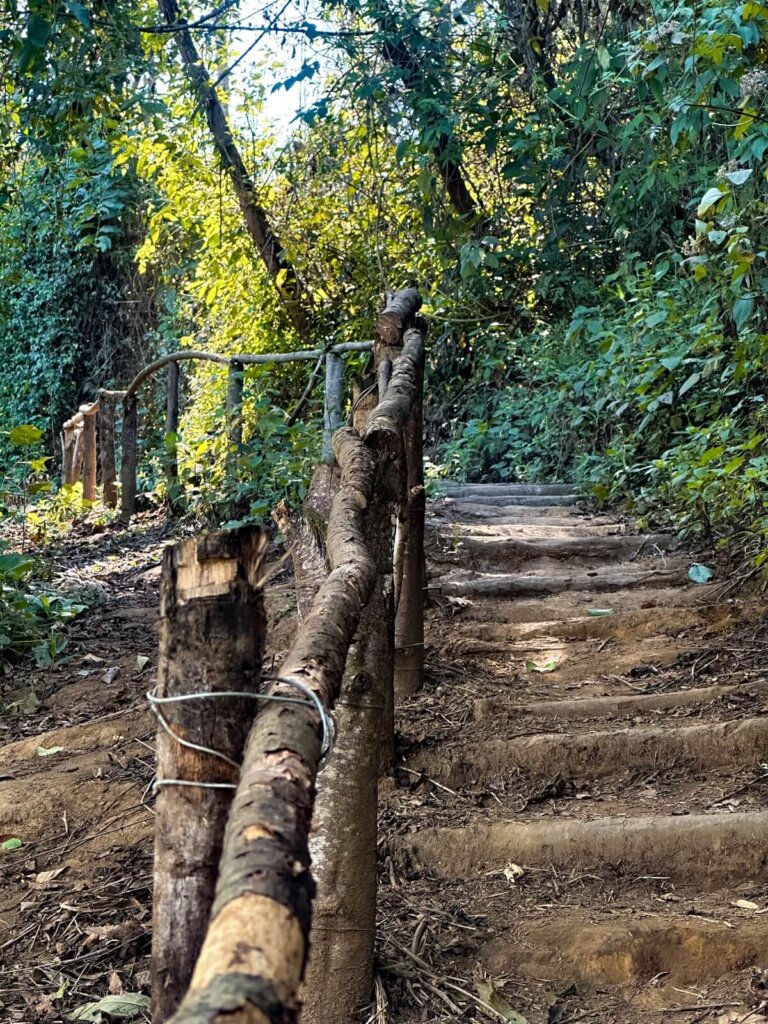
The trail basically consists of switchbacks that get steeper as you climb higher. At the start of the trail we just had to follow some white painted rocks because there were a few small paths veering off to local farms. Otherwise, it’s pretty straight forward to follow.
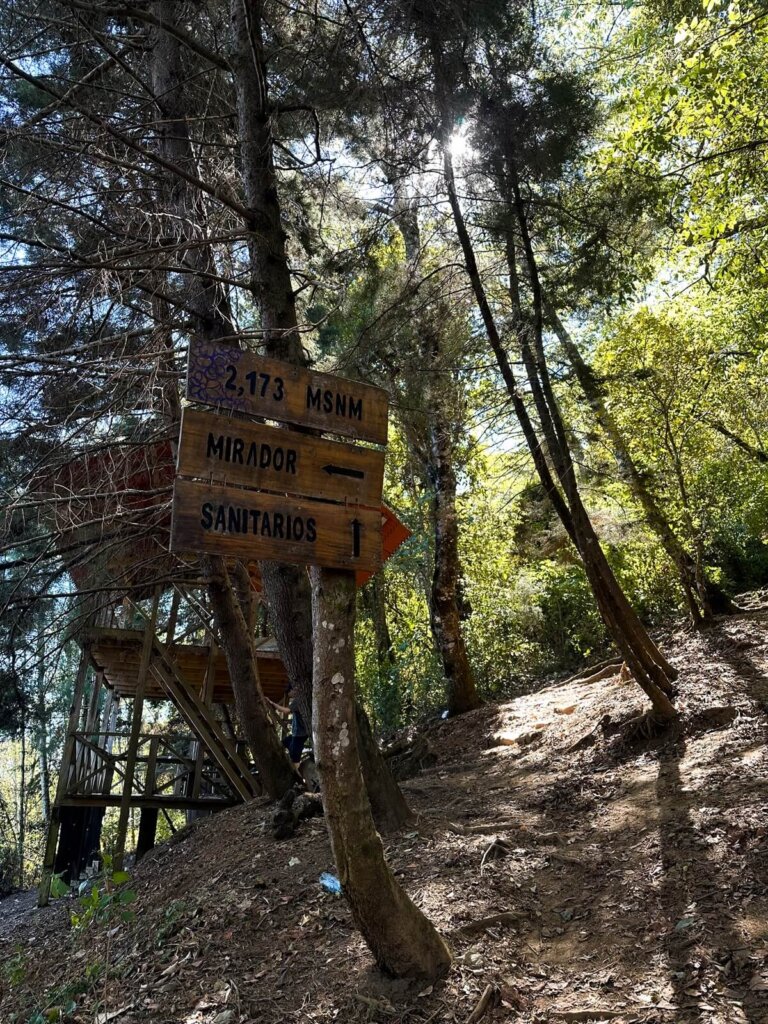
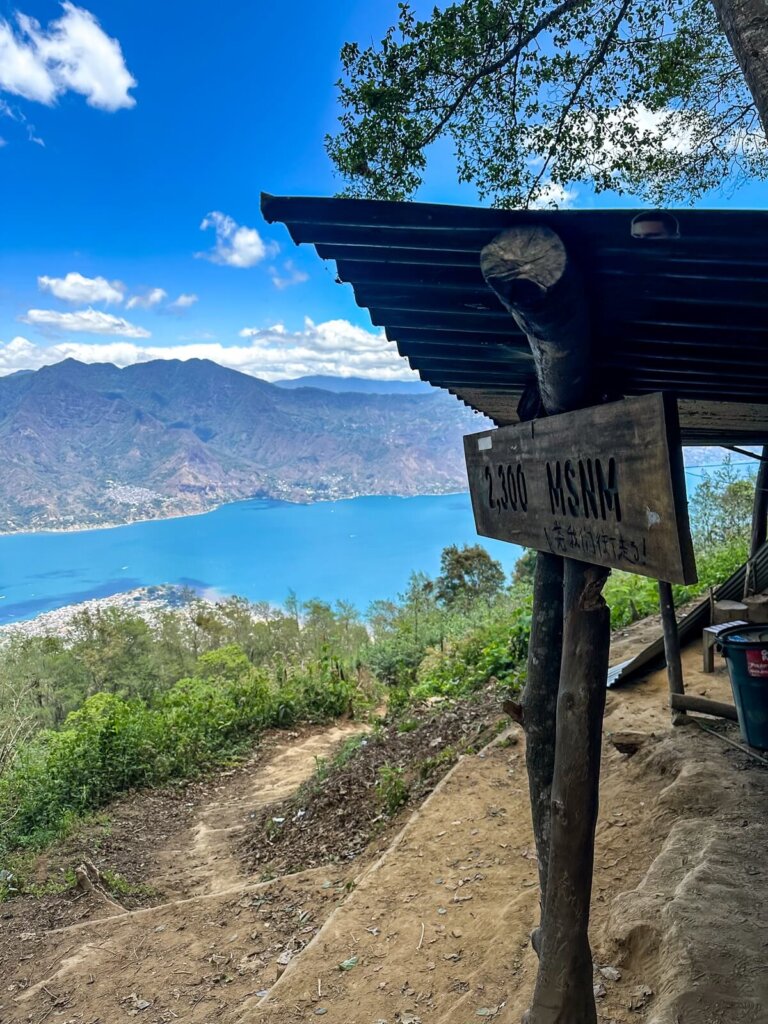
They have signs telling you the altitude every 100 m (328 ft), starting at 2,000 m (6,562 ft). This was pretty useful in the sense that we could track our progress. However, sometimes it felt like the markers would never come which was a little annoying.
The trail itself is well maintained, and had hardly any rubbish on it compared to Santa Maria. We guess the fact that locals don’t bring offerings up has something to do with that. The switchbacks were also pretty gradual until about 2,600 m (8,530 ft) when they started to get steeper. Overall, we found the trail much more enjoyable than Santa Maria.
What to Wear and Bring with You
We highly recommend wearing outdoor and weather appropriate clothing when going on the San Pedro Volcano hike. The temperatures will be higher by the shore of the lake but it can get chilly at the top. Therefore, make sure to wear layers so you can adjust to the conditions. You can wear either shorts or long trousers depending on what you feel more comfortable in. We still suggest taking a fleece and / or a rain jacket.
In terms of footwear, you should wear hiking boots or shoes with good grip. We personally like wearing boots for their extra ankle support, which comes in handy on the way down. If you’re doing a sunrise hike, definitely bring a headlamp.
Also, make sure to have enough SPF on you as the sun can be pretty strong. Take a hat and sunglasses for extra protection as well. The trail is also dusty, so you may want to wear a buff to cover your mouth and nose. Thankfully the dust wasn’t as bad as when we summited Volcan Santa Maria near Xela (Quetzaltenango).
The descent can be pretty hard on the knees, so you might want to use poles on the way down.
Most importantly, make sure to have plenty of drinking water because you’ll be drinking a lot on the way up. Staying hydrated is also important to avoid altitude sickness. Having some snacks or a packed lunch is a good idea to help re-fuel your body. We normally drink some electrolytes or rehydration drinks after such a demanding hike.
Have some cash on you for your transport and entry fees and a little extra for any emergencies but don’t carry too much.
Best Time to Hike Volcan San Pedro
You can technically hike Volcan San Pedro all year round. Of course, the best time would be during the dry season, which in Guatemala is from November to April. This doesn’t mean that you can’t hike in the rainy season but make sure to check the forecast. Normally, the mornings are fine with some heavy rain in the afternoon.
In terms of time of day, we recommend going earlier rather than later for a few reasons. Firstly, the clouds can roll in by mid to late morning. This means that you might not get clear views at the top. Another reason for starting early is that the temperatures will be a bit more pleasant, especially going uphill. Lastly, more people head up in the morning, and it’s always a bit safer to hike with others around you.
Should You Hike San Pedro Volcano with a Guide or Independently
An important question you might have when planning to hike Volcan San Pedro, or for any hike in Guatemala, is whether it’s safe to do it on your own or whether you should go with a guide.
Now, if you’ve been doing some research on hiking around Lake Atitlan, including San Pedro Volcano, then you must’ve come across many articles and reviews stating that it’s very dangerous to hike it independently. Some comments will say that at best you’ll get robbed and at worst you could even get seriously hurt because of armed robberies happening in the area.
Unfortunately, these reviews aren’t fake and plenty of incidents have happened in the past on San Pedro Volcano that have deterred even some tour operators from offering guided hikes. Based on recent news though, crime related incidents have reduced significantly in the past year or so. However, even to this day it’s considered a risk to hike up Volcan Toliman and Atitlan as bandits are known to roam those areas.
Volcan San Pedro Safety Advice
We did this hike independently and thankfully nothing happened to us. However, before we decided to go up on our own we took the following precautions.
- Asked locals about the current situation and when the last incident took place. Thankfully, nothing had happened in the previous 9 months before the date we attempted it.
- Read the most up-to-date Google reviews from both the trailhead and the summit. Although, we found the best source was AllTrails’ reviews. It’s important that you set it to the most recent reviews first and scroll back a fair bit to get a picture of the current situation.
- If you decide to go independently, try not to go solo and find a few friends if possible. (Although we saw 1 or 2 other tourists hiking it solo).
- Don’t take many valuables. (Admittedly, we did have our camera gear with us, but we didn’t take it out until we got to the summit). Some posts we read said to hide some of your stuff at a certain elevation because most robberies take place above 2,800 m. Honestly, we’re not sure if that’s true or if it would be much help if someone did attack you.
- A few recent sources said that there’s now armed police roaming the trail, although we didn’t see any of them.
- What we did see was some people being escorted up and down by armed police or armed tour guides. Apparently, you can get a tourism police escort offered by Guatemala’s Tourism Institute (INGUAT). You need to request that at least 3 days before your hike, plus you’ll have to make sure they have everything they need to be able to escort you.
Do you Need Special Travel Insurance to Hike San Pedro Volcano
We cannot emphasize enough how important it is to have travel insurance before any trip you make abroad. Now, most travel insurance won’t automatically include cover for all the activities you’re planning on doing during your travels.
For example, if you’re visiting Guatemala, and planning on hiking at high altitudes, then you should make sure to have cover for high altitude trekking in your insurance policy. Shop around to find the most suitable one. You just never know what could happen, and it’s better to be safe than sorry. We personally use SafetyWing which covers trekking under 4,500m as standard and has an Adventure Sport add-on, which will then cover you up to 6,000m of elevation.
Cost of Hiking San Pedro Volcano Independently
Below is a summary of how much you can expect to pay if you want to hike Volcan San Pedro independently:
- Water taxi to San Pedro La Laguna: Q50 (Q25 one-way, unless you’re staying in town)
- Tuk-Tuk to the trailhead: Q25 one-way (you can walk back to town at the end)
- Park entry fee: Q100
- Food and drink costs for the day.
Volcan San Pedro Hiking Trail
1. From Your Hotel to the Trailhead
Depending on where you’re staying around Lake Atitlan, you may need to get either a water taxi (lancha) or a tuk-tuk to San Pedro La Laguna. Make sure to calculate this extra time (and cost) when deciding what time you need to set off in the morning. As mentioned above, the earlier you start the hike, the better your chances of getting clear views at the top.
Once you’re in San Pedro La Laguna, you can either walk up to the trailhead or take a tuk-tuk. We decided to jump into a tuk-tuk to save some time and energy. The trailhead is at 1,800 m (5,905 ft) above sea level, so you’d need to climb an additional 240 m (787 ft) just to get to the trailhead. You’ll be gaining a lot of elevation anyway, so you may want to conserve some energy.
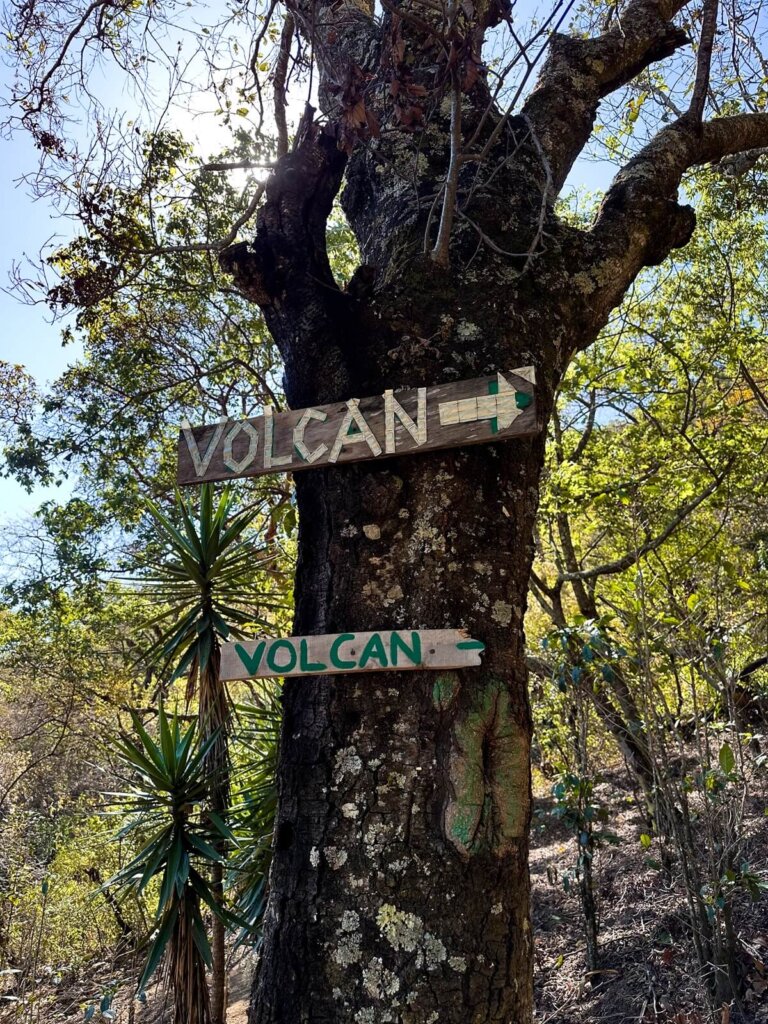
Once you’re at the trailhead, you’ll have to pay the Q100 entry fee to hike the volcano. The person at the office will tell you that you need to follow the white-painted rocks at the beginning. After that, the path will become more obvious.
2. Trailhead to the Viewpoints (Miradors)
Once you’re on the trail, follow the relatively wide dirt track with lake views on your left. Soon, the path will get narrower and steeper. Make sure to keep following the white painted rocks. The first 200 m (656 ft) is a gradual incline but once you pass the 2,000 m (6,561 ft) sign the switchbacks become steeper.
You’ll only have to climb another 140 m (459 ft) before you reach the first viewpoint (mirador). This two-storey lookout gives you some lovely views of Lake Atitlan and San Pedro La Laguna below.
From here, carry on hiking up the switchbacks. Soon (at 2,300 m / 7,545 ft) there will be another lookout point. This one looked more like a little campsite with a bodega and a fire pit.
3. Viewpoints to the Summit
Once you pass this viewpoint, the switchbacks start to get even steeper. At 2,900 m (9,514 ft) you’ll reach a rest spot, although there wasn’t much going on there apart from some old and empty structures.
After this comes the final push to the summit. The trail was a little bit flat after the rest spot, but soon became steep again for the last 200 m (656 ft).
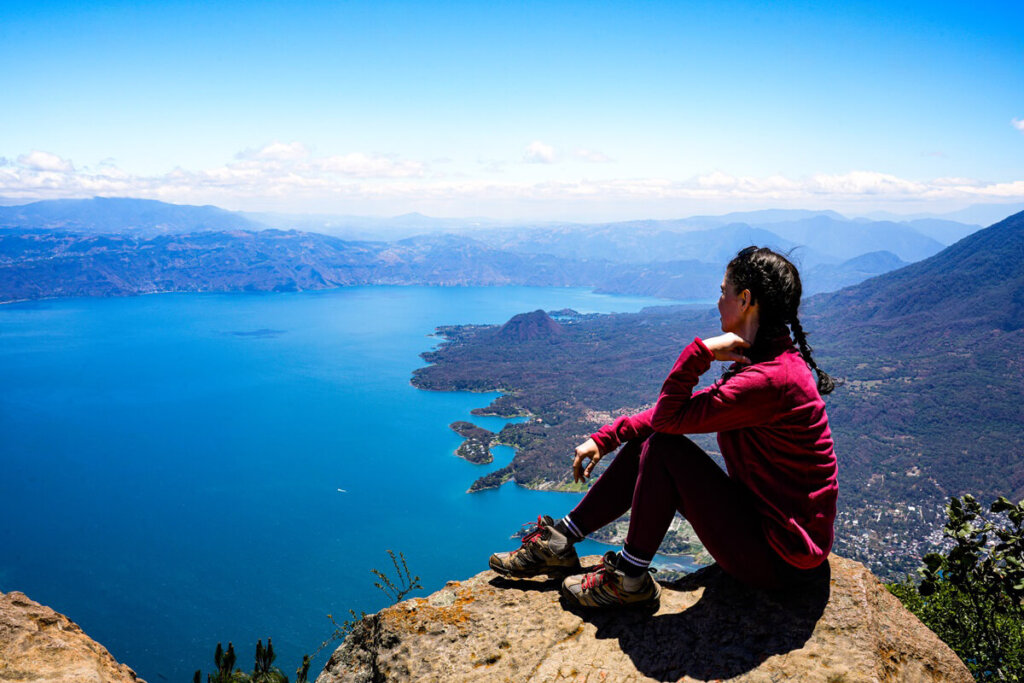
You’ll know you’ve reached the summit when you have to go up a few man-made stairs. The summit consists mostly of large boulders, so there isn’t a wide open space to wander around. However, we still got panoramic views of the surrounding area. We could see pretty much the whole lake, most of the towns and also Toliman and Atitlan volcanoes.
There were a few people at the top when we arrived but they started to head back not long after we got there. Since we didn’t see too many people on our way up, we decided not to linger for too long on our own there.
4. Summit to San Pedro La Laguna
Of course, as you would imagine, once we started heading back down, we passed quite a lot of people still ascending. We made our way down the exact same path which was way quicker in this direction, and thankfully not too dusty or slippery either. However, we still recommend you watch your step as you’re coming down.
From the trailhead, we decided to walk back to San Pedro La Laguna which added a good 20-30 minutes to our overall time. Navigating back to the town was simple, but it was very steep and hard on our already tired knees. At this point we were happy with our decision to take a tuk-tuk up to the trailhead in the morning.
If you’re staying in San Pedro, you can just go straight back to your accommodation. If you’re staying somewhere else along Lake Atitlan, then you’ll need to hop onto one of the lanchas leaving the dock and head back to the town you’re staying in.
Final Thoughts on Hiking Volcan San Pedro, Lake Atitlan
Although we were definitely on high alert during our hike, thankfully we didn’t run into any problems on the trail. We did find the trail up to Volcan San Pedro well-maintained and very easy to follow. Luckily we did the hike on a beautiful day, so we got some incredible views of the surrounding area. We’d definitely recommend hiking up San Pedro Volcano, but always make sure to do thorough research to get an idea of the current situation before attempting it independently.
As always, we would love to hear about your experience hiking up Volcan San Pedro, or your time around Lake Atitlan in general. Please also comment below if you have any updated information that would be useful for fellow travellers.
Now, let your adventure begin,

Remember…It all starts with a Pin…